Магнитолы Pioneer MVH-150UI - инструкция пользователя по применению, эксплуатации и установке на русском языке. Мы надеемся, она поможет вам решить возникшие у вас вопросы при эксплуатации техники.
Если остались вопросы, задайте их в комментариях после инструкции.
"Загружаем инструкцию", означает, что нужно подождать пока файл загрузится и можно будет его читать онлайн. Некоторые инструкции очень большие и время их появления зависит от вашей скорости интернета.

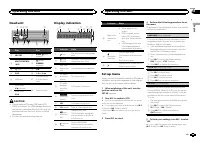

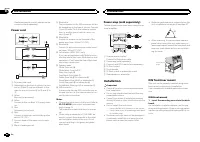


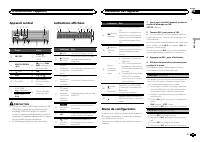

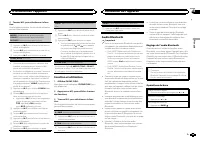

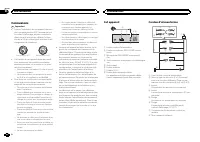


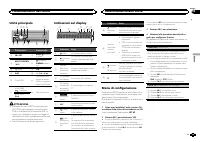
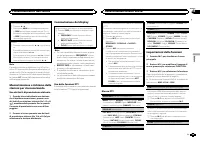
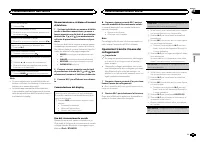

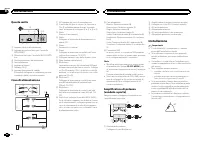


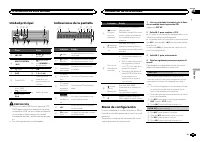
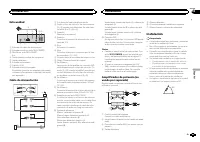


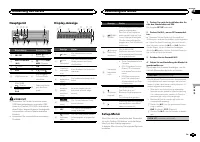

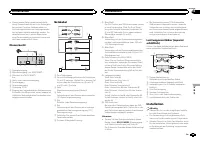


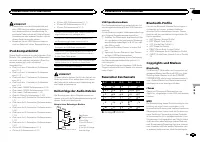

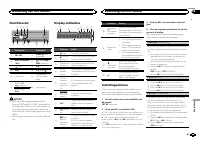


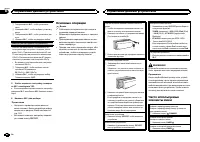


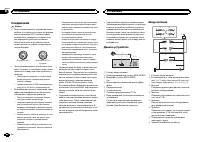
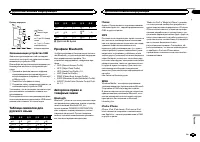


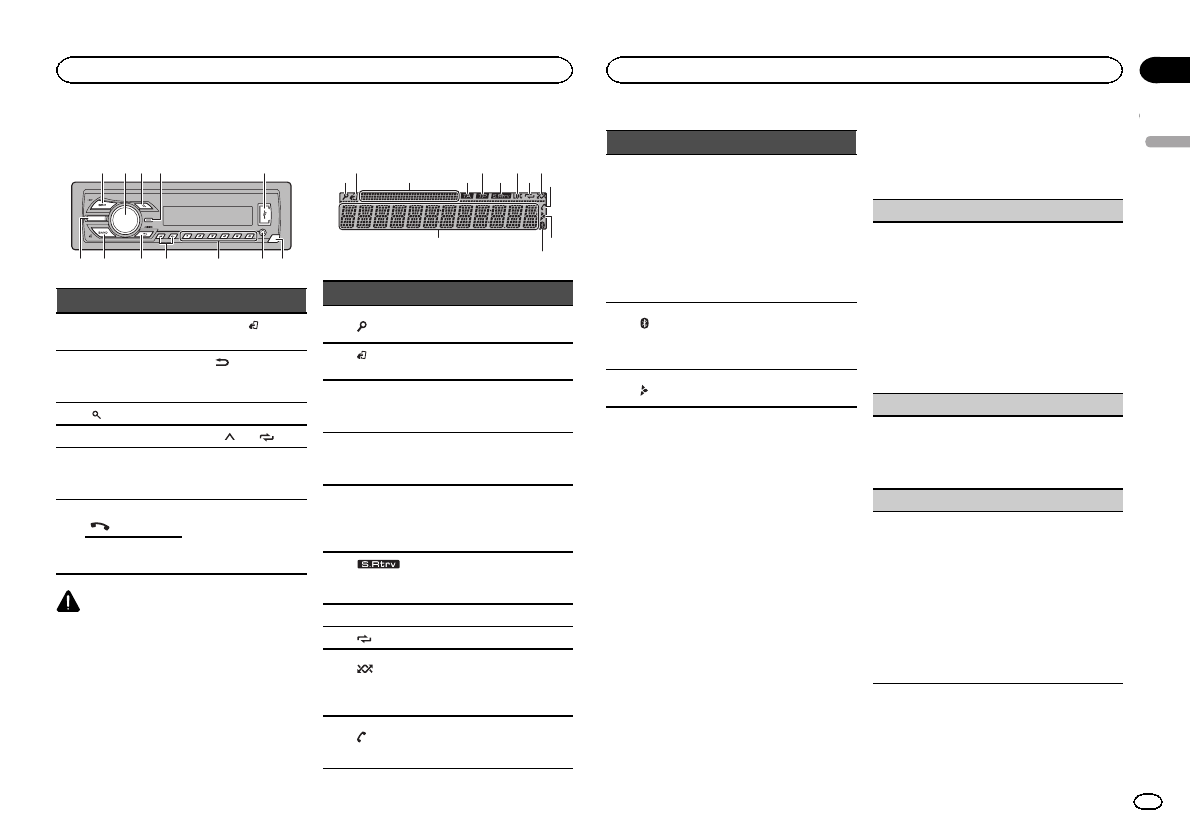
Head unit
a
b
4
7
1 2 3
5
9
8
c
6
Part
Part
1
SRC
/
OFF
7
BAND
/ (iPod
control)
2
MULTI-CONTROL
(
M.C.
)
8
(back)/
DIMMER
(dimmer)
3
(list)
9
c
/
d
4
DISP
a
1
/ to
6
/
5
USB port
b
AUX input jack
(3.5 mm stereo
jack)
6
MVH-350BT
(phone)
c
Detach button
MVH-150UI
iPod
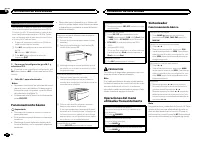
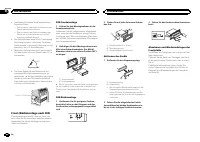
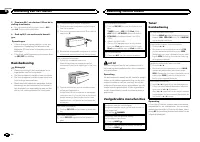
CAUTION
!
Use an optional Pioneer USB cable (CD-
U50E) to connect the USB storage device as
any device connected directly to the unit will
protrude out from the unit, which could be
dangerous.
!
Do not use unauthorized products.
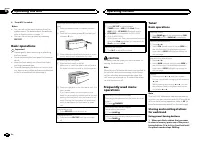
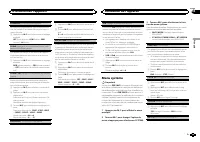
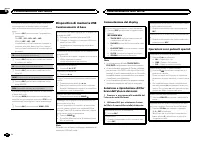
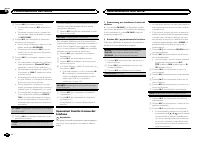
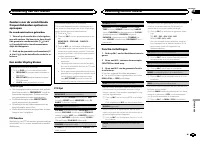
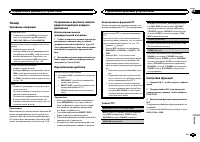
Display indication
3
1
4
8
6
d
b
2
5
7 9
a
c
Indicator
State
1
(list)
The list function is being oper-
ated.
2
(iPod
control)
This unit
’
s iPod function is op-
erated from your iPod.
3
Sub infor-
mation sec-
tion
Sub information is displayed.
4
TA (traffic
announce-
ments)
TA function is on.
5
TP (traffic
program
identifica-
tion)
A TP station is tuned in.
6
(sound re-
triever)
The sound retriever function
is on.
7
LOC
Local seek tuning is on.
8
(repeat)
Track or folder repeat is on.
9
(ran-
dom/shuf-
fle)
Random play is on.
The iPod source is selected
and the shuffle or shuffle all
function is on.
a
(auto an-
swer)
Only for MVH-350BT
Shows when the automatic
answering function is on.
Indicator
State
b
Main infor-
mation sec-
tion
!
Tuner: band and fre-
quency
!
RDS: program service
name, PTY information
and other literal informa-
tion
!
USB storage device and
iPod: elapsed playback
time and text information
c
(Bluetooth
indicator)
Only for MVH-350BT
Connected to a Bluetooth de-
vice.
The line is on hold.
d
Appears when a lower tier of
folder or menu exists.
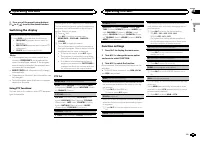
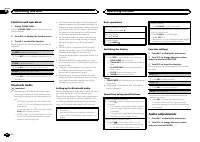
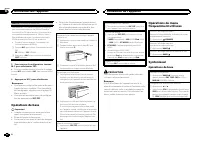
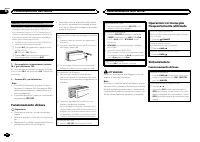
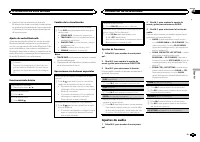
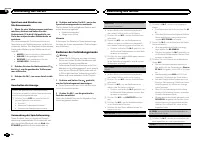
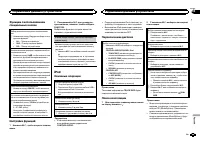
Set up menu
When you turn the ignition switch to ON after in-
stallation, set up menu appears on the display.
You can set up the menu options below.
1
After installation of this unit, turn the
ignition switch to ON.
SET UP
appears.
2
Turn M.C. to switch to YES.
#
If you do not operate for 30 seconds, the set up
menu will not be displayed.
#
If you prefer not to set up at this time, turn
M.C.
to switch to
NO
. Press to select.
If you select
NO
, you cannot set up in the set up
menu.
3
Press M.C. to select.
4
Perform the following procedures to set
the menu.
To proceed to the next menu option, you need to
confirm your selection.
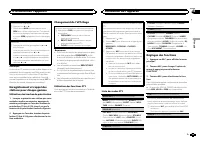
LANGUAGE
(multi-language)
This unit can display the text information from a
compressed audio file even for information em-
bedded in English or Russian.
!
If the embedded language and the selected
language setting are not the same, text infor-
mation may not display properly.
!
Some characters may not be displayed prop-
erly.
1
Turn
M.C.
to select the desired setting.
ENG
(English)
—
РУС
(Russian)
2
Press
M.C.
to confirm the selection.
CLOCK SET
(setting the clock)
1
Turn
M.C.
to adjust hour.
2
Press
M.C.
to select minute.
3
Turn
M.C.
to adjust minute.
4
Press
M.C.
to confirm the selection.
FM STEP
(FM tuning step)
Normally, the FM tuning step employed by seek
tuning is 50 kHz. When AF or TA is on, the tuning
step automatically changes to 100 kHz. It may be
preferable to set the tuning step to 50 kHz when
AF is on.
!
The tuning step remains at 50 kHz during man-
ual tuning.
1
Turn
M.C.
to select the FM tuning step.
50
(50 kHz)
—
100
(100 kHz)
2
Press
M.C.
to confirm the selection.
QUIT
appears.
5
To finish your settings, turn M.C. to select
YES.
#
If you prefer to change your setting again, turn
M.C.
to switch to
NO
. Press to select.
English
Operating this unit
3
Section
Operating this unit
En
02
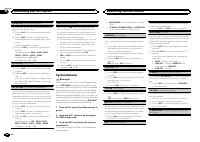
Содержание
- 130 Сведения об этом устройстве; ВНИМАНИЕ; Сведения об этом руководстве; Перед началом эксплуатации
- 131 Основное устройство; Индикация на дисплее; Установочное меню; Управление данным устройством
- 132 YES; Меню системы; SRC; Основные операции
- 133 Тюнер; SEEK; AF; Переключение дисплея; FREQUENCY; Использование функций; Список; Настройка функций; FUNCTION
- 134 TRACK INFO; дорожек из списка
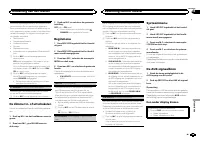
- 135 Поиск композиции
- 136 Только для
- 137 Настройки для громкой связи
- 138 Использование меню соединения; Использование меню телефона
- 139 Функции и их назначение; аудио
- 140 Регулировки параметров звука; AUDIO
- 142 PW SAVE
- 143 Стартовое меню; Меню систе
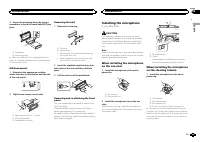
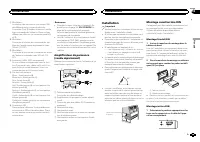
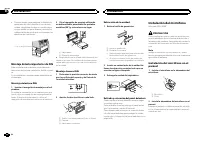
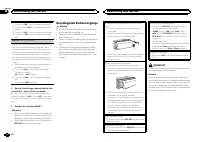
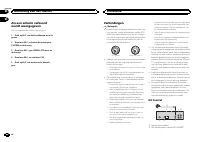
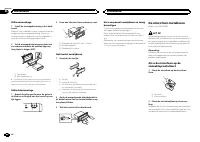
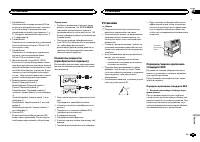
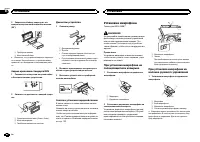
- 144 Соединения; Важно; Данное устройство; Установка
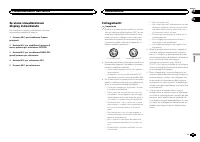
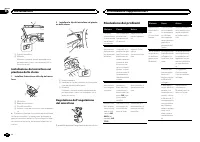
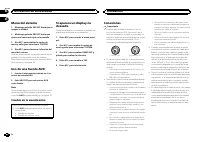
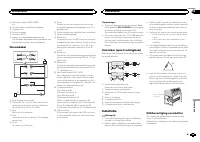
- 145 настройка выхода заднего канала и; Усилительмощности; RCA; Переднее; Переднее крепление стандарта; Вставьте монтажную обойму в пере
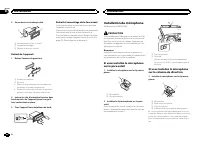
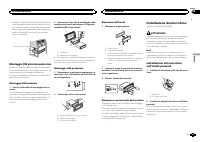
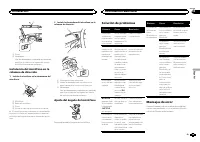
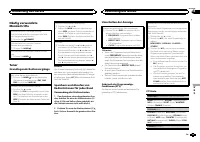
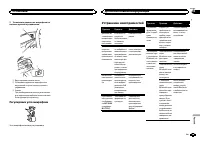
- 146 Установка микрофона
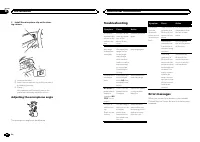
- 147 Регулировка угла микрофона; Угол микрофона можно регулировать; Устранение неисправностей; Дополнительная информация
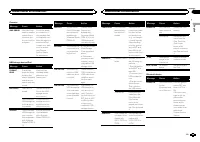
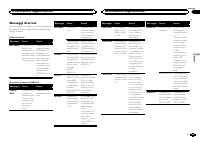
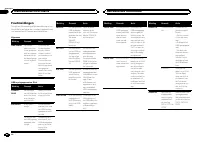
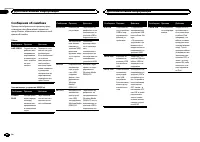
- 148 Сообщения об ошибках; Прежде чем обратиться к торговому пред
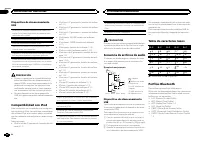
- 149 Запоминающее устройство
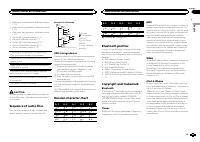
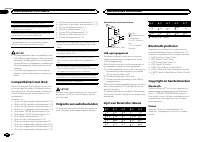
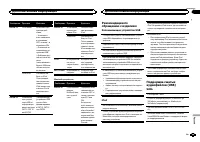
- 150 Поддержка
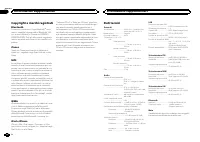
- 151 Профили
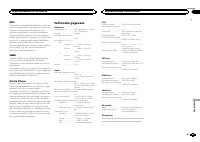
- 152 Технические характеристики


