
Кусторезы Makita UM164DWE - инструкция пользователя по применению, эксплуатации и установке на русском языке. Мы надеемся, она поможет вам решить возникшие у вас вопросы при эксплуатации техники.
Если остались вопросы, задайте их в комментариях после инструкции.
"Загружаем инструкцию", означает, что нужно подождать пока файл загрузится и можно будет его читать онлайн. Некоторые инструкции очень большие и время их появления зависит от вашей скорости интернета.


12
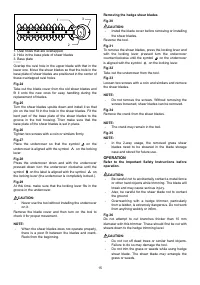
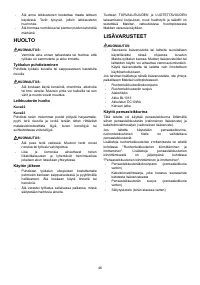
accessory shear blades.
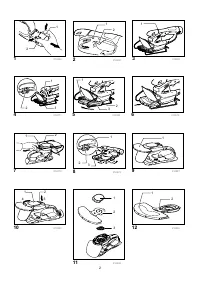
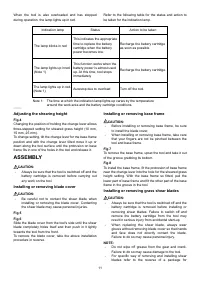
Fig.9
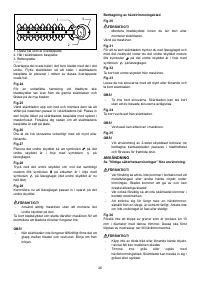
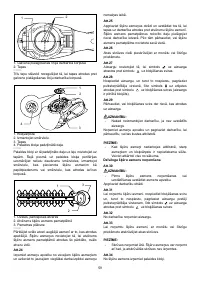
Remove the base frame and place the tool upside down.
CAUTION:
•
Before placing the tool upside down, be sure to
remove the base frame.
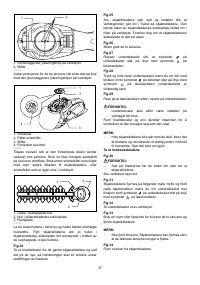
Fig.10
To remove the shear blade, press the locking lever and
with the locking lever pressed turn the undercover
counterclockwise until the symbol on the undercover
is aligned with the symbol
on the locking lever.
Fig.11
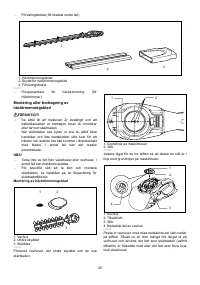
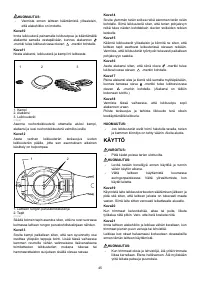
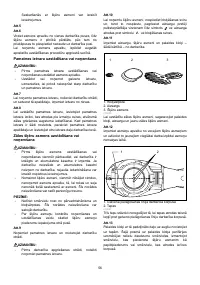
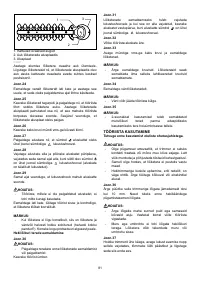
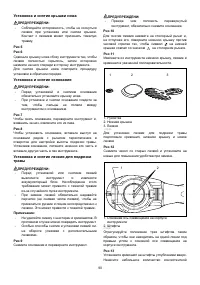
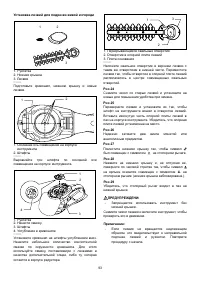
Take out the undercover, shear blade and crank in order
from the tool.
1
2
3
010895
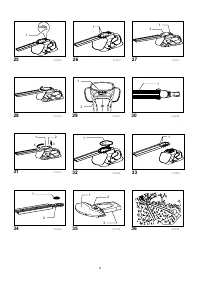
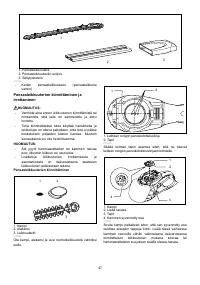
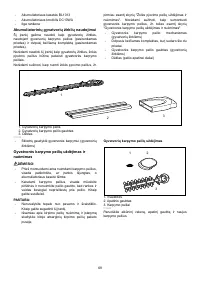
To install the grass shear blade, prepare the crank,
undercover and new grass shear blade
Fig.12
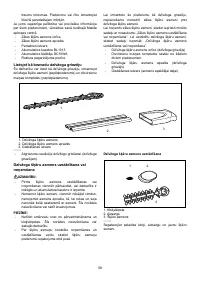
Take out the blade cover from the old shear blades and
fit it onto the new ones for easy handling during the
replacement of blades.
1
2
010897
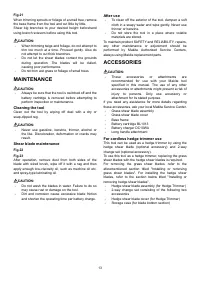
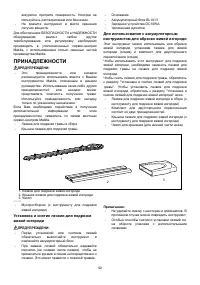
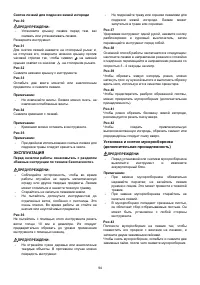
Adjust the three pin position so that these pins are lined
up at right angle in relation to the basic alignment line on
the tool housing.
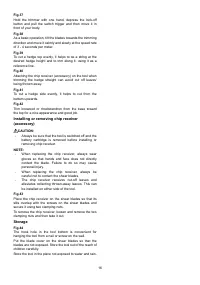
Fig.13
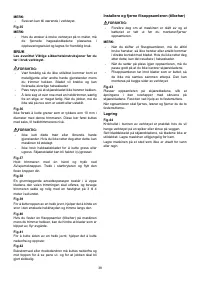
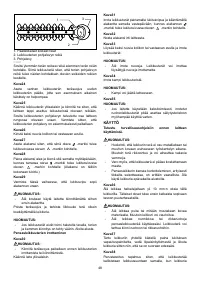
Fit the crank with its recessed part facing upwards onto
the pins. At this time, apply a small amount of grease to
the periphery of the crank using grease that the shear
blades as optional accessory are provided with or that
remains inside gear housing.
Fig.14
Overlap the oval hole in the upper blade with that in the
lower one. Move the shear blades so that the hole in the
base plate of shear blades are positioned in the center of
these overlapped oval holes.
Fig.15
Turn the shear blades upside down and install it so that
the pins on the tool fit in the hole in the shear blades.
Make sure that the shear blades are set in place
securely as far as they reach the base plate.
Fig.16
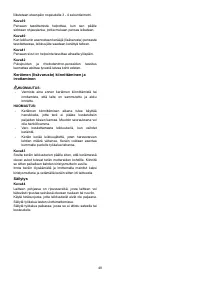
Place the undercover so that the symbol on the
undercover is aligned with the symbol
on the locking
lever.
Fig.17
Press the undercover down and turn the undercover
clockwise while pressing it down until the symbol on
the label is aligned with the symbol
on the locking
lever (the undercover is completely locked.).
Fig.18
At this time, make sure that the locking lever fits in the
groove in the undercover.
Remove the blade cover and then turn on the tool to
check it for proper movement.
NOTE:
•
When the shear blades does not operate properly,
there is a poor fit between the blades and crank.
Redo from the beginning.
OPERATION
WARNING:
•
Keep hands away from blades.
CAUTION:
•
Smear the blade before and once per hour during
operation using machine oil or similars.
•
Avoid operating the tool under the scorching
sunlight as much as practicable. When operating
the tool, be careful of your physical conditions.
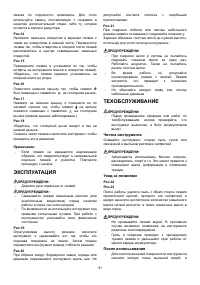
Fig.19
Turn the tool on after adjusting the shearing height and
hold it so that the foot of the tool rest on the ground. Then
gently move the tool forward into the area to be cut.
Fig.20
When trimming around curb, fence or trees, move the
tool along them. Be careful for the blade not to contact
them.
1. Crank
2. Undercover
3. Shear blades
1. Basic alignment line on the tool housing
2. Pins
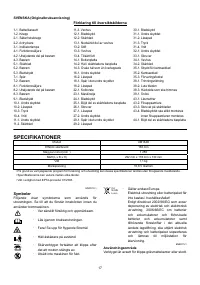
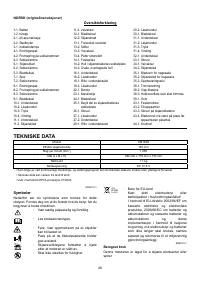
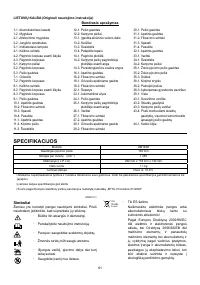
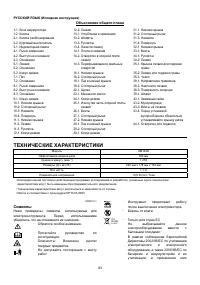
Характеристики

Остались вопросы?Не нашли свой ответ в руководстве или возникли другие проблемы? Задайте свой вопрос в форме ниже с подробным описанием вашей ситуации, чтобы другие люди и специалисты смогли дать на него ответ. Если вы знаете как решить проблему другого человека, пожалуйста, подскажите ему :)


