
Кусторезы Makita UM164DWE - инструкция пользователя по применению, эксплуатации и установке на русском языке. Мы надеемся, она поможет вам решить возникшие у вас вопросы при эксплуатации техники.
Если остались вопросы, задайте их в комментариях после инструкции.
"Загружаем инструкцию", означает, что нужно подождать пока файл загрузится и можно будет его читать онлайн. Некоторые инструкции очень большие и время их появления зависит от вашей скорости интернета.


11
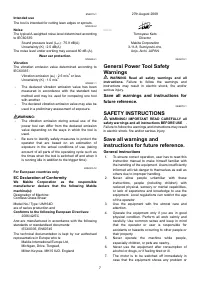
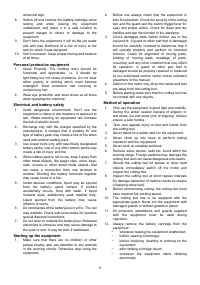
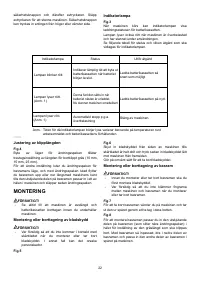
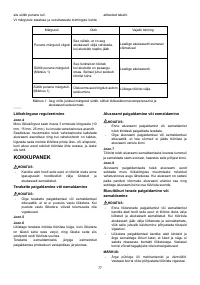
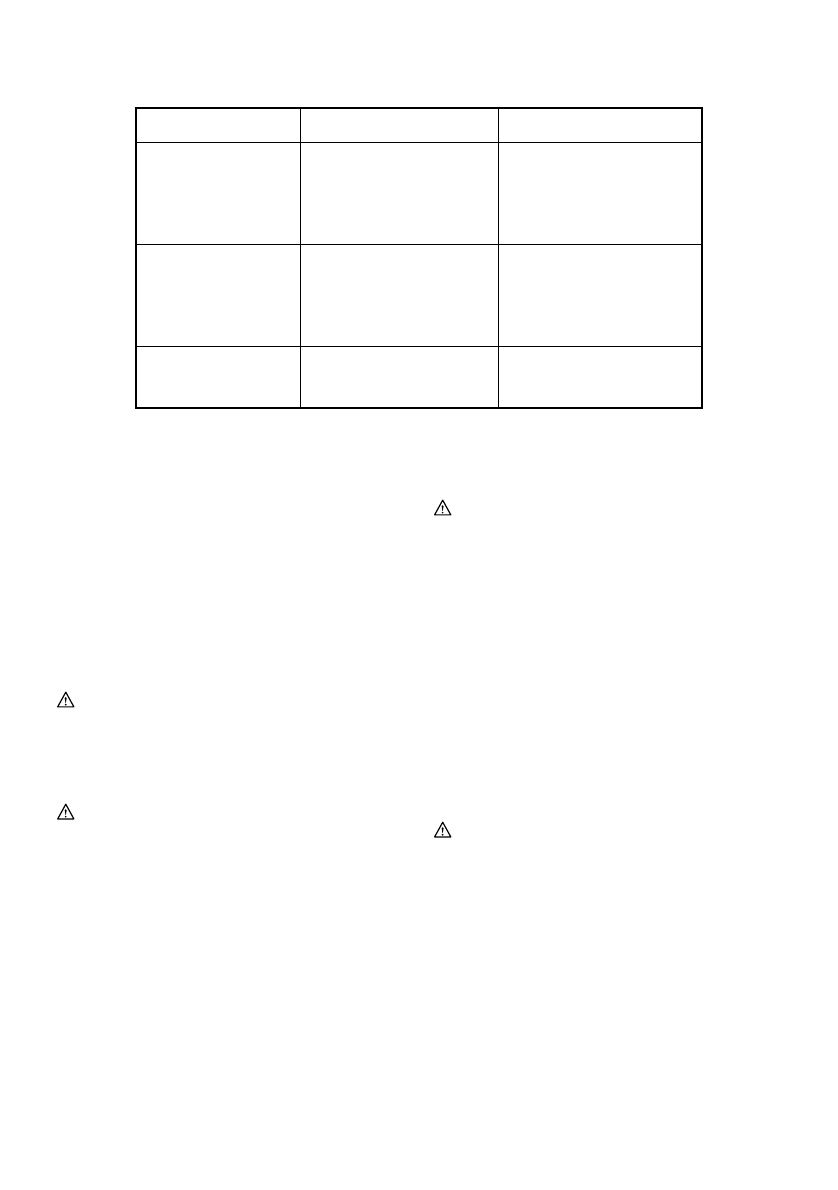
When the tool is also overloaded and has stopped
during operation, the lamp lights up in red.
Refer to the following table for the status and action to
be taken for the indication lamp.
N
ote
1:
T
he
t
im
e
at
w
h
ic
h
the
in
d
ic
at
i
o
n l
a
mp li
ghts
u
p v
ar
i
es
by
the
te
mp
erature
arou
n
d
the
w
or
k
area
a
n
d
the
b
atter
y c
artr
i
dge
c
o
n
d
i
t
i
o
n
s
.
In
d
ic
at
i
o
n l
a
mp
T
he
l
a
mp blink
s
in
red
T
he
l
a
mp li
ghts
u
p in
red
.
(N
ote
1)
T
he
l
a
mp li
ghts
u
p in
red
.
(N
ote
1)
Status
T
h
i
s
in
d
ic
ates
the
a
pp
ro
p
r
i
ate
t
im
e
to
re
pl
a
c
e
the
b
atter
y
c
artr
i
dge
w
he
n
the
b
atter
y
p
o
w
er
b
e
c
o
m
es
l
o
w.
T
h
i
s
f
u
nc
t
i
o
n w
or
k
s
w
he
n
the
b
atter
y p
o
w
er
i
s
a
lm
ost
used
u
p.
At
th
i
s
t
im
e
,
too
l
sto
p
s
imm
ed
i
ate
ly
Autosto
p
due
to
o
v
er
l
oad
A
c
t
i
o
n
to
b
e
ta
k
e
n
R
e
c
harge
the
b
atter
y c
artr
i
dge
as
soo
n
as
p
oss
ibl
e
R
e
c
harge
the
b
atter
y c
artr
i
dge
.
T
ur
n
o
ff
the
too
l.
010970
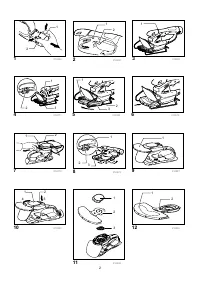
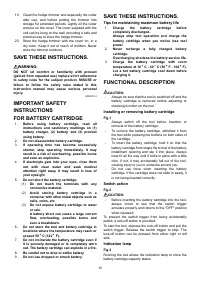
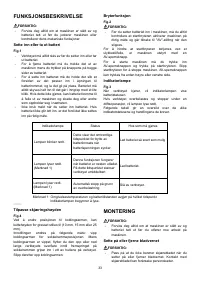
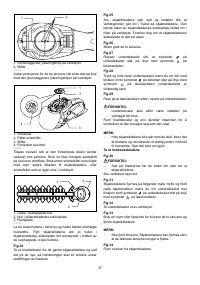
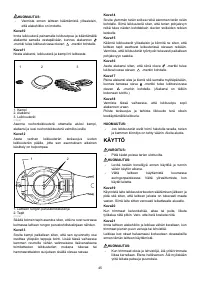
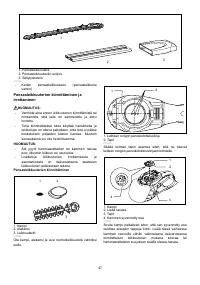
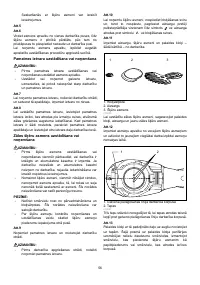
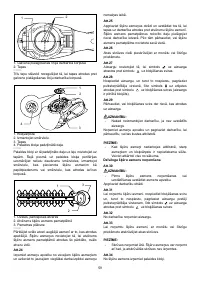
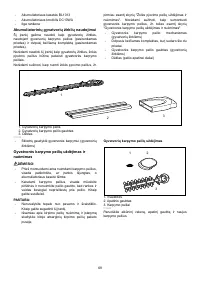
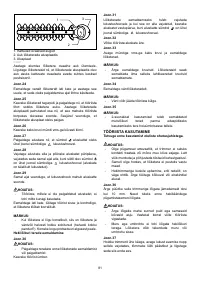
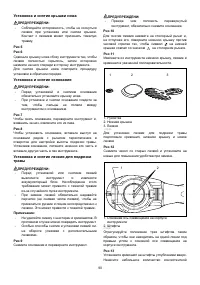
Adjusting the shearing height
Fig.4
Changing the position of holding the change lever allows
three-stepped setting for sheared grass height (10 mm,
15 mm, 25 mm).
To change setting, tilt the change lever for the base frame
position and with the change lever tilted move it up or
down along the tool surface until the protrusion on base
frame fits in one of the holes in the tool and release it.
ASSEMBLY
CAUTION:
•
Always be sure that the tool is switched off and the
battery cartridge is removed before carrying out
any work on the tool.
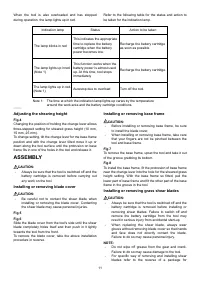
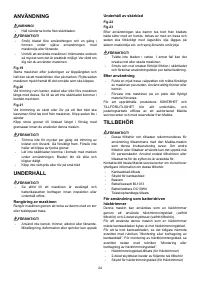
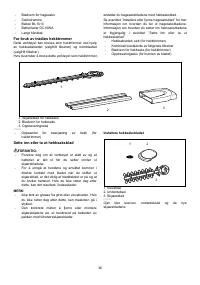
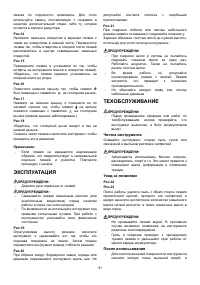
Installing or removing blade cover
CAUTION:
•
Be careful not to contact the shear blade when
installing or removing the blade cover. Contacting
the shear blade may cause personal injuries.
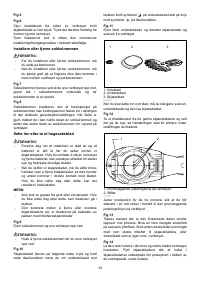
Fig.5
Fig.6
Slide the blade cover from the tool's side until the shear
blade completely hides itself and then push in it lightly
towards the tool from the front.
To remove the blade cover, take the above installation
procedure in reverse.
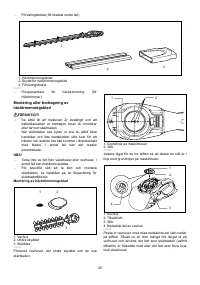
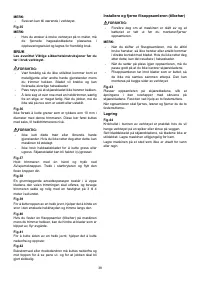
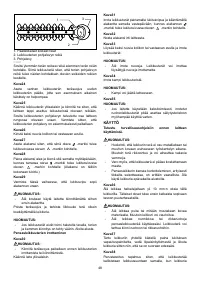
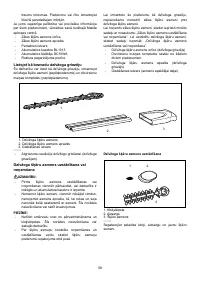
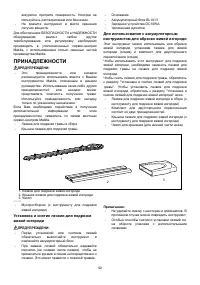
Installing or removing base frame
CAUTION:
•
Before installing or removing base frame, be sure
to install the blade cover.
•
When installing or removing base frame, take care
that your fingers are not be pinched between the
tool and base frame.
Fig.7
To remove the base frame, upset the tool and take it out
of the groove grabbing its bottom.
Fig.8
To install the base frame, fit the protrusion of base frame
near the change lever into the hole for the sheared grass
height setting. With the base frame so fitted, pull the
lower part of base frame and fit the other part of the base
frame in the groove in the tool.
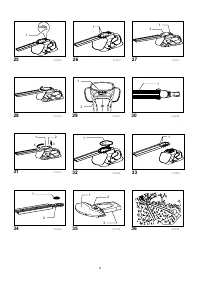
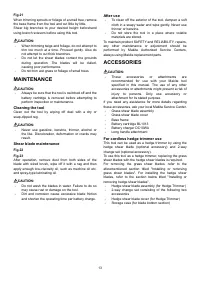
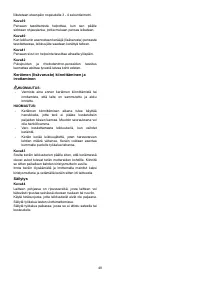
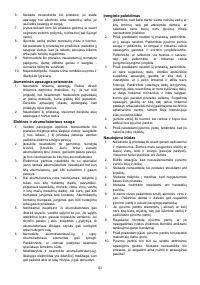
Installing or removing grass shear blades
CAUTION:
•
Always be sure that the tool is switched off and the
battery cartridge is removed before installing or
removing shear blades. Failure to switch off and
remove the battery cartridge from the tool may
result in serious injury from accidental start-up.
•
When replacing the shear blade, always wear
gloves without removing blade cover so that hands
and face does not directly contact the blade.
Failure to do so may cause personal injury.
NOTE:
•
Do not wipe off grease from the gear and crank.
Failure to do so may cause damage to the tool.
•
For specific way of removing and installing shear
blades refer to the reverse of a package for
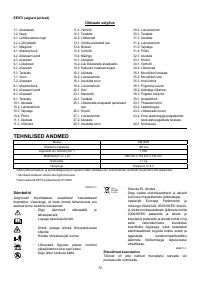
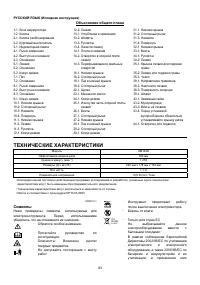
Характеристики

Остались вопросы?Не нашли свой ответ в руководстве или возникли другие проблемы? Задайте свой вопрос в форме ниже с подробным описанием вашей ситуации, чтобы другие люди и специалисты смогли дать на него ответ. Если вы знаете как решить проблему другого человека, пожалуйста, подскажите ему :)


