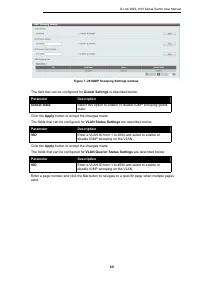
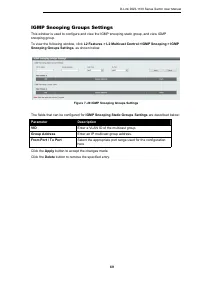
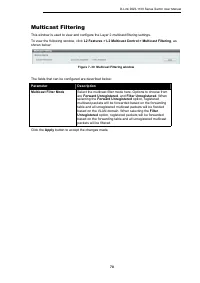
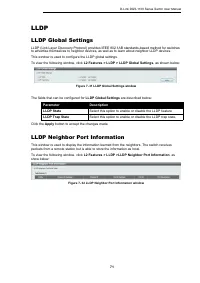
Коммутаторы D-Link DGS-1100-16V2 16xGE - инструкция пользователя по применению, эксплуатации и установке на русском языке. Мы надеемся, она поможет вам решить возникшие у вас вопросы при эксплуатации техники.
Если остались вопросы, задайте их в комментариях после инструкции.
"Загружаем инструкцию", означает, что нужно подождать пока файл загрузится и можно будет его читать онлайн. Некоторые инструкции очень большие и время их появления зависит от вашей скорости интернета.
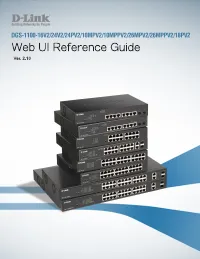
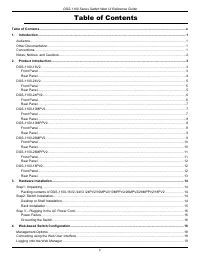
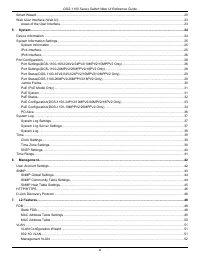

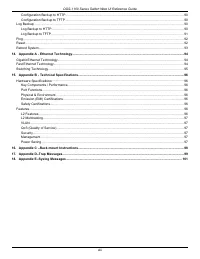


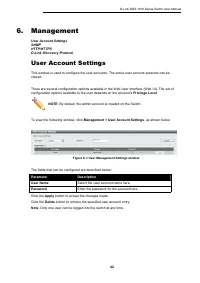


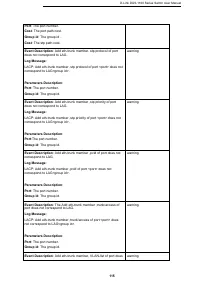
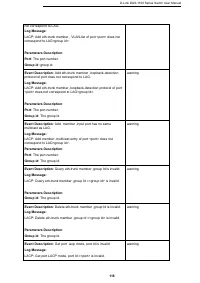
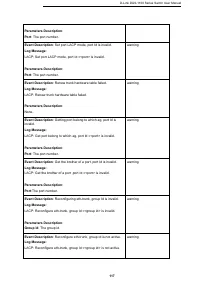
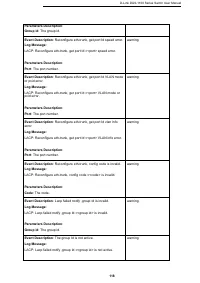
D-Link DGS-1100 Series Switch User Manual
34
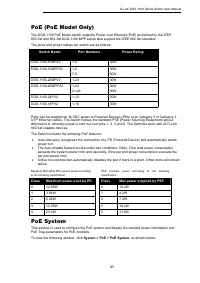
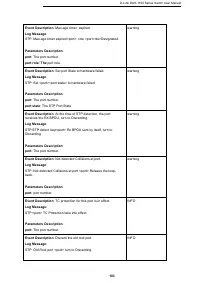
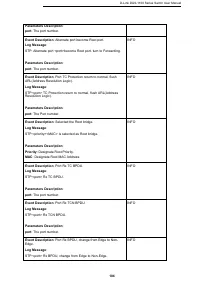
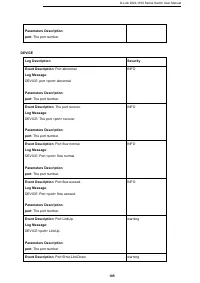
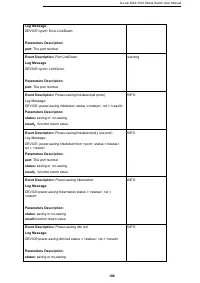
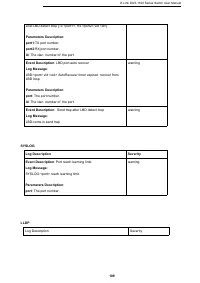
1.Check if the PD connected to the port supports the IEEE 802.3at standard.
2.Manually configure the corresponding port’s power limit value to 30 Watts.
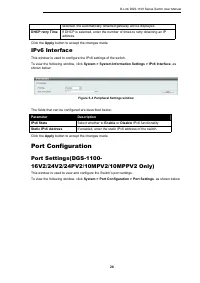
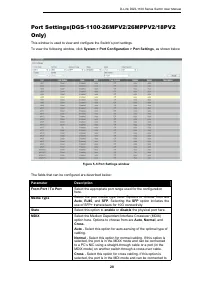
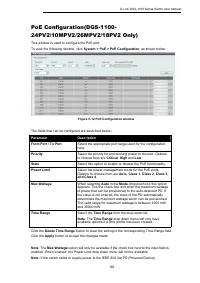
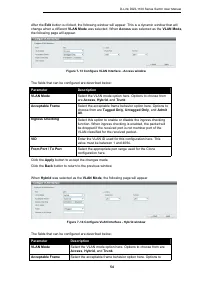
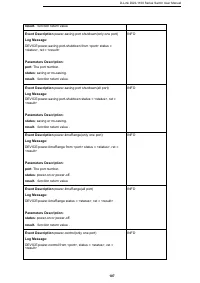
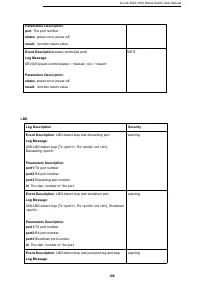
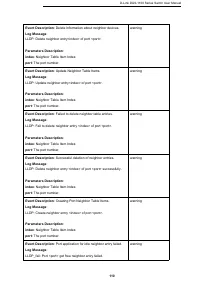
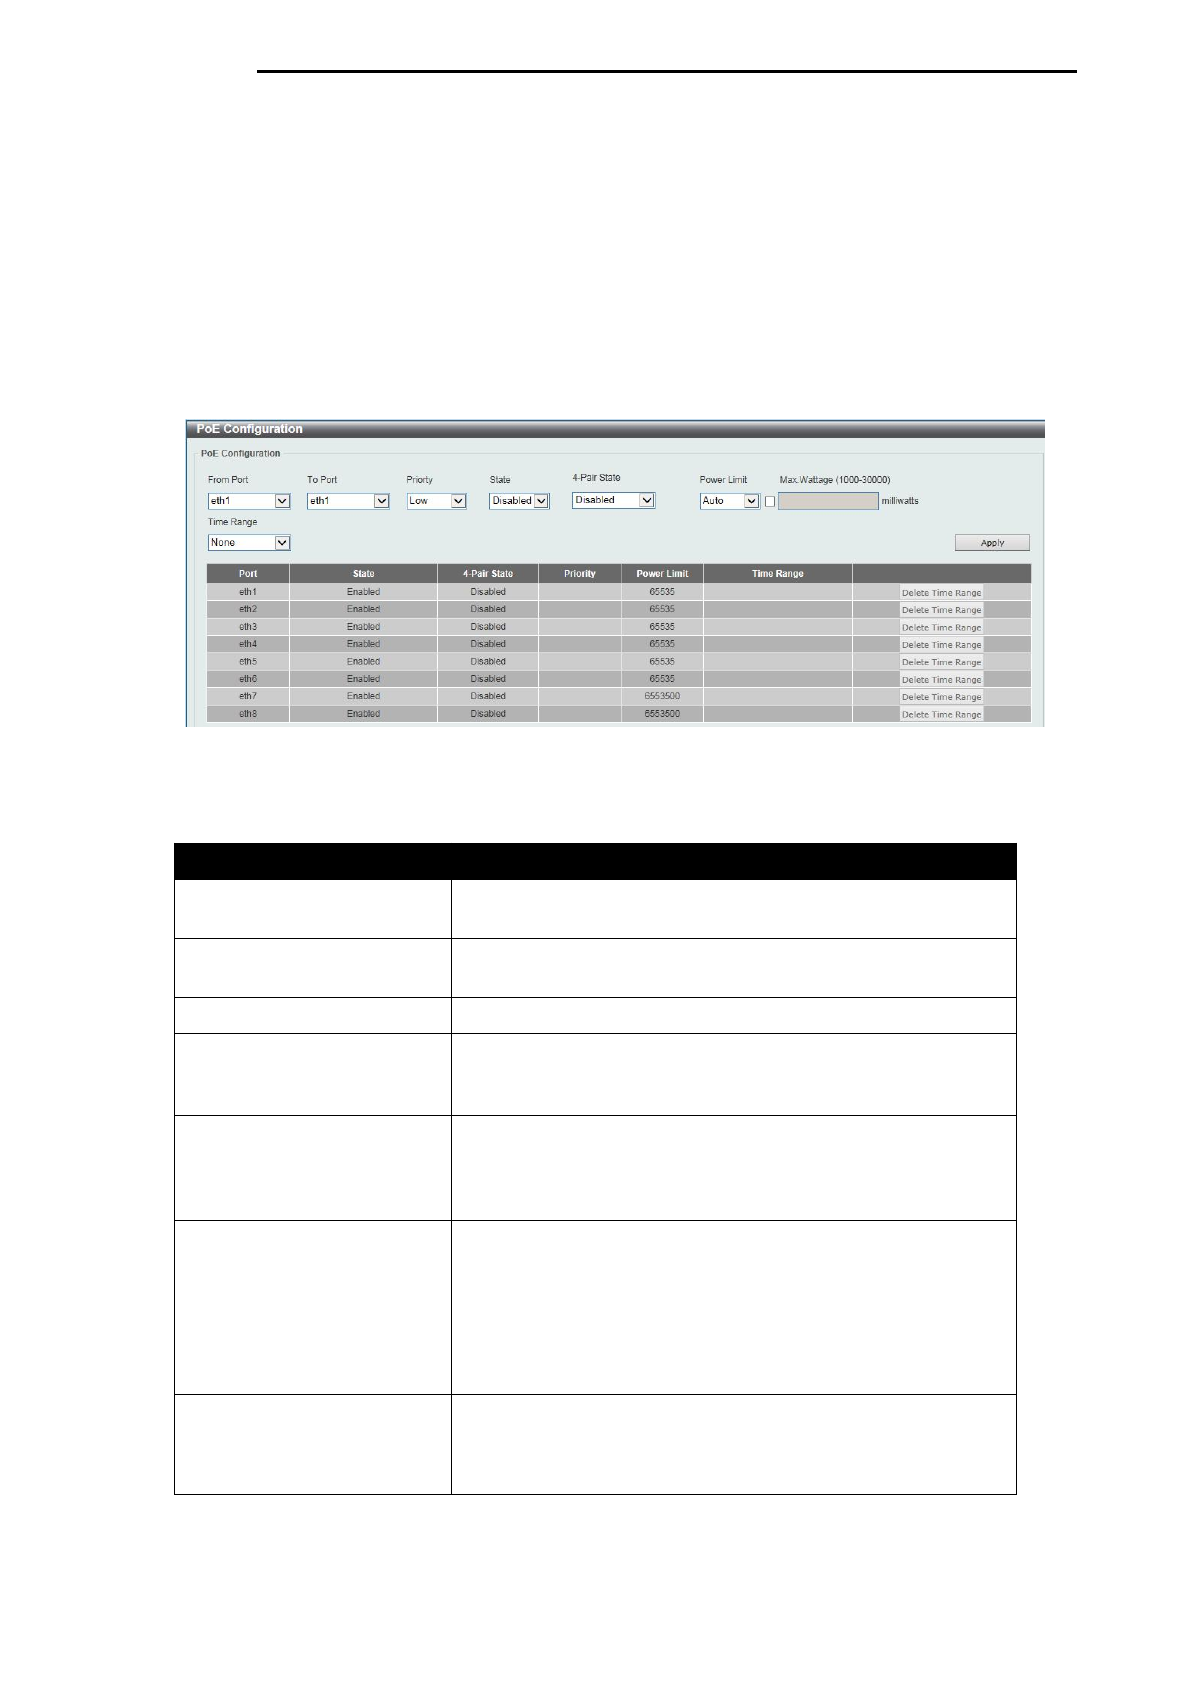
PoE Configuration(DGS-1100-10MPPV2/26MPPV2
Only)
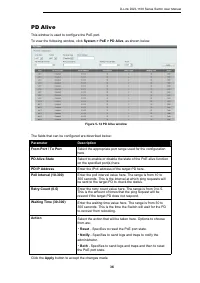
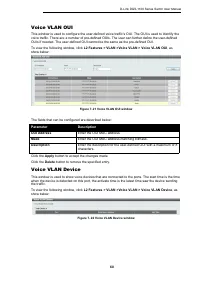
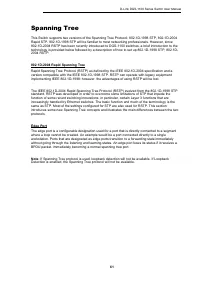
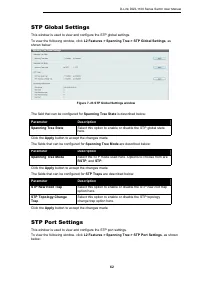
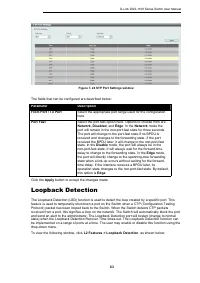
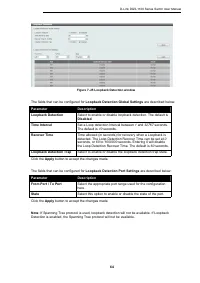
This window is used to configure the PoE port.
To view the following window, click
System > PoE > PoE Configuration
, as shown below:
Figure 5- 13 PoE Configuration window
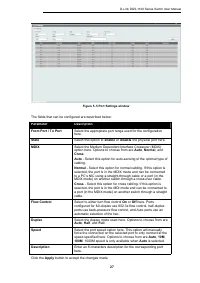
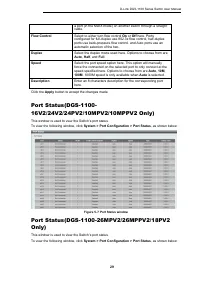
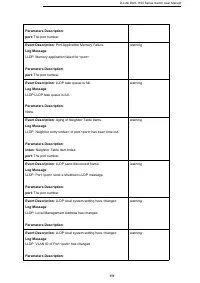
The fields that can be configured are described below:
Parameter
Description
From Port / To Port
Select the appropriate port range used for the configuration
here.
Priority
Select the priority for provisioning power to the port. Options
to choose from are
Critical
,
High
and
Low
.
State
Select this option to enable or disable the PoE functionality.
4-Pair State
Select the power management mode for the PoE ports.
Options to choose from are
Disable, 60W Enabled, 90W
Enabled
.
Power Limit
Select the power management mode for the PoE ports.
Options to choose from are
Auto, Class 1, Class 2, Class 3,
and Class 4
. (When 4-Pair State is enabled, Power Limit is
Auto always.)
Max Wattage
When selecting
Auto
in the
Mode
drop-down list, this option
appears. Tick the check box and enter the maximum wattage
of power that can be provisioned to the auto-detected PD. If
the value is not entered, the class of the PD automatically
determines the maximum wattage which can be provisioned.
The valid range for maximum wattage is between 1000 mW
and 30000 mW.
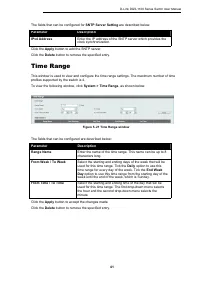
Time Range
Select the
Time Range
from the drop-down list.
Note
: The
Time Range
drop down menu will only have
available options if a time profile has been created.
Click the
Delete Time Range
button to clear the setting in the corresponding Time Range field.
Click the
Apply
button to accept the changes made.
Характеристики

Остались вопросы?Не нашли свой ответ в руководстве или возникли другие проблемы? Задайте свой вопрос в форме ниже с подробным описанием вашей ситуации, чтобы другие люди и специалисты смогли дать на него ответ. Если вы знаете как решить проблему другого человека, пожалуйста, подскажите ему :)


