Коммутаторы D-Link DGS-1100-16V2 16xGE - инструкция пользователя по применению, эксплуатации и установке на русском языке. Мы надеемся, она поможет вам решить возникшие у вас вопросы при эксплуатации техники.
Если остались вопросы, задайте их в комментариях после инструкции.
"Загружаем инструкцию", означает, что нужно подождать пока файл загрузится и можно будет его читать онлайн. Некоторые инструкции очень большие и время их появления зависит от вашей скорости интернета.


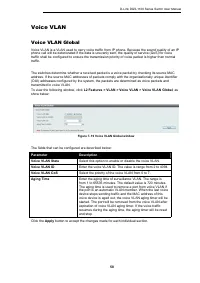
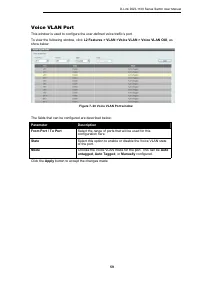
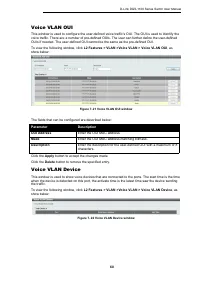
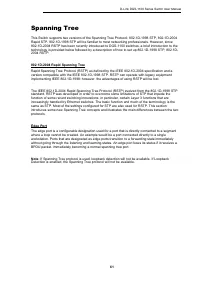

D-Link DGS-1100 Series Switch User Manual
15
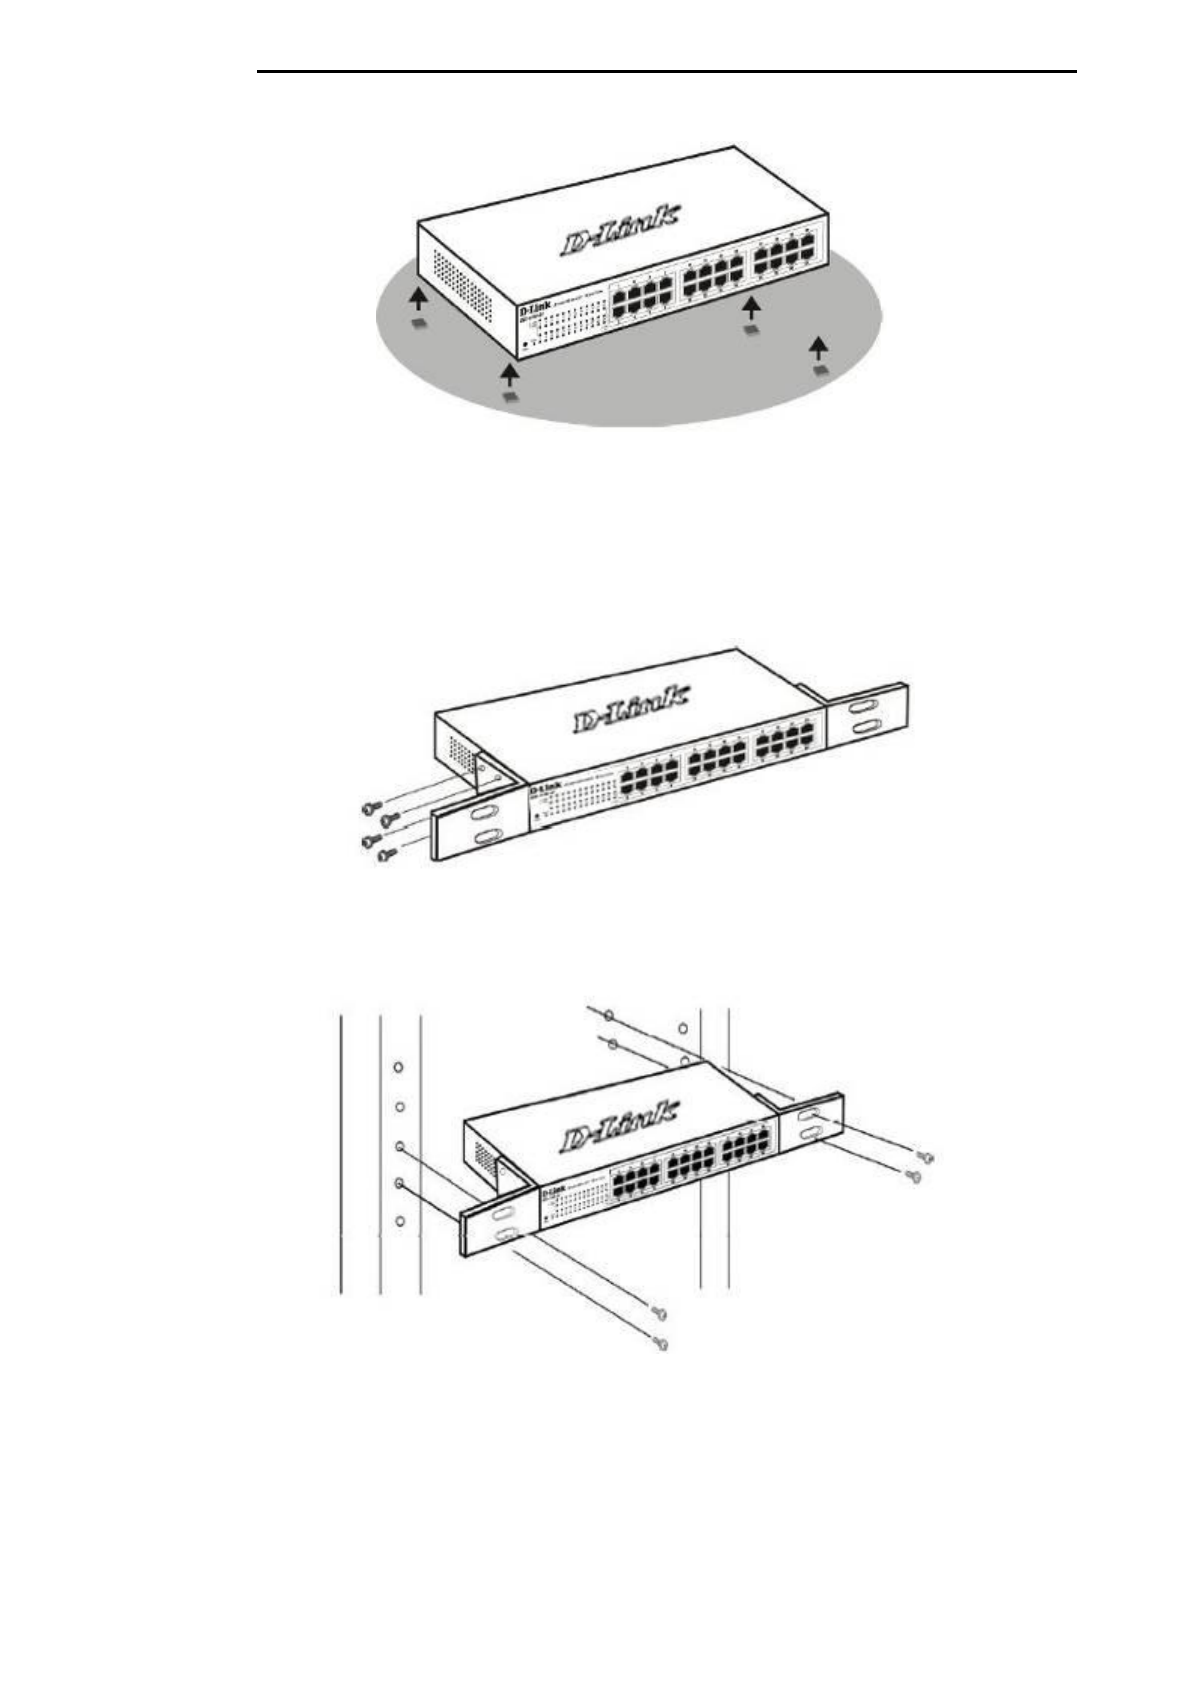
Figure 3-1 – Attach the adhesive rubber pads to the bottom
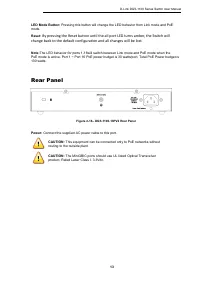
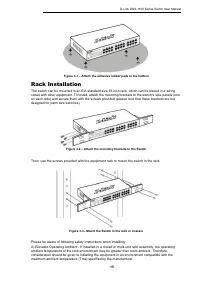
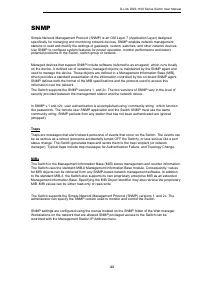
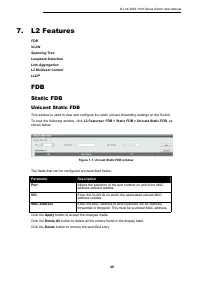
Rack Installation
The switch can be mounted in an EIA standard size 19-inch rack, which can be placed in a wiring
closet with other equipment. To install, attach the mounting brackets to the switch’s side panels (one
on each side) and secure them with the screws provided (please note that these brackets are not
designed for palm size switches).
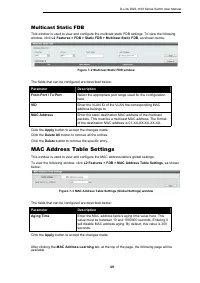
Figure 3-2 – Attach the mounting brackets to the Switch
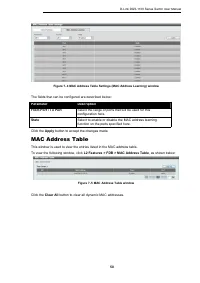
Then, use the screws provided with the equipment rack to mount the switch in the rack.
Figure 3-3– Mount the Switch in the rack or chassis
Please be aware of following safety Instructions when installing:
A) Elevated Operating Ambient - If installed in a closed or multi-unit rack assembly, the operating
ambient temperature of the rack environment may be greater than room ambient. Therefore,
consideration should be given to installing the equipment in an environment compatible with the
maximum ambient temperature (Tma) specified by the manufacturer.
Характеристики

Остались вопросы?Не нашли свой ответ в руководстве или возникли другие проблемы? Задайте свой вопрос в форме ниже с подробным описанием вашей ситуации, чтобы другие люди и специалисты смогли дать на него ответ. Если вы знаете как решить проблему другого человека, пожалуйста, подскажите ему :)


