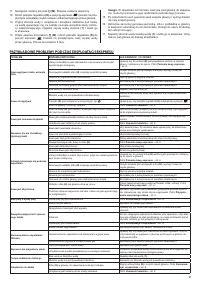
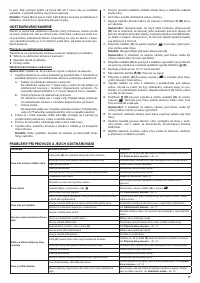
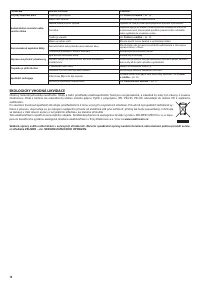
Кофемашина Zelmer 13Z014 - инструкция пользователя по применению, эксплуатации и установке на русском языке. Мы надеемся, она поможет вам решить возникшие у вас вопросы при эксплуатации техники.
Если остались вопросы, задайте их в комментариях после инструкции.
"Загружаем инструкцию", означает, что нужно подождать пока файл загрузится и можно будет его читать онлайн. Некоторые инструкции очень большие и время их появления зависит от вашей скорости интернета.


71
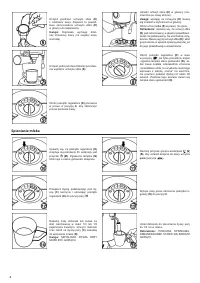
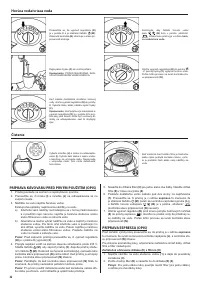
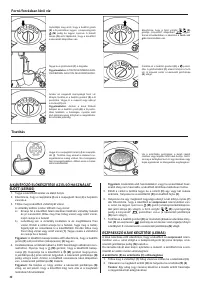
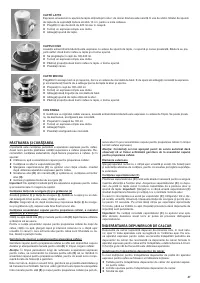
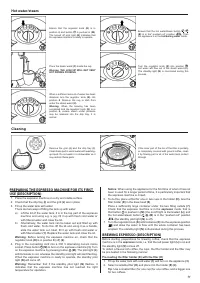
Hot water/steam
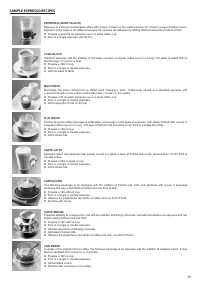
Ensure that the regulator knob
(K)
is in
position
0
and button is pushed in
(M)
.
The turned off pilot light
(N)
indicates that
the espresso machine is ready to operate.
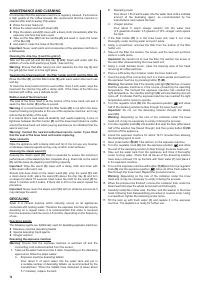
Ensure that the hot water/steam button
(B)
is in the” pushed out” position
. Then
the appliance is in the
hot/boiling water
mode.
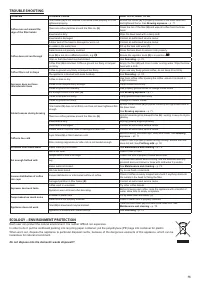
Place the steam wand
(C)
inside the cup.
Warning: THE JUG/CUP WILL GET VERY
HOT DURING POURING
.
Turn the regulator knob
(K)
into position
.
Hot water will low out of the steam wand
(C)
.
The standby light
(N)
is illuminated during this
process.
When a suficient amount of water has been
obtained, turn the regulator knob
(K)
into
position
0
. Remove the cup or dish from
under the steam wand
(C)
.
Warning:
When the brewing has been
completed and the regulator knob
(K)
is in
position
0,
excess steam under pressure
may be released into the drip tray. It is
normal.
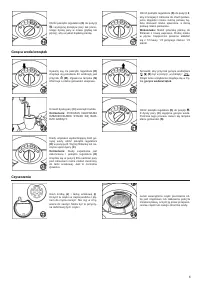
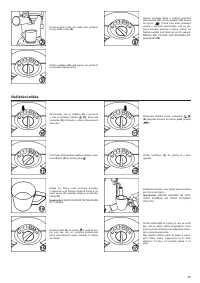
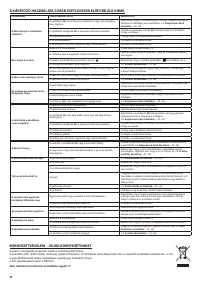
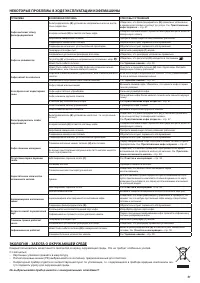
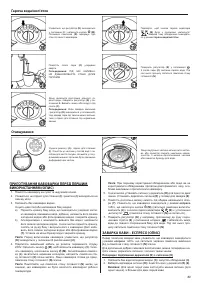
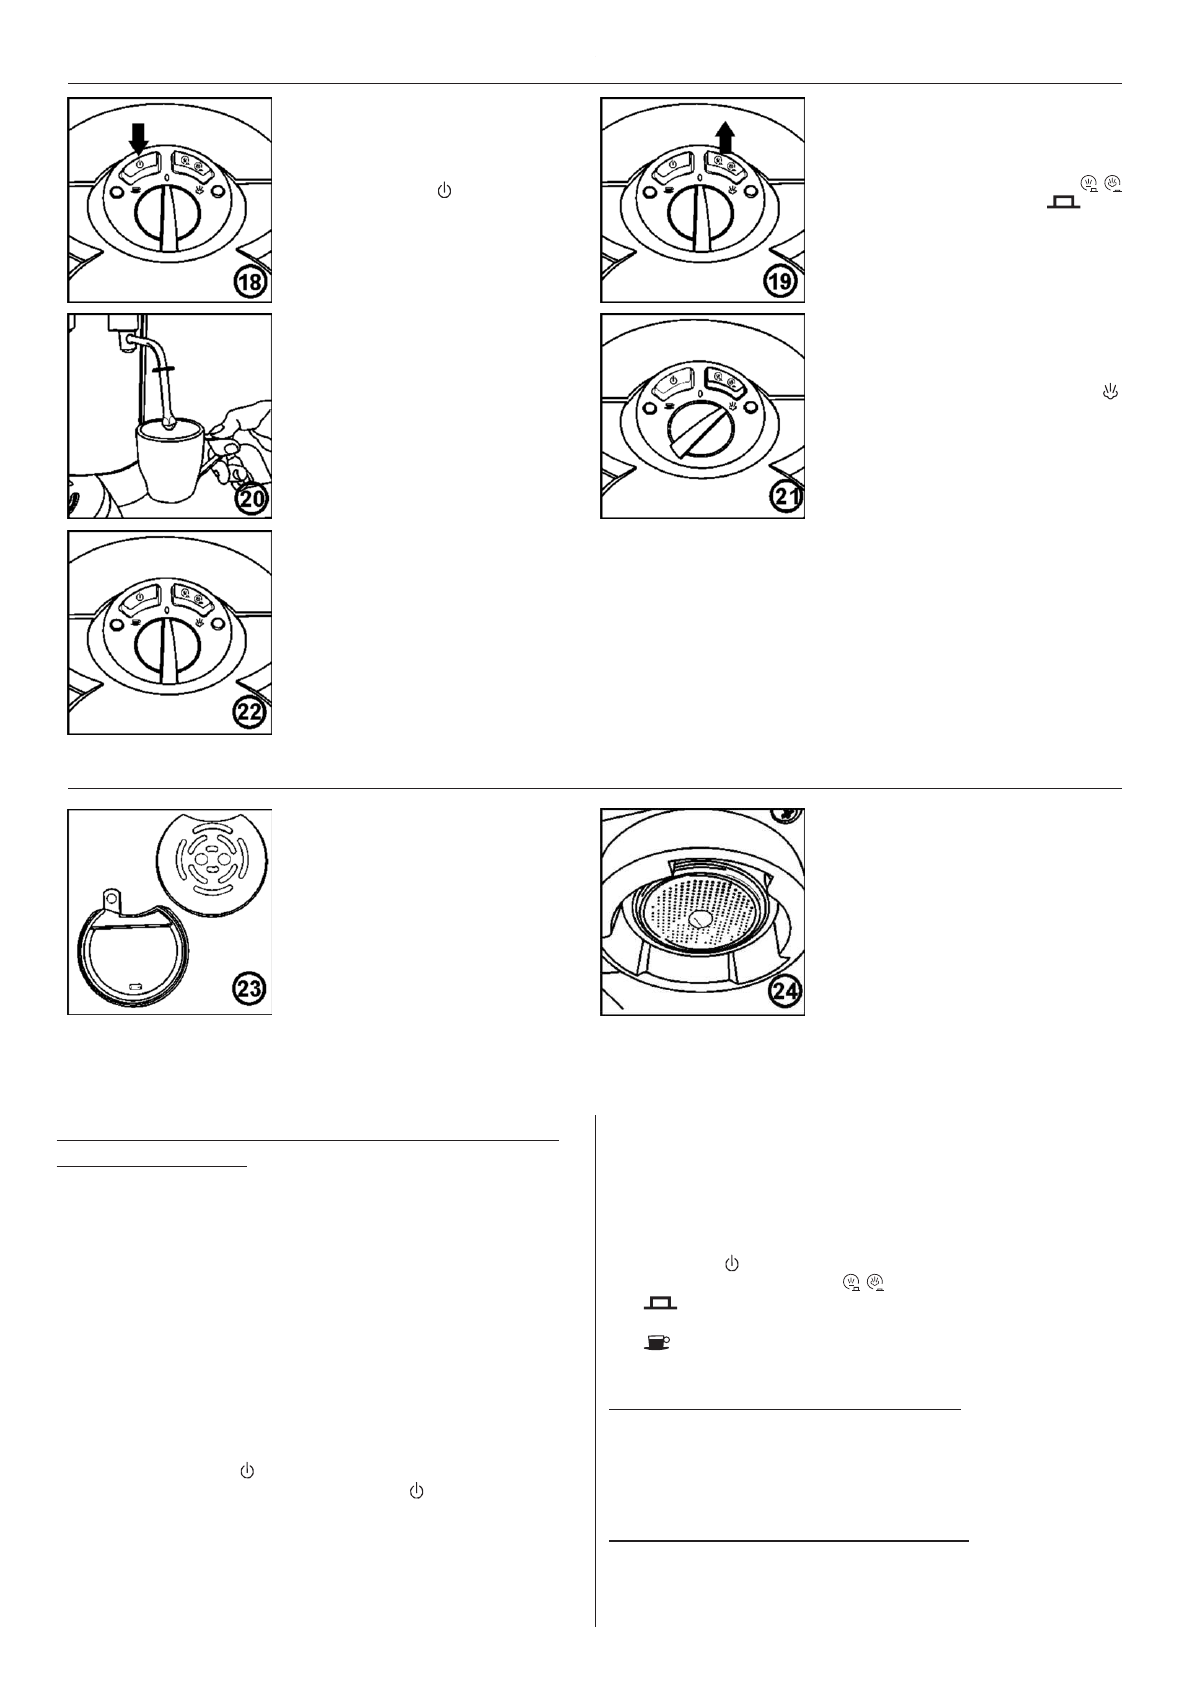
Cleaning
Remove the grid
(J)
and the drip tray
(I)
.
Clean these part in warm water with washing-
up liquid. Do not wash in a dishwasher as it
may deform these parts.
If the inner part of the rim of the ilter is partially
or completely covered with ground coffee, clean
it by lowing part or all of the water tank content
through.
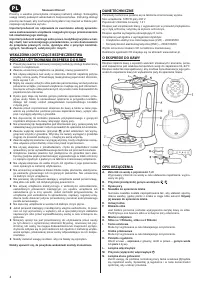
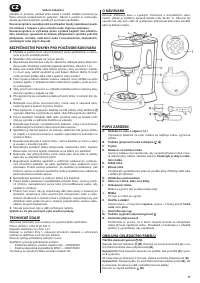
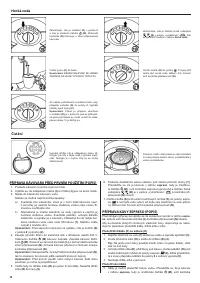
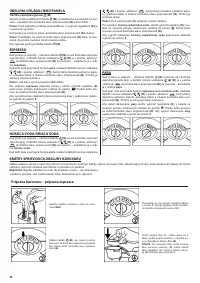
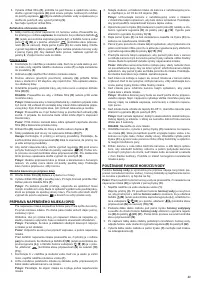
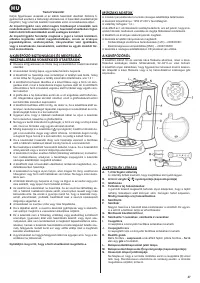
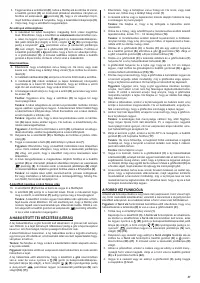
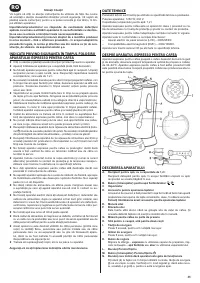
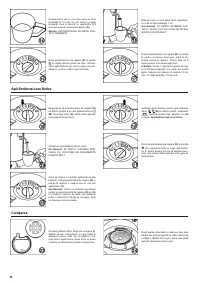
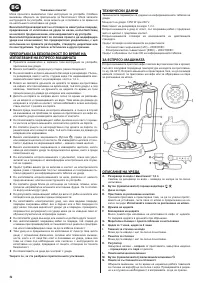
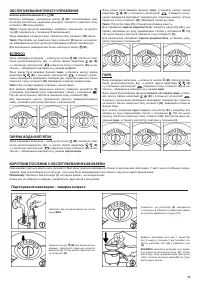
PREPARING THE ESPRESSO MACHINE FOR ITS FIRST
USE (DESCRIPTION)
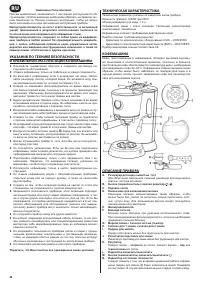
1. Place the espresso machine on a dry and stable surface.
2. Check that the drip tray
(I)
and the grid
(J)
are in place.
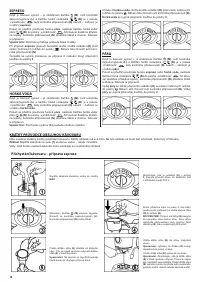
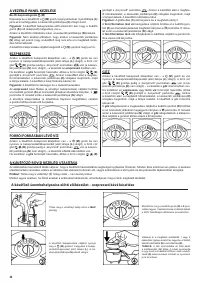
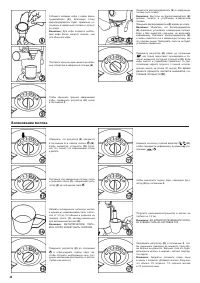
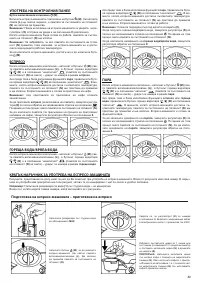
3. Fill up the water tank with water.
There are two ways of illing the tank up with water:
a) Lift the lid of the water tank; it is in the top part of the espresso
machine and using e.g. a jug, ill it up with fresh cold water or
with iltered water and close the lid.
b) Alternatively, the water tank can be taken out and illed up with
fresh cold water. To do this, lift the lid and using it as a handle,
slide the water tank out. Next, ill it up with fresh cold water or
with iltered water
(1)
. Replace the water tank and close the lid.
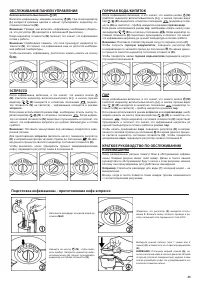
Warning
: Before turning the espresso machine on, check that the
regulator knob
(K)
is in position
0
(off)
(2)
.
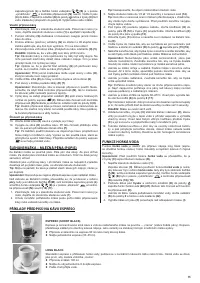
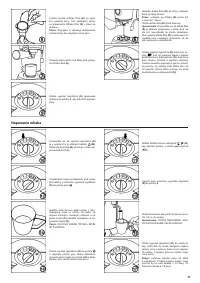
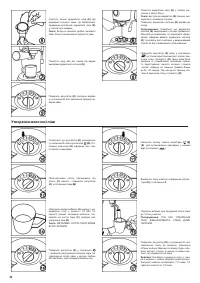
4. Plug in the connecting cord into a 230 V alternating current mains
socket. Press button
(M)
to turn on the espresso machine
(3)
. Turn
on the espresso machine by pressing button
(M)
. The pilot light
(L)
will illuminate in red, whereas the standby pilot light will start lashing.
When the espresso machine is ready to operate, the standby pilot
light
(N)
will come off.
Warning
: Remember that if the standby pilot light
(N)
lashes, it
indicates that the espresso machine has not reached the right
temperature for operation.
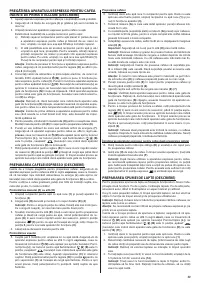
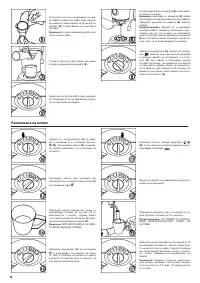
Notice
: When using the appliance for the irst time of when it has not
been in used for a longer period of time, it is particularly important that
the espresso machine is rinsed.
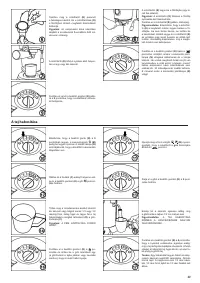
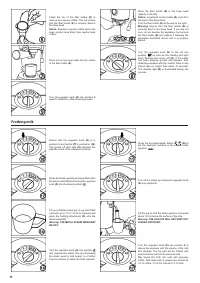
5. To do this, place a ilter for one or two cups in the holder
(H)
. lace the
ilter holder
(E)
in the brew head
(6)
.
Place a suficiently large container under the two illing outlets
(7)
.
Check that the espresso machine is in the
espresso
mode, that is
that button is pushed in
(M)
(the on/off light is illuminated
(L)
) and
the hot water/steam button
(B)
is in the “pushed out” position
(the standby pilot light
(N)
is off).
7. Turn the regulator knob
(K)
anticlockwise
(8)
into the espresso position
and allow the water to low until the whole container has been
emptied. The standby light
(N)
is illuminated during this process.
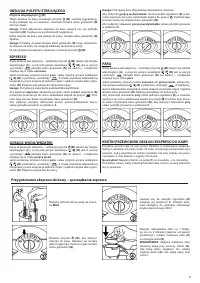
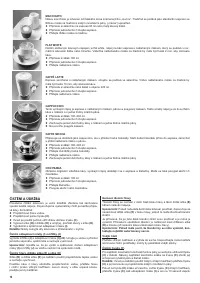
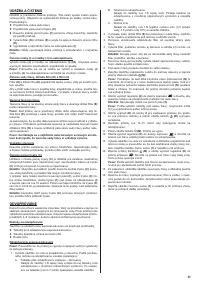
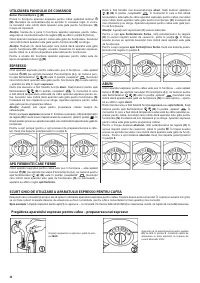
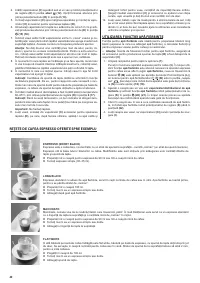
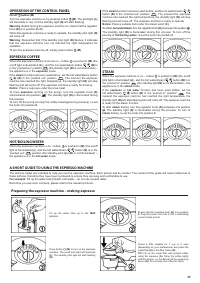
BREWING ESPRESSO (DESCRIPTION)
Before starting preparations for brewing coffee, check that the espresso
machine is in the
espresso
mode, i.e. that the red power light
(L)
is on and
the standby light
(N)
comes off.
To obtain a lavour-rich coffee, the cups, the ilter holder and the ilter may
be pre-heated in the following manner:
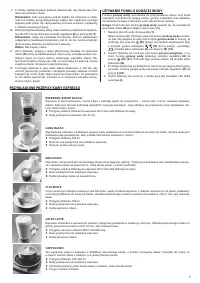
Pre-heating the ilter holder (E) with the iler (H)
1. Fill up the water tank with cold water
(1)
and turn on the appliance
(3)
.
2. Select a suitable ilter
(H)
and place it in the holder
(E)
(4)
Tip
: Use a smaller ilter (for one cup) for one coffee, and a bigger one
for two coffees.


