
Электропилы Makita DUC356Z - инструкция пользователя по применению, эксплуатации и установке на русском языке. Мы надеемся, она поможет вам решить возникшие у вас вопросы при эксплуатации техники.
Если остались вопросы, задайте их в комментариях после инструкции.
"Загружаем инструкцию", означает, что нужно подождать пока файл загрузится и можно будет его читать онлайн. Некоторые инструкции очень большие и время их появления зависит от вашей скорости интернета.


16 ENGLISH
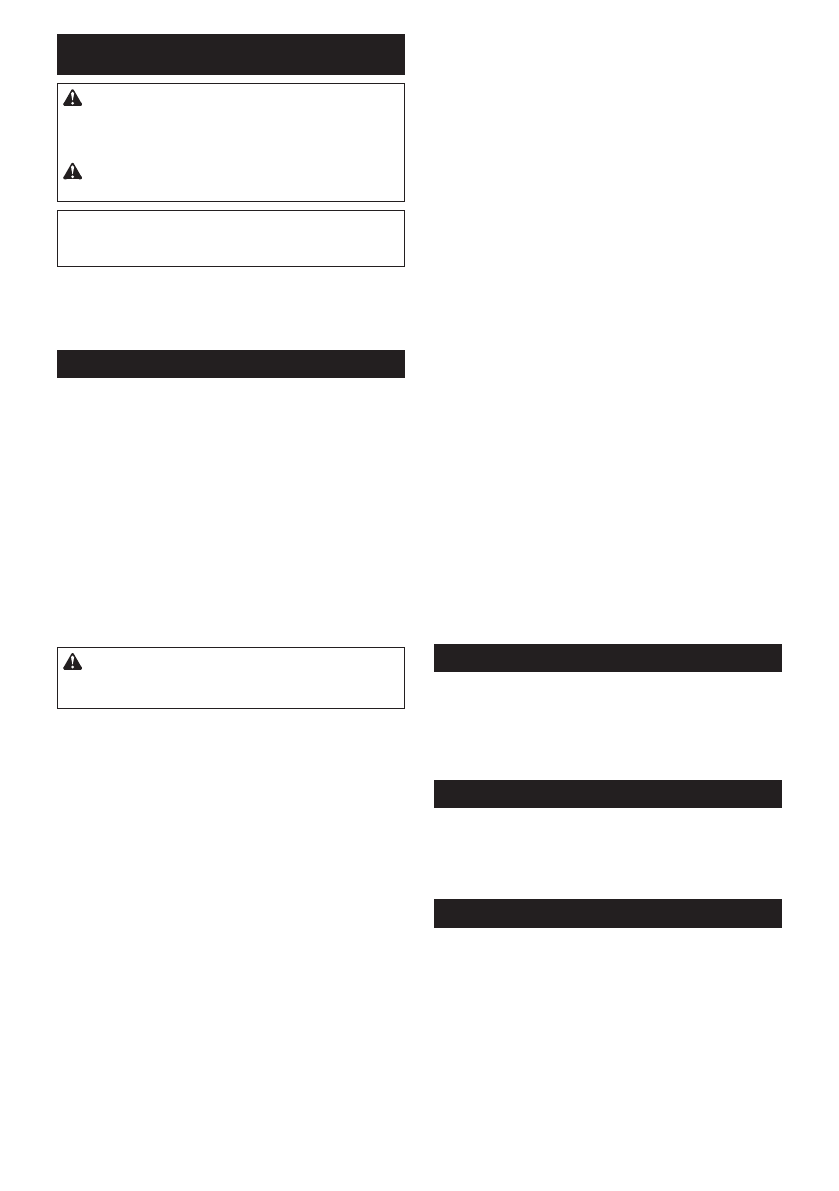
MAINTENANCE
CAUTION:
Always be sure that the tool is
switched off and the battery cartridge is removed
before attempting to perform inspection or
maintenance.
CAUTION:
Always wear gloves when perform-
ing any inspection or maintenance.
NOTICE:
Never use gasoline, benzine, thinner,
alcohol or the like. Discoloration, deformation or
cracks may result.
To maintain product SAFETY and RELIABILITY,
repairs, any other maintenance or adjustment should
be performed by Makita Authorized or Factory Service
Centers, always using Makita replacement parts.
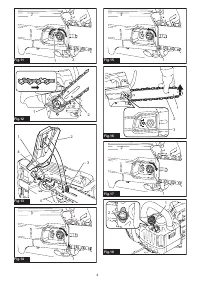
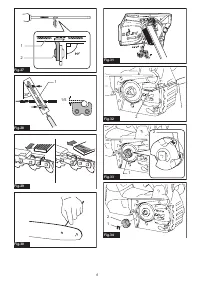
Sharpening the saw chain
Sharpen the saw chain when:
•
Mealy sawdust is produced when damp wood is cut;
•
The chain penetrates the wood with difficulty, even
when heavy pressure is applied;
•
The cutting edge is obviously damaged;
•
The saw pulls to the left or right in the wood.
(caused by uneven sharpening of the saw chain or
damage to one side only)
Sharpen the saw chain frequently but a little each time.
Two or three strokes with a file are usually sufficient for
routine resharpening. When the saw chain has been
resharpened several times, have it sharpened in our
authorized service center.
Sharpening criteria:
WARNING:
An excessive distance between
the cutting edge and depth gauge increases the
risk of kickback.
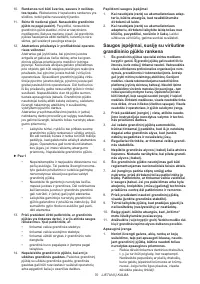
►
Fig.25:
1.
Cutter length
2.
Distance between cutting
edge and depth gauge
3.
Minimum cutter
length (3 mm)
— All cutter length must be equal. Different cutter
lengths prevent the saw chain from running
smoothly and may cause the saw chain to break.
— Do not sharpen the chain when the cutter length
has reached 3 mm or shorter. The chain must be
replaced with new one.
— The chip thickness is determined by the distance
between the depth gauge (round nose) and the
cutting edge.
— The best cutting results are obtained with following
distance between cutting edge and depth gauge.
•
Chain blade 90PX : 0.65 mm
•
Chain blade 91PX : 0.65 mm
•
Chain blade 25AP : 0.65 mm
►
Fig.26
— The sharpening angle of 30° must be the same on
all cutters. Different cutter angles cause the chain
to run roughly and unevenly, accelerate wear, and
lead to chain breaks.
— Use a suitable round file so that the proper sharp
-
ening angle is kept against the teeth.
•
Chain blade 90PX : 55°
•
Chain blade 91PX : 55°
•
Chain blade 25AP : 55°
File and file guiding
— Use a special round file (optional accessory) for
saw chains to sharpen the chain. Normal round
files are not suitable.
— Diameter of the round file for each saw chain is as
follows:
•
Chain blade 90PX : 4.5 mm
•
Chain blade 91PX : 4.0 mm
•
Chain blade 25AP : 4.0 mm
— The file should only engage the cutter on the for
-
ward stroke. Lift the file off the cutter on the return
stroke.
— Sharpen the shortest cutter first. Then the length
of this shortest cutter becomes the standard for all
other cutters on the saw chain.
— Guide the file as shown in the figure.
►
Fig.27:
1.
File
2.
Saw chain
—
The file can be guided more easily if a file holder
(optional accessory) is employed. The file holder has
markings for the correct sharpening angle of 30° (align
the markings parallel to the saw chain) and limits the
depth of penetration (to 4/5 of the file diameter).
►
Fig.28:
1.
File holder
— After sharpening the chain, check the height of the
depth gauge using the chain gauge tool (optional
accessory).
►
Fig.29
— Remove any projecting material, however small,
with a special flat file (optional accessory).
— Round off the front of the depth gauge again.
Cleaning the guide bar
Chips and sawdust will build up in the guide bar groove.
They may clog the bar groove and impair the oil flow.
Clean out the chips and sawdust every time when you
sharpen or replace the saw chain.
►
Fig.30
Cleaning the sprocket cover
Chips and saw dust will accumulate inside of the
sprocket cover. Remove the sprocket cover and saw
chain from the tool then clean the chips and saw dust.
►
Fig.31
Cleaning the oil discharge hole
Small dust or particles may be built up in the oil dis-
charge hole during operation. These dust or particles
may impair the oil to flow and cause an insufficient
lubrication on the whole saw chain. When a poor chain
oil delivery occurs at the top of guide bar, clean the oil
discharge hole as follows.
1.
Remove the sprocket cover and saw chain from
the tool.
2.
Remove the small dust or particles using a slotted
screwdriver or the like.
►
Fig.32:
1.
Slotted screwdriver
2.
Oil discharge hole
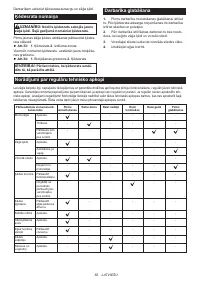
Содержание
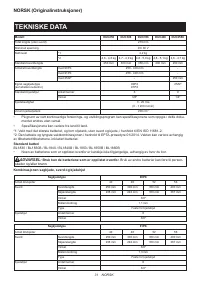
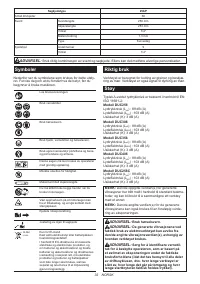
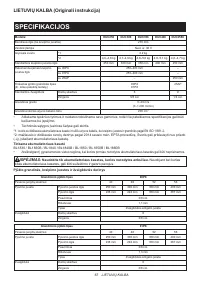
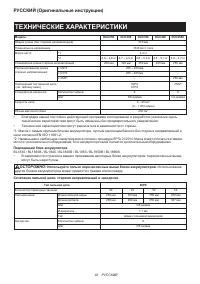
- 92 ТЕХНИЧЕСКИЕ ХАРАКТЕРИСТИКИ
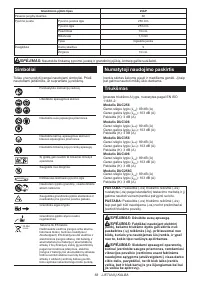
- 93 Символы
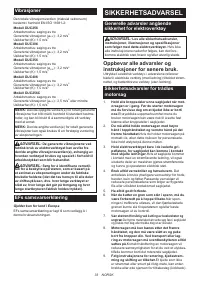
- 94 МЕРЫ БЕЗОПАСНОСТИ; Сохраните брошюру с инструк
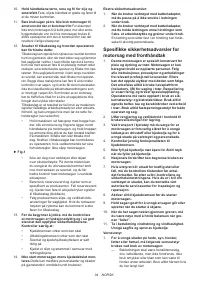
- 96 Специальные инструкции по; СОХРАНИТЕ ДАННЫЕ
- 97 Важные правила техники
- 98 ОПИСАНИЕ ДЕТАЛЕЙ
- 99 Система защиты инструмента/
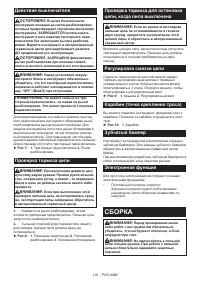
- 100 СБОРКА
- 101 Снятие или установка пильной; ЭКСПЛУАТАЦИЯ; Смазка
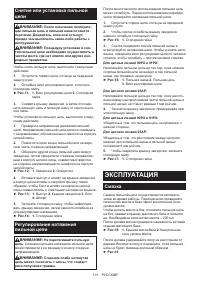
- 102 ЭКСПЛУАТАЦИЯ ЦЕПНОЙ ПИЛЫ; ОБСЛУЖИВАНИЕ; Заточка пильной цепи
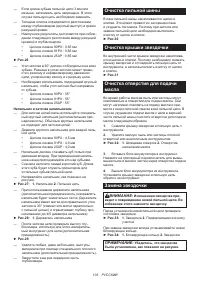
- 103 Очистка пильной шины
- 104 Хранение инструмента
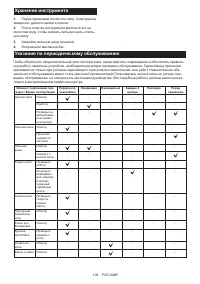
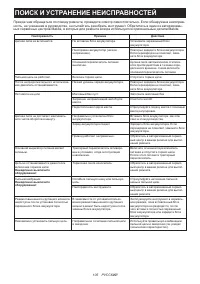
- 105 ПОИСК И УСТРАНЕНИЕ НЕИСПРАВНОСТЕЙ
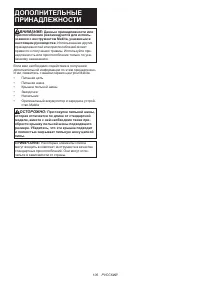
- 106 ДОПОЛНИТЕЛЬНЫЕ
Характеристики

Остались вопросы?Не нашли свой ответ в руководстве или возникли другие проблемы? Задайте свой вопрос в форме ниже с подробным описанием вашей ситуации, чтобы другие люди и специалисты смогли дать на него ответ. Если вы знаете как решить проблему другого человека, пожалуйста, подскажите ему :)


