
Духовые шкафы Kuppersbusch EEB 6550.8 MX - инструкция пользователя по применению, эксплуатации и установке на русском языке. Мы надеемся, она поможет вам решить возникшие у вас вопросы при эксплуатации техники.
Если остались вопросы, задайте их в комментариях после инструкции.
"Загружаем инструкцию", означает, что нужно подождать пока файл загрузится и можно будет его читать онлайн. Некоторые инструкции очень большие и время их появления зависит от вашей скорости интернета.

EEB 6550.8
49
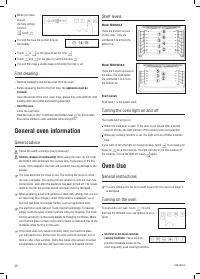
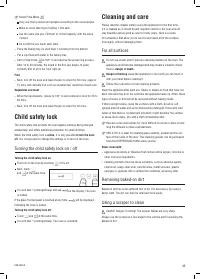
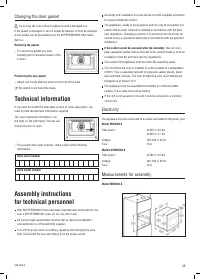
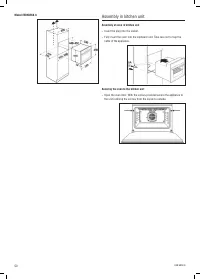
Changing the door gasket
Do not use the oven without a gasket or with a damaged one.
If the gasket is damaged or can no longer be cleaned, it must be changed.
A new gasket can be purchased from the KÜPPERSBUSCH After-Sales
Service.
Removing the gasket
– To remove the gasket you must
carefully pull it outwards at each of the
corners.
Positioning the new gasket
– Attach one corner after the other to the front of the oven.
Be careful to not bend the clasps.
Technical information
If you need to contact the after-sales service or order spare parts, you
must provide the technical information supplied.
The oven’s technical information is on
the right, on the side frame. You can see
it when the door is open.
– For possible after-sales inquiries, make a note of the following
information:
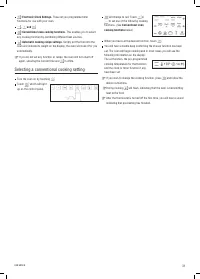
Assembly instructions
for technical personnel
Only KÜPPERSBUSCH hobs have been manufactured and tested for use
over a KÜPPERSBUSCH oven. Do not use other hobs.
All current legal requirements must be met as well as the standard
connection terms of the electricity supplier.
Turn off the power when connecting, repairing and changing the oven
bulb. Disconnect the fuse and unplug from the power source.
Assembly and installation must be carried out with complete protection
to prevent accidental contact.
The appliance is ready to be plugged in and can only be connected to a
socket with an earth connection installed in accordance with the perti-
nent regulations. Changing a socket or a connection line must only be
carried out by a specialised electrician in accordance with the pertinent
regulations.
If the socket cannot be accessed after the assembly, then an omni-
polar separation device with a minimum 3mm contact distance must be
installed to meet the pertinent security regulations.
The socket of the appliance must be within the assembly space.
The unit where the oven is installed must be resistant to a temperature
of 90°C. This is especially relevant for plywood, sealed, plastic, glued
and varnished surfaces. The front of adjoining units must withstand a
temperature of at least 70°C.
The appliance must be assembled horizontally on a fl at and stable
surface. The surface must not be folding.
If the unit is not secured to the wall it must be screwed to a common
corner unit.
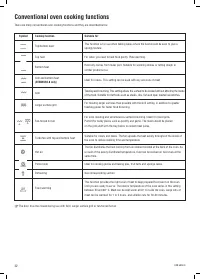
Electricity
The appliance must be connected to a socket connected to the power grid.
Model EEB6550.8
Total power:
at 230 V: 3.6 Kw
at 235 V: 3.7 Kw
Voltage:
230-240 V, 50 Hz
Fuse: 16
A
Modelo EEBK6550.8
Total power:
at 230 V: 3.2 Kw
Voltage:
220-240 V, 50 Hz
Fuse: 16
A
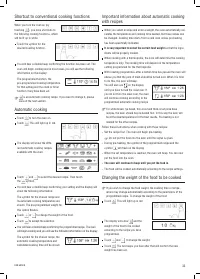
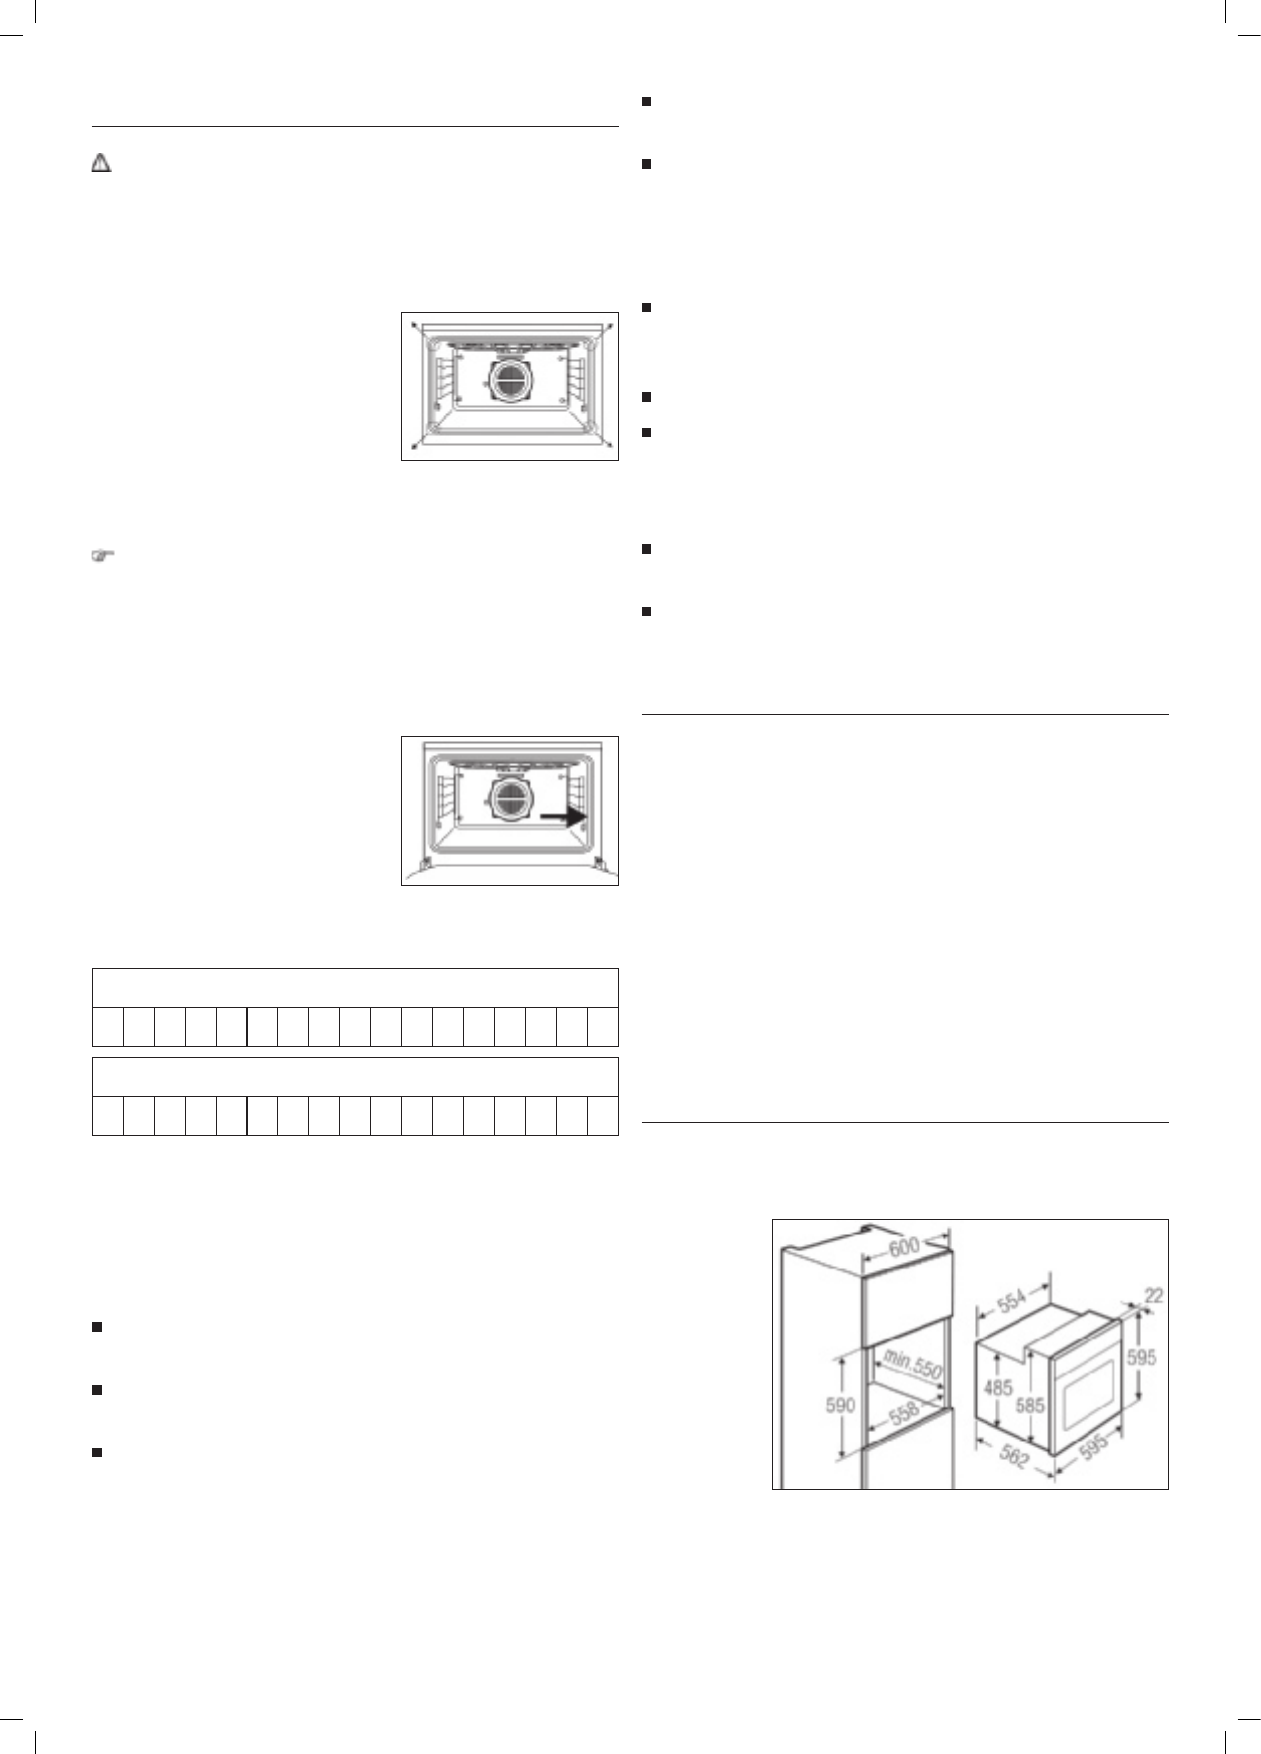
Measurements for assembly
Model EEB6550.8
Oven serial number
Oven model number
Характеристики

Остались вопросы?Не нашли свой ответ в руководстве или возникли другие проблемы? Задайте свой вопрос в форме ниже с подробным описанием вашей ситуации, чтобы другие люди и специалисты смогли дать на него ответ. Если вы знаете как решить проблему другого человека, пожалуйста, подскажите ему :)


