Телескопы Bresser National Geographic 114 900 AZ - инструкция пользователя по применению, эксплуатации и установке на русском языке. Мы надеемся, она поможет вам решить возникшие у вас вопросы при эксплуатации техники.
Если остались вопросы, задайте их в комментариях после инструкции.
"Загружаем инструкцию", означает, что нужно подождать пока файл загрузится и можно будет его читать онлайн. Некоторые инструкции очень большие и время их появления зависит от вашей скорости интернета.


12
10.2. On reflecting telescopes
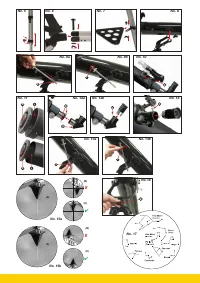
Loosen the clamping screws on the eyepiece supports (6). Insert the 20 mm
eyepiece (18) directly into the eyepiece supports. Hand tighten the clamping
screws (No. 13, X). Remove the dust cap from the main tube end.
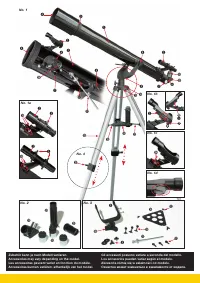
Part II – Handling
1. Mount
Your telescope is equipped with an azimuth mount that makes it easy to
adjust your telescope horizontally and vertically.
2. Setup
A dark place is essential for observations because light of all kinds (e.g.
street lamps) disturb the visible details of the sky. If you leave a bright room
at night, your eyes need approximately 20 minutes to reach full night adapta-
tion, after which you can begin your observations.
Don't observe from enclosed areas, and put your telescope in location, with
the accessories, at least 30 minutes before beginning observation, in order
to guarantee a temperature balance.
You should also make sure that the telescope is placed on stable and even
ground.
3. Vertical and horizontal adjustment
3.1. Vertical adjustment
Loosen the fastening screw (No. 14a, X) and move the tube up or down.
Once you find the right setting, hand tighten the screw to secure the adjust-
ment.
Minor changes can be carried out by slight turns of the adjustment wheel
(No. 14b, Y). Before readjusting, loosen the fastening screw (No. 14a, X).
3.2. Horizontal adjustment
To move the telescope horizontally, loosen the fastening screw (No. 16, Z)
and turn the device in the desired direction.
Once you've reached the desired position, hand tighten the fastening
screw.
4. Observation
Aim the telescope at the object to be observed. Look through the finder
scope or LED finder scope and centre the object in the middle of the view-
ing field (crosshairs or red dot) by horizontally and vertically adjusting the
telescope.
Now look through the lens and you will see the magnified object.
Turn the focusing wheel to sharpen the focus if necessary.
You can also change the lens to achieve greater magnification.
HINT:
Start each observation with a low-powered lens (20
mm).
i
5. Finding stars
You may initially have problems orienting yourself in the sky, as stars and
constellations are in constant movement and change their position depend-
ing on the season, date and time.
The North Star is the sole exception. It is a fixed star and the starting point
of all stellar maps.
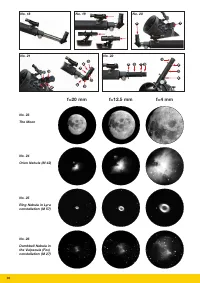
You can see some well-known stars and constellations on the map (No.
17) that are visible throughout the year. The arrangement of the stars is
dependent on the date and time, however.
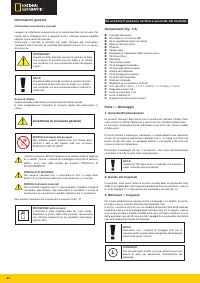
6. Accessories
Your telescope is supplied with a number of accessories (No. 2). Depending
on your telescope's model, these accessories may include the following:
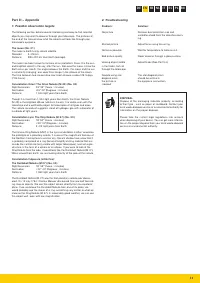
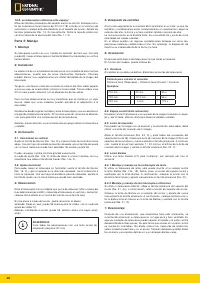
6.1. Eyepieces
Change eyepieces to change your telescope‘s magnification.
700 mm
÷ 20 mm
=
35 x
700 mm
÷ 12.5 mm
=
56 x
700 mm
÷ 4 mm
=
175 x
Formula for calculating magnification:
Focal length (Telescope) ÷ Focal length (Eyepiece) = Magnification
Examples:
6.2. Zenith mirror (refraction telescope only)
The zenith mirror (19) reverses the image you see and is therefore used only
for celestial observation.
6.3. Erecting lens
To see a vertical image the right way up, an erecting lens (20) may be
used.
Loosen the clamping screws (No. 22, X) and remove all accessories from
the eyepiece supports (6). Insert the erecting lens (20) into the eyepiece
supports, and hand tighten the clamping screws. Then insert the eyepiece
into the erecting lens opening, and tighten the clamping screws (No. 22,
Y).
6.4. Barlow lens
A Barlow lens (21) increases magnification.
6.4.1 Assembling and using refracting telescopes
If you use a refracting telescope, the Barlow lens should only be inserted
into the zenith mirror (No. 12a, X). Remove the eyepiece from the zenith
mirror and replace it with the Barlow lens. Then insert the eyepiece with the
greatest focal length and hand tighten the clamping screw to affix it in place
(No. 21, Z).
6.4.2 Assembling and using reflecting telescopes
If you use a reflecting telescope, undo the clamping screws on the eyepiece
supports (No. 21, X), and remove the eyepiece from those supports. Then
insert the Barlow lens straight in the supports and hand tighten the clamp-
ing screws. Finally, insert the eyepiece with the greatest focal length into
the Barlow lens, and then fasten it in place with the clamping screws (No.
21, Z).
7. Dismantling
After an interesting and successful observation, it is recommended that you
store the entire telescope in a dry, well-aired area. On some telescopes, the
tripod and mount can easily be separated. The adjustments to the mount will
remain intact.
Don't forget to put the dust-protection caps onto the tube opening and onto
the eyepiece connection before storing. Also, you should stow all the eye-
pieces and optical accessories in their corresponding receptacles.
HINT:
The erecting lens is not recommended for astronomical
observations. Only use the diagonal mirror for
astronomical observations. Use the erecting lens to
observe landscapes.
i
Notes on cleaning
Clean the eyepieces and lenses only with a soft, lint-free cloth, like a micro-
fibre cloth. Do not apply excess pressure to the cloth to avoid scratching
the lenses.
To remove more stubborn dirt, moisten the cleaning cloth with an eyeglass-
cleaning solution, and wipe the lenses gently.
Protect the device from dust and moisture. After use, particularly in high
humidity, let the device acclimatize for a short period of time, so that the
residual moisture can dissipate before storing. Remove the dust cover and
store it in the included bag during use.
Содержание
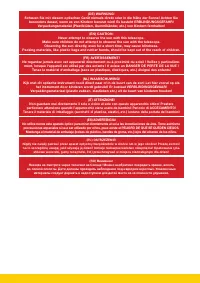
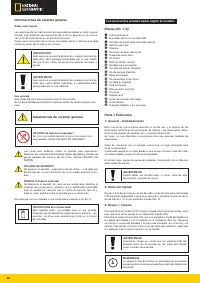
- 2 Never attempt to observe the sun with this telescope.
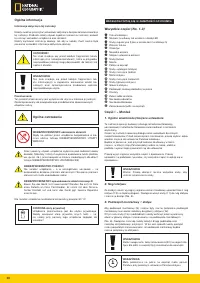
- 3 Руководство по эксплуатации
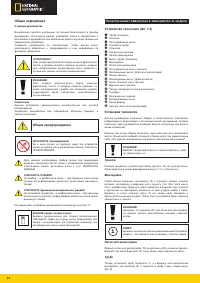
- 34 Общая информация; Общие предупреждения; Оснастка может изменяться в зависимости от модели.; Тренога
- 35 Тонкая настройка по оси восхождения; Защитная крышка
- 36 Использование телескопа; УКАЗАНИЯ по чистке
- 37 Устранение возможных проблем

