
Строительные пылесосы Makita VC004GLZ01 - инструкция пользователя по применению, эксплуатации и установке на русском языке. Мы надеемся, она поможет вам решить возникшие у вас вопросы при эксплуатации техники.
Если остались вопросы, задайте их в комментариях после инструкции.
"Загружаем инструкцию", означает, что нужно подождать пока файл загрузится и можно будет его читать онлайн. Некоторые инструкции очень большие и время их появления зависит от вашей скорости интернета.


17 ENGLISH
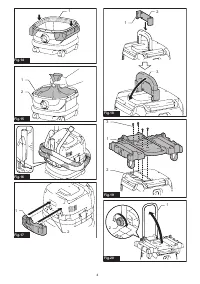
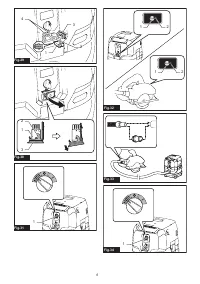
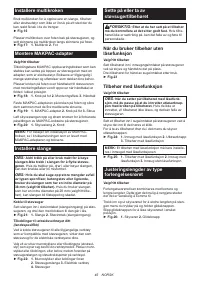
Mount the MAKPAC adapter onto the mounting base
hook, and secure them together with four screws
provided.
►
Fig.19:
1.
MAKPAC adapter
2.
Mounting base hook
3.
Screw
Lift the push bar up and tighten the knob to prepare
installing the MAKPAC cases onto the cleaner.
►
Fig.20:
1.
Push bar
2.
Knob
NOTE:
For details on installing the MAKPAC cases,
refer to the instructions provided with the MAKPAC
adapter and cases.
Installing hose
NOTICE:
Never force the hose for bending or
stamp it. Never move the cleaner by pulling the
hose.
Forcing, stamping and pulling the hose may
cause a breakage or deformation of the hose.
NOTICE:
When picking up large wastes such as
planer carvings, concrete dusts or similar other
than small wastes, use the 38 mm inner diameter
hose (optional accessory).
Using the 28 mm inner
diameter hose (optional accessory) may cause a
hose stuffing and damage.
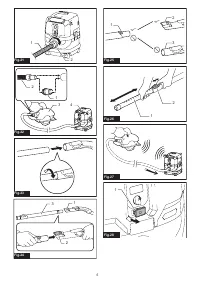
Connection to cleaner
Insert the hose end to the dust intake (hose inlet) of the
cleaner, then turn it clockwise until it locks in place.
►
Fig.21:
1.
Hose
2.
Dust intake (hose inlet)
Connections with your work tools
(Country specific)
By connecting the vacuum cleaner to any available
work tools compatible with the cleaner, it works as a
dust extractor for your power tools.
Select one of the front cuffs or joints (optional acces-
sories) as most suitable for your tool model. Place the
cuffs or joint, as necessary, between the front end of the
cleaner hose and a dust extraction port of your tool.
►
Fig.22:
1.
Front cuffs or joint
2.
Cleaner hose
3.
Power tool
4.
Vacuum cleaner
Installing or removing cleaner
attachments
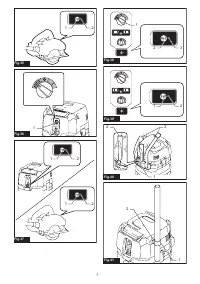
CAUTION:
After installing an attachment,
check if it is securely installed.
If the attachment
is installed imperfectly, it may come off and cause
personal injury.
Attachments without lock function
Optional accessory
Insert an attachment into the suction inlet of the cleaner
by pushing and hand screwing it in place.
Hand twist and pull the attachment apart from the suc-
tion inlet after use.
►
Fig.23
Attachments with lock function
Optional accessory
NOTICE:
When installing the attachment with
lock function, be sure to align the release button
with the hook on the attachment.
If they are not
aligned, the attachment will not be locked and may
come off from the cleaner.
Insert an attachment into the suction inlet of the cleaner
by pushing them together with a click.
To remove the attachment, pull it off while pushing the release button.
►
Fig.24:
1.
Suction inlet with lock function
2.
Release
button
3.
Attachment with lock function
NOTE:
An attachment with lock function can only be
installed in the suction inlet with lock function.
►
Fig.25:
1.
Attachment with lock function
2.
Suction
inlet with lock function
3.
Suction inlet with
-
out lock function
Adjusting lengths of slide-type
extension wand
Optional accessory
A slide-type extension wand can be combined for
shorter and longer lengths. It allows to clean hard-to-
reach areas and comfortable positioning options.
Pull in and out the slide pipe to change wand lengths
while pressing and holding the slide button.
Release the slide button to lock the slide pipe in your desired position.
►
Fig.26:
1.
Slide pipe
2.
Slide button
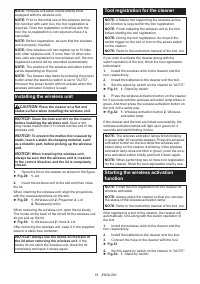
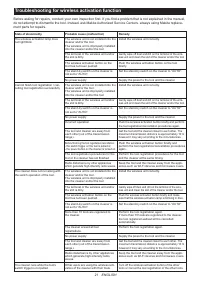
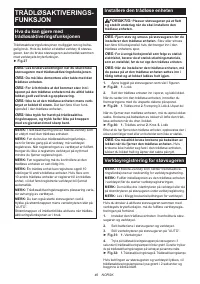
WIRELESS ACTIVATION
FUNCTION
What you can do with the wireless
activation function
The wireless activation function enables clean and
comfortable operation. By connecting a supported tool
to the cleaner, you can run the cleaner automatically
along with the switch operation of the tool.
►
Fig.27
NOTICE:
Be sure to refer to the instruction man-
ual of the tool when using the cleaner with wire-
less activation function.
NOTICE:
Do not disassemble or tamper with the
wireless unit.
NOTICE:
To prevent dust coming into the slot
of the wireless unit, always close the lid securely
during operation and storage.
NOTICE:
Do not remove the wireless unit while
the power is being supplied.
Doing so may cause a
malfunction of the wireless unit.
NOTICE:
Do not press the wireless activation
button too hard and/or press the button with an
object with a sharp edge.
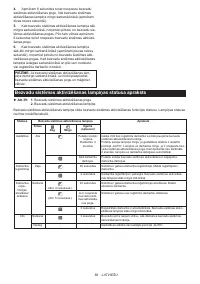
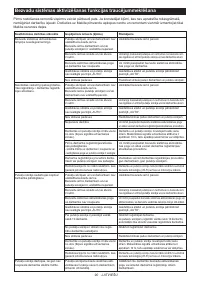
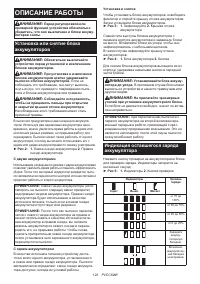
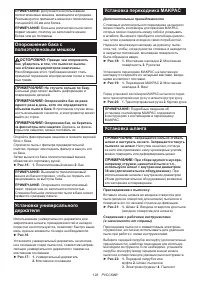
Содержание
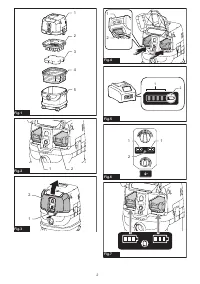
- 119 Подходящий блок аккумулятора и зарядное устройство
- 121 МЕРЫ БЕЗОПАСНОСТИ; Правила техники безопасности
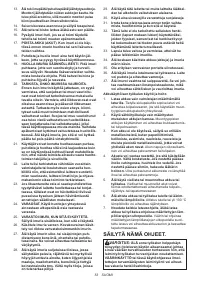
- 122 СОХРАНИТЕ ДАННЫЕ
- 124 ОПИСАНИЕ ДЕТАЛЕЙ
- 125 ОПИСАНИЕ РАБОТЫ; Установка или снятие блока
- 126 Система защиты устройства /
- 127 СБОРКА
- 129 Насадки с фиксацией; ФУНКЦИЯ
- 131 Отмена регистрации инструмента
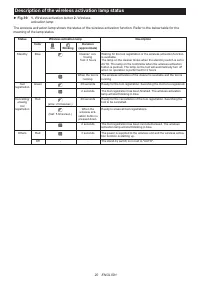
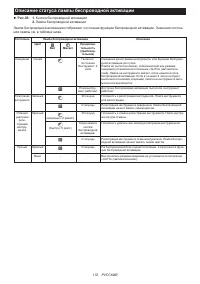
- 132 Описание статуса лампы беспроводной активации
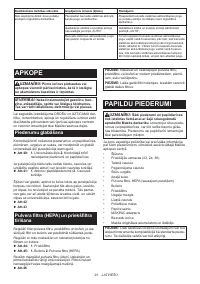
- 134 ОБСЛУЖИВАНИЕ; Хранение дополнительного
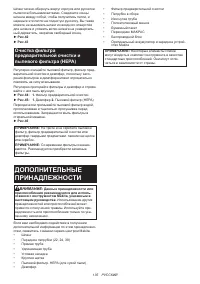
- 135 ДОПОЛНИТЕЛЬНЫЕ
Характеристики

Остались вопросы?Не нашли свой ответ в руководстве или возникли другие проблемы? Задайте свой вопрос в форме ниже с подробным описанием вашей ситуации, чтобы другие люди и специалисты смогли дать на него ответ. Если вы знаете как решить проблему другого человека, пожалуйста, подскажите ему :)


