Смартфоны Bosch 909 Dual S - инструкция пользователя по применению, эксплуатации и установке на русском языке. Мы надеемся, она поможет вам решить возникшие у вас вопросы при эксплуатации техники.
Если остались вопросы, задайте их в комментариях после инструкции.
"Загружаем инструкцию", означает, что нужно подождать пока файл загрузится и можно будет его читать онлайн. Некоторые инструкции очень большие и время их появления зависит от вашей скорости интернета.


Events
Your phone acts as a calendar enabling you to
keep a check on different events such as meet-
ings, phone calls to be made, birthdays, etc. The
calendar is active even though your telephone is
switched off.
How to add a new event
1. Press
to enter the List menu system.
2. Select
E v e n t s
and press
S E L E C T
3. Select
N e w e v e n t
and press
S E L E C T
You can now choose from the following different
event types:
C u s t o m s e t u p
(Recurring
- if set by you)
S t a n d a r d a l a r m
(Not recurring)
1 h o u r n o t i c e
(Not recurring)
W a k e u p a l a r m
(Not recurring)
B i r t h d a y
(Recurs every year)
In Custom setup you can define any setting
according to your own wishes. The options
available are: Set date, set start and end time,
enter event text, set recurring frequency, select
tone volume and pattern, and define advance
notice for the event.
As a minimum you will always have to enter date
and start time (if you want to change the ones dis-
played). The cursor will always stand to the left of
the digit/letter to be entered or corrected. Use the
arrow keys to move the cursor.
moves to the
left,
to the right. Confirm your entry by press-
ing
O K
, and the event is automatically saved.
The settings of the last 4 event types are predefined
by the manufacturer, but you can always change
the settings. See under
How to edit or delete an
event
on page 22 for more information.
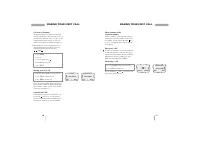
How to be notified of occuring events
When an event is occurring you will see this sym-
bol
on the display, the phone will
emit a ringing tone (if activated - see page 32) and
the LED on top of the phone will flash green. The
event text will be shown on the display. The phone
will continue ringing for one minute if you don’t
acknowledge the event. Press
D E L E T E / O K
to
do so.
The event is automatically deleted unless you
have selected that you don’t want it to be deleted.
See page 35 for more information.
How to postpone an event
If you do not have the time to see an event at the
moment it occurs, you can postpone it. Press
R E M I N D
. The event will recur after 10 minutes.
How to see stored events
1. Press
to enter the List menu system.
2. Select
E v e n t s
and press
S E L E C T
3. Select
L i s t e v e n t s
and press
O K
Each date under which one or more events are
stored will now be listed, indicated by the name
of the day of the week and date. Use the arrow
keys to scroll through the dates. After being high-
lighted for 2 seconds, the times of the first two
events under the selected date will be listed. Press
S E L E C T
, and after further 2 seconds the text of
the first stored event will be shown on the display.
Use the arrow keys to scroll through the events.
A recurring event will be marked by
to the left
of the starting time.
21
EVENTS
MISSED CALLS
20
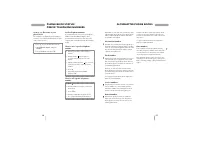
Missed calls
Your phone remembers the last 10 incoming calls
which you did not answer. If the caller is one of
the entries that you have stored in your phone
book, then his name will appear on your display.
The display will tell you how many missed calls
your phone has received. If, for instance, there are
15 missed calls the standby display will show
. 15
.
As the telephone registers only identified calls in
the list, the number of missed calls shown on the
display and the number of phone numbers actu-
ally listed may be different.
Immediate access to the list of
missed calls
1. Press
2. Scroll through the telephone numbers
using or
3. When the telephone number you wish
to dial is displayed, press
S E L E C T
4. Press
C A L L
to initiate the call.
How to see the list of missed calls
at a later moment
As soon as you have used the list, either to make
a call or to view numbers, the
symbol will
disappear from the display. However, the list will
always be available through the List menu system.
1. Press
to enter the List menu system.
2. Select
M i s s e d c a l l s
and press
O K
The telephone number will be deleted from the
list as soon as you have called it, but you can
always find it again in the list of last outgoing
calls.
How to copy a phone number from
one of the lists into your phone book
1. Press
to enter the List menu system.
2. Select the actual menu and the phone
number you wish to copy into your
phone book.
3. Confirm by pressing
S E L E C T
4. Press
to access your phone book.
5. Give the number a name and a location
number and press
O K
How to delete call information
You can delete all entries stored in the Outgoing,
Answered and Missed calls lists. Select the sub
menu
D e l e t e c a l l i n f o r m a t i o n
in the
Phone book setup menu and select the list which
you want to delete.


