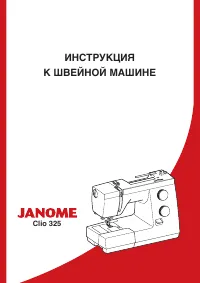
Швейная машина Janome Clio 325 - инструкция пользователя по применению, эксплуатации и установке на русском языке. Мы надеемся, она поможет вам решить возникшие у вас вопросы при эксплуатации техники.
Если остались вопросы, задайте их в комментариях после инструкции.
"Загружаем инструкцию", означает, что нужно подождать пока файл загрузится и можно будет его читать онлайн. Некоторые инструкции очень большие и время их появления зависит от вашей скорости интернета.


28
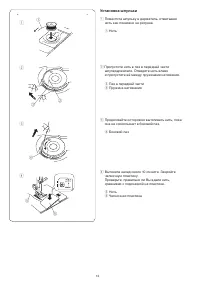
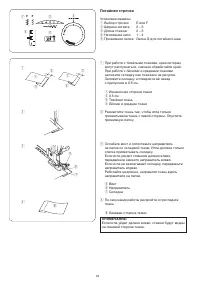
Зажгутованная петля
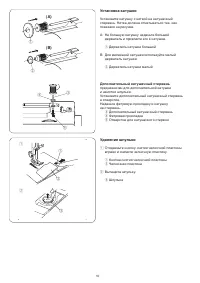
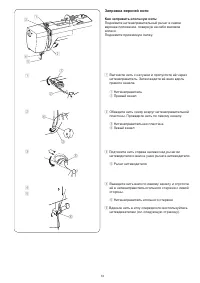
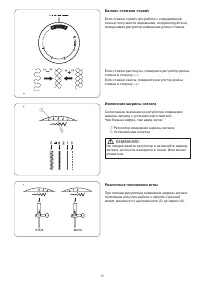
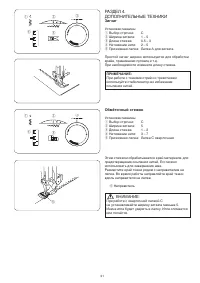
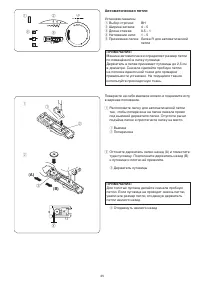
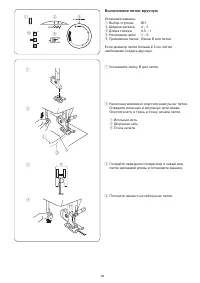
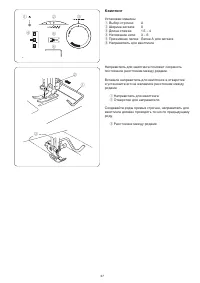
Установки машины
q
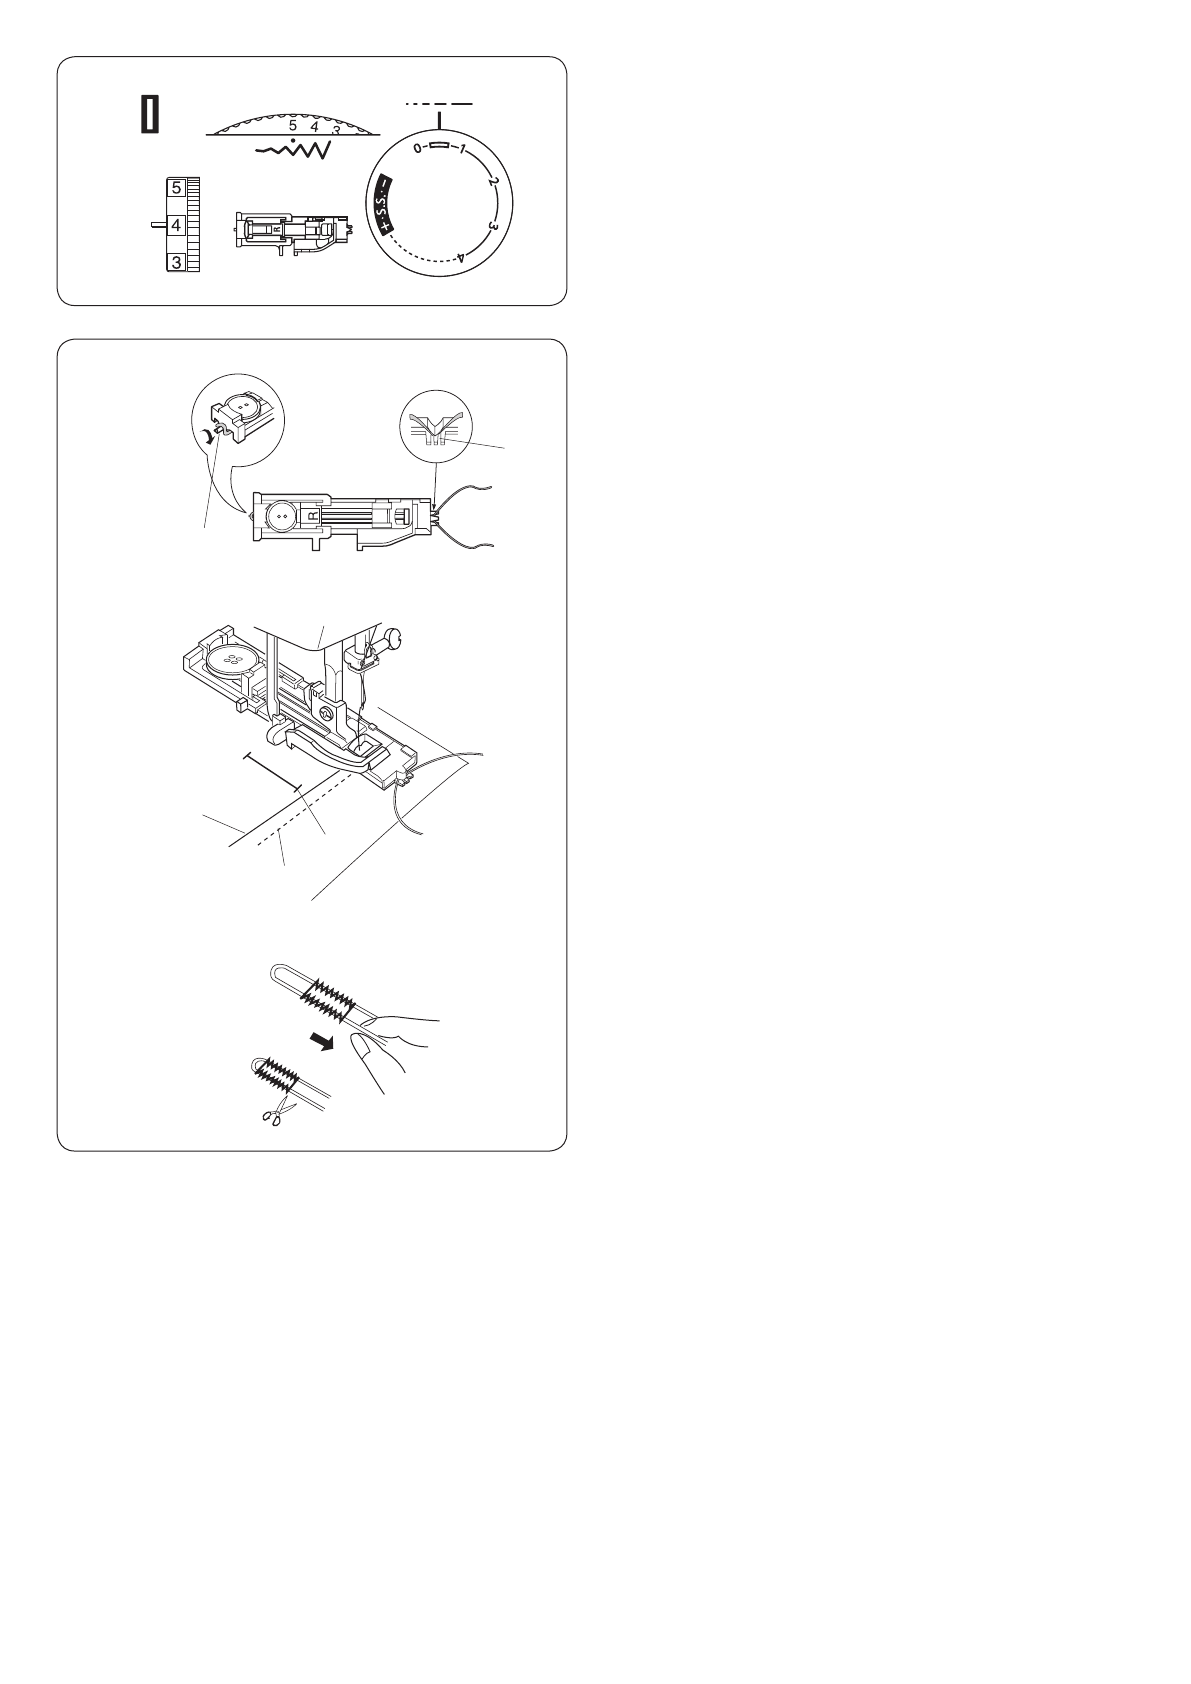
Выбор строчки:
ВН
w
Ширина зигзага:
4 – 5
e
Длина стежка:
0.5 – 1
r
Натяжение нити:
1 – 5
t
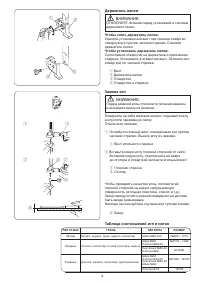
Прижимная лапка: Лапка R для петли-автомат
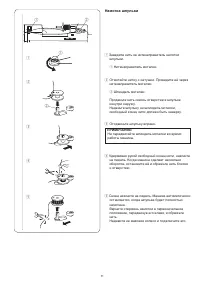
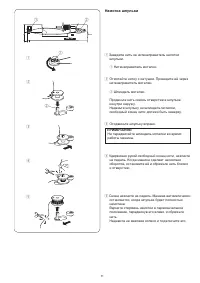
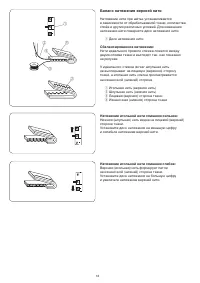
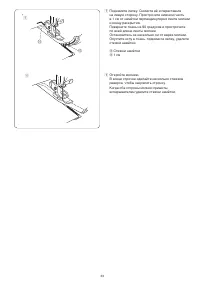
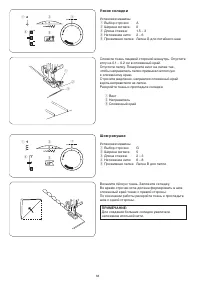
z
Поднимите лапку для автоматической петли,
набросьте шнур на крючок сзади лапки.
Переведите концы шнура вперёд, заправив
под лапку. Зацепите шнур в вилке впереди лапки,
чтобы натянуть его.
q
Крючок
w
Вилка
x
Отведите обе нити влево. Опустите иглу в ткань
в точке начала петли и опустите прижимную
лапку. Слегка нажмите на педаль и создайте
петлю поверх шнура. Последовательность
выполнения такая же, как и при создании простой
петли. Снимите ткань с машины и обрежьте нити.
e
Игольная нить
r
Шпульная нить
t
Точка начала
c
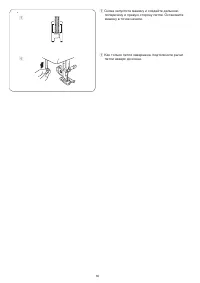
Потяните за левый конец шнура, затяните
его и обрежьте концы. Как разрезать петлю
см. стр. 26.
28
Corded Buttonhole
q
Stitch pattern: BH
w
Stitch width:
4 – 5
e
Stitch length:
0.5 – 1
r
Thread tension: 1 – 5
t
Presser foot:
Automatic buttonhole foot R
z
x
c
q
e
r
t
w
q
w
e
r
t
z
With the buttonhole foot raised, hook the filler
cord on the spur at the back of the foot.
Bring the ends toward you under the foot,
clearing the front end.
Hook the filler cord into the forks on the front
of the foot to hold them tight.
q
Spur
w
Forks
x
Draw both needle and bobbin thread to the
left. Lower the needle into the fabric at the
starting point and lower the foot.
Depress the foot control gently and sew the
buttonhole over the cord.
The sewing sequence is the same as the
automatic buttonhole.
e
Needle thread
r
Bobbin thread
t
Starting point
c
Pull the left end of the filler cord to tighten it
and cut the excess tails.
To cut the buttonhole opening, refer to the
instructions on page 26.
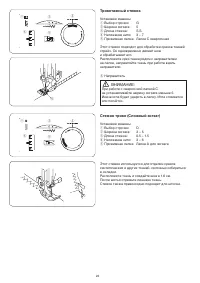
Содержание
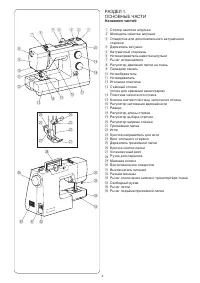
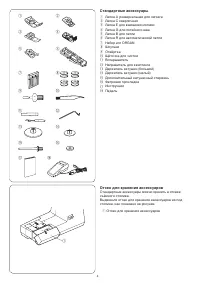
- 5 ОСНОВНЫЕ ЧАСТИ; Названия частей; ESSENTIAL PARTS; Names of Parts; • To carry the sewing machine,
- 6 Отсек для хранения аксессуаров; Standard Accessories
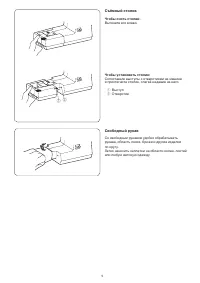
- 7 Съёмный столик; Чтобы установить столик:; Сопоставьте выступы с отверстиями на машине; Свободный рукав; Extension Table; q w
- 8 Operating Instructions:; Controlling the Sewing Speed; Connecting the Power Supply; GETTING READY TO SEW; Foot control; ПОДГОТОВКА К ШИТЬЮ; Подключение машины к сети
- 9 Установочная отметка; Отключение нижнего транспортёра ткани; Рычаг нижнего транспортёра ткани
- 10 Как отстегнуть лапку:; Raising and Lowering the Presser Foot
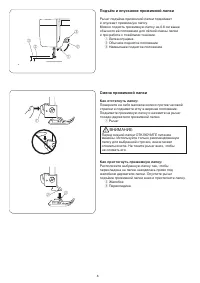
- 12 Установка катушки; Дополнительный катушечный стержень; Удаление шпульки; Extra spool pin; Extra spool pin
- 13 hand, depress the foot control. Stop the
- 15 the thread to the left, sliding it between the
- 17 Нитевдеватель; Needle threader
- 18 Pull 4 ̋ (10 cm) of both threads back and
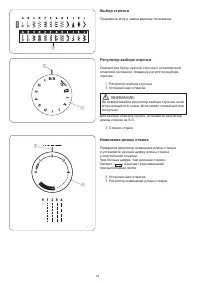
- 19 Stitch pattern selector dial
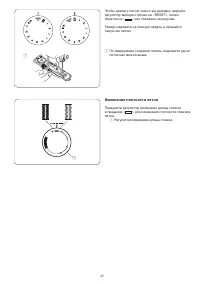
- 20 Регулятор изменения ширины зигзага; Различные положения иглы
- 21 Баланс натяжения верхней нити; Диск натяжения нити; Сбалансированное натяжение:; Balancing Needle Thread Tension
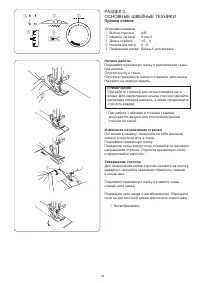
- 22 ОСНОВНЫЕ ШВЕЙНЫЕ ТЕХНИКИ; Прямой стежок; Starting to sew; BASIC SEWING; To fasten the beginning of the seam, first sew; Прямой стежок стрейч
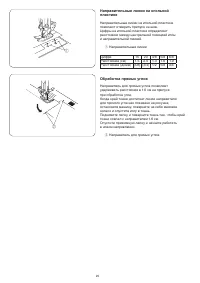
- 23 Направительные линии; Обработка прямых углов; Направитель для прямых углов; The cornering guide helps you maintain a 5/8 ̋; The cornering guide helps you maintain a 5/8 ̋
- 24 ДОПОЛНИТЕЛЬНЫЕ ТЕХНИКИ; Зигзаг; Обмёточный стежок; Установки машины; UTILITY STITCHES
- 25 Трикотажный стежок; Knit Stitch
- 26 Стежок стрейч зигзаг
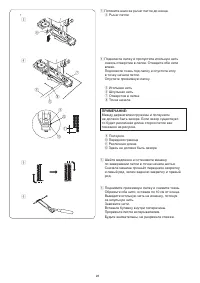
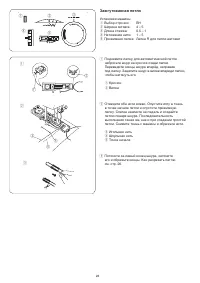
- 30 Изменение плотности петли; » для изменения плотности стежков; RESET; Adjusting the buttonhole stitch density
- 32 Manual Buttonhole; If the diameter of the button is more than 1 ̋ (2.5
- 34 Втачивание молнии; Установка лапки для молнии; e r; Zipper Application; Fabric preparation; Zipper Application; e r; Fabric preparation
- 35 Втачивание; To sew
- 37 Потайная строчка; Blind Hemming
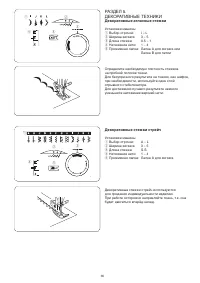
- 38 ДЕКОРАТИВНЫЕ ТЕХНИКИ; Декоративные атласные стежки
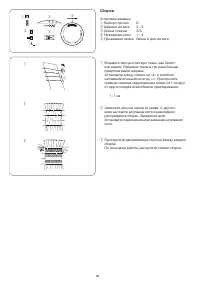
- 40 Quilting; Sew, tracing the previous row of stitching
- 43 После работы установите давление лапки на «3».; Аппликация
- 44 УХОД ЗА МАШИНОЙ; Чистка челнока и транспортёра ткани; Wipe the hook race with a soft, dry cloth.; CARE AND MAINTENANCE; Cleaning the Hook Race and Feed Dog
- 45 Make sure the knob of the bobbin holder fits
- 46 Устранение неисправностей
- 47 Куәлік нөмірі


