Пылесос VITEK VT-1888 - инструкция пользователя по применению, эксплуатации и установке на русском языке. Мы надеемся, она поможет вам решить возникшие у вас вопросы при эксплуатации техники.
Если остались вопросы, задайте их в комментариях после инструкции.
"Загружаем инструкцию", означает, что нужно подождать пока файл загрузится и можно будет его читать онлайн. Некоторые инструкции очень большие и время их появления зависит от вашей скорости интернета.


6
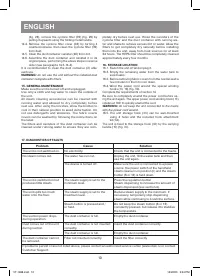
ENGLISH
Do not vacuum sharp or rigid objects. The manufacturer
reserves the right to make aesthetic, technical and design
changes without prior notice.
Before leaving the production, all products are thoroughly test-
ed. This is why your unit may contain some water in the tank.
The correct use of the product is described only in this in-
struction manual. Any other use may damage the unit and
void the warranty.
WHAT WATER TO USE
The unit has been designed to work with normal tap wa-
ter between 8°C and 20°C. If your tap water contains a lot
of limescale, use a commercially available mix of 50% tap
water and 50% demineralized water.
Replace the anti-scale filter periodically as described in
section 13. Never use rainwater or water containing perfume
additives (such as perfume), or water produced by other
household appliances, water softeners or filters. Do not add
chemical or natural detergents or descaling agents, etc.
Before using bottled drinking water, find out its total min-
eralization (usually indicated on the label) and compare
it with indicators for tap water (they can be found on the
water supply organization’s website, or by the Internet
search). Typically, bottled water salinity is 100-400 mg / l.
It may turn out that the water from the tap has a salinity
several times lower, so that the use of bottled water will
increase the formation of scale. With constant use of the
vacuum cleaner, it is periodically recommended to com-
pletely refresh the water in the tank and rinse the tank itself
in order to avoid stagnation of water and the appearance of
an extraneous smell.
ATTENTION! If the scale forms in the boiler, this case
will be recognized as a non-warranty.
Steam vacuum cleaner VT-1888: 3 PRODUCTS IN 1
It is a handy vertical steam unit that combines three prod-
ucts in one, as it can be used as a vacuum cleaner, steam
mop, and portable steam cleaner. It can perform many
cleaning functions and treat a variety of surfaces: floors
with various finishes (tiles, porcelain stoneware, parquet),
kitchen work surfaces, hoods, bathrooms, taps, grouting,
windows and mirrors, upholstery, sofas, armchairs, mat-
tresses, cushions, car interiors), interior doors and cabinet
doors, heating radiators and roller shutters, curtains and
clothes, green plants. Third party tests, conducted by an
independent laboratory, confirm that the steam cleaner re-
moves 99.9% of germs and bacteria when used according
to the instructions included in this manual with a microfiber
cloth attached for a 30 second runtime.
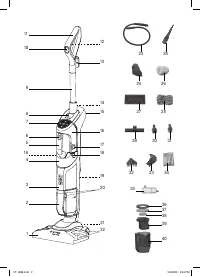
1. ASSEMBLING THE UNIT AS A VACUUM
CLEANER / STEAM MOP
1.1. Remove the unit from the packaging making sure the
product is not damaged and that all parts are included
in the package.
1.2. Connect the unit body (3) to the universal brush (1)
(fig. 1).
To remove the universal brush, place your foot on the
brush, press the button (21) and pull the device straight up
by the carrying handle (15).
NOTE: before assembling the device, please note that the
screw (14), when packing the device, can be screwed into
the extension tube (9).
1.3. Unscrew the screw (14) on the extension tube (9) with
a slotted screwdriver. Place the extension tube into
the seat on the unit body and tighten the screw (fig. 2).
WARNING: check from time to time to see if the screw
is tightened.
1.4. Place the fabric cover (28) on the mop nozzle (27) and
connect it to the bottom of the universal brush (1) so
that the clamps on the mop nozzle fit into the corre-
sponding grooves of the universal brush (fig. 3)
(for
steam cleaning only).
NOTE: to remove the mop nozzle (27) from the universal
brush (1), press one of its two side pedals (22) and pull the
device vertically upwards by the handle (15).
2. USING THE UNIT AS A VACUUM CLEANER
Verify that section 1 requirements are met
2.1. Unwind the power cord completely and connect it to
an electrical outlet that has a reliable earthing con-
nection (fig. 4). Always use the product with the power
cord completely unwound.
2.2. Move the button of the power switch (10) located on
the handle of the vacuum cleaner (11) to position (I)
(fig. 5). Move the universal brush (1) to the working
position from the parking position, for this place your
foot on the brush and tilt the vacuum cleaner by the
carrying handle (15) (fig. 6). Vacuum cleaner is ready
for operation.
To keep the power cord out of the way during cleaning,
pass it through the upper hook (13) (fig. 7).
3. PREPARATION FOR USE OF THE UNIT AS A MOP
AND A HANDHELD STEAM CLEANER
3.1. Remove the water tank (4), to do this press the side
buttons of the clamps (18) and pull it towards you
(fig. 8). Turn the water tank over and open the rub-
ber stopper by pulling the tab upwards (fig. 9). Fill the
water tank with clean water.
Do not add other substances or additives to the water
tank.
3.2. Close the plug of the water tank tightly and reinstall
it. Always carry out this operation with the power cord
unplugged.
WARNING: make sure the water tank (4) is installed cor-
rectly to avoid leakage.
3.3. Place the fabric cover (28) on the mop nozzle (1) and
connect it to the bottom of the universal brush (fig. 3).
3.4. Unwind the power cord completely and connect it to
an electrical outlet that has a reliable earthing con-
nection (fig. 4). Always use the product with the power
cord completely unwound.
3.5. Press the button of the power switch (17) of the steam
cleaner located on the side of the unit (fig. 10). The
power indicator on the control panel (7) will blink ( )
green.
Wait 30 seconds until the indicator on the control panel
glows continuously (fig. 11).
The unit is then ready for use.
HANDHELD STEAM CLEANER (16)
3.6. For separate use of the handheld steam cleaner (16),
detach it from the unit body (3) by pressing the upper
button (8) and pulling it outwards by the handle (5)
(fig. 12).
VT-1888.indd 6
10/20/20 3:24 PM
Содержание
- 13 Не загораживайте отверстия и решетки на изделии.
- 14 Сохраните заводскую упаковку.
- 15 Минимальный уровень (
- 16 ет легко очищать углы и края мебели и стен.
- 17 Подсоедините наиболее подходящий аксессуар
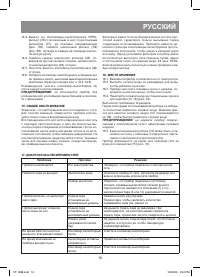
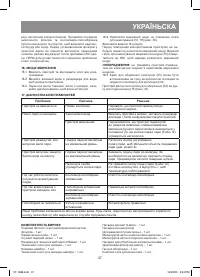
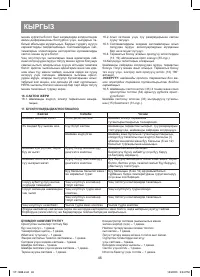
- 19 чтобы избежать протечек.; ДИАГНОСТИКА НЕСИПРАВНОСТЕЙ
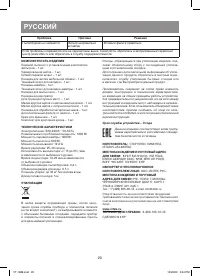
- 20 Проблема; Пылесборник не снимается.; УТИЛИЗАЦИЯ; Срок службы устройства – 3 года


