
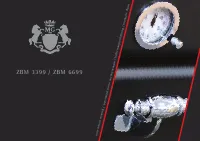
Плита MG ZBM 6699 ANT - инструкция пользователя по применению, эксплуатации и установке на русском языке. Мы надеемся, она поможет вам решить возникшие у вас вопросы при эксплуатации техники.
Если остались вопросы, задайте их в комментариях после инструкции.
"Загружаем инструкцию", означает, что нужно подождать пока файл загрузится и можно будет его читать онлайн. Некоторые инструкции очень большие и время их появления зависит от вашей скорости интернета.


GB
55
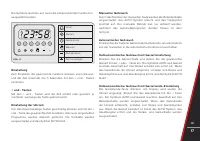
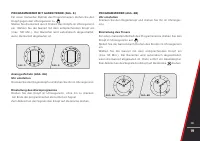
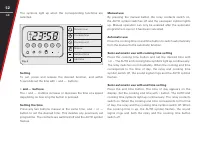
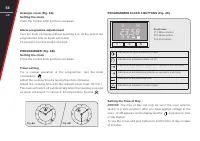
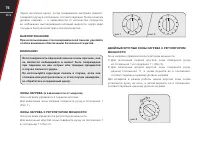
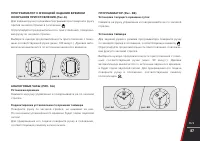
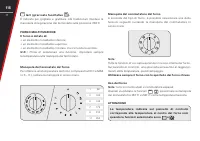
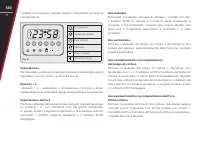
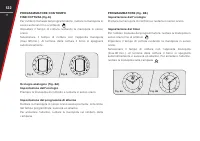
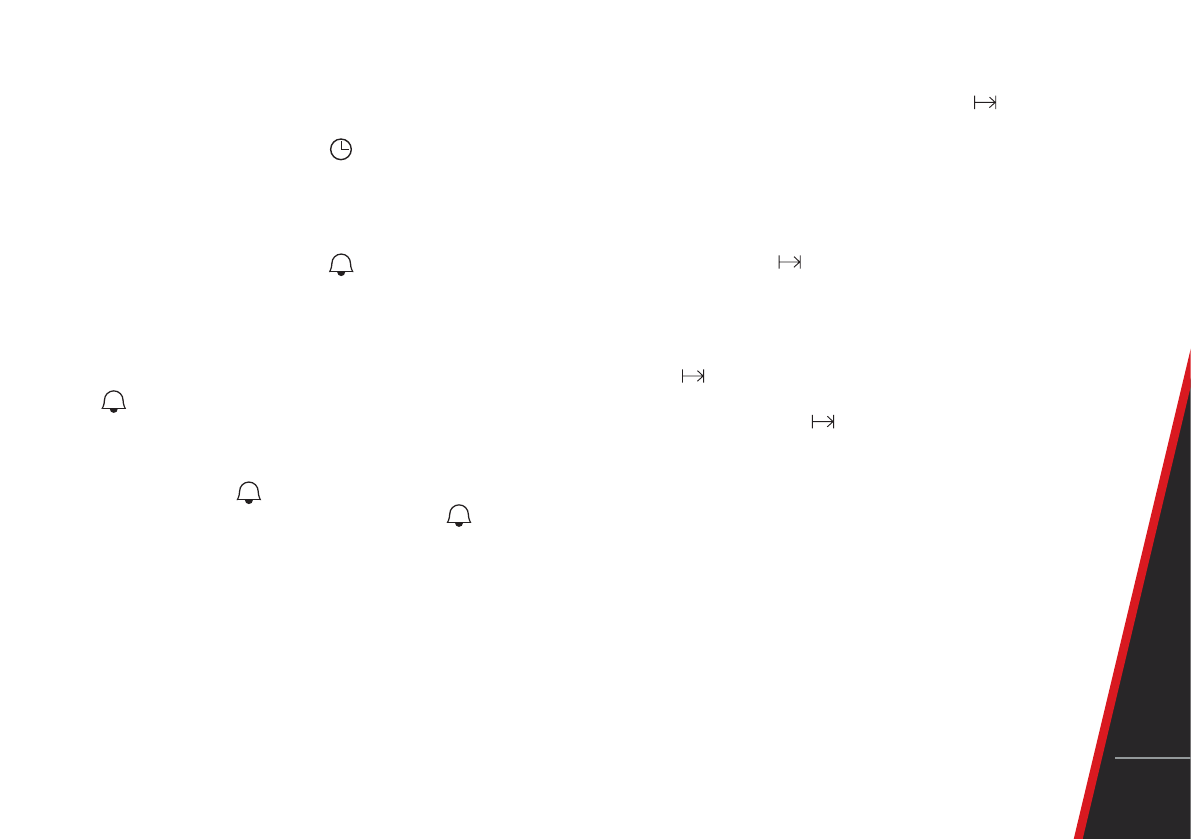
The time of day now displayed elapses accurately to the second.
The timer is now operational and in “manual” mode.
Note:
If you want to set the time of day during later operation,
press the mode button until the “
” indicator for time of day
flashes and subsequently proceed as described above.
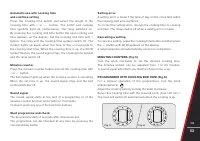
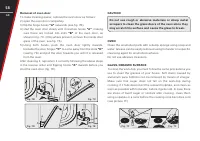
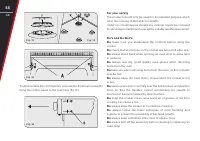
Setting the Minute Minder
The setting range of the minute minder is from 0:00 to 23:59.
Press the mode button until the “
” indicator for the minute
minder flashes.
Note:
If you do not make an input in the next 5 seconds, the timer
returns to the time of day display. To use the minus and plus buttons
to set the desired period in steps of 1 minute after confirming
with the mode button, the time of day reappears on the display.
The “
” indicator for minute minder is illuminated on the display.
After the set time has elapsed, a signal sounds (
.. ..
) (i.e. a pause
follows after two signals).
On the display, the “
” indicator flashes. The signal ends
automatically after approx. 1 minute while the “
” indicator
continues to flash. Press any button to exit the current mode.
You can also manually stop the signal indicating the end of time
by pressing any button.
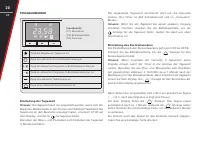
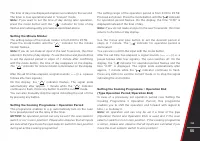
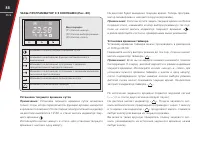
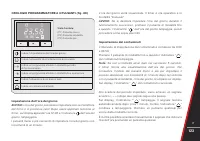
Setting the Cooking Programme > Operation Period
This programme enables to e.g. automatically turn on the oven
for a preset period via the relay of the timer.
NOTICE:
An operation period can only be set if the oven selector
switch is not in zero position! Please also observe that all inputs
are cancelled if you move the oven selector switch to zero position
during an active cooking programme!
The setting range of the operation period is from 0:00 to 23:59.
Proceed as follows: Press the mode button until the “
” indicator
for operation period flashes. On the display, the time “0:00” is
displayed instead of the time of day.
Note:
If you do not make an input in the next 5 seconds, the timer
returns to the time of day display.
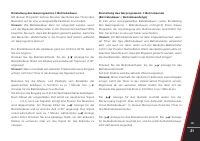
Use the minus and plus button to set the desired period in
steps of 1 minute. The “
” indicator for operation period is
illuminated.
You can also confirm the input with the mode button.
After the set time has elapsed, a signal sounds (
.... ....
) (i.e. a
pause follows after four signals). The oven swiches off. On the
display, the “
” indicator for operation period flashes and the
time “0:00” is displayed. The signal ends automatically after
approx. 1 minute while the “
” indicator continues to flash.
Press any button to exit the current mode or to stop the signal
indicating the end of time.
Setting the Cooking Programme > Operation End
(Type Operation Period/Operation End)
In case of a previously set operation period (see Setting the
Cooking Programme
>
Operation Period), this programme
enables you to shift the operation end forward with regard to
time, i.e. to delay it.
Note:
An operation end can only be set if a timer of the type
(Operation Period and Operation End) is used and if the oven
selector switch is not in zero position. If the cooking programme
is active, please also observe that all inputs are cancelled if you
move the oven selector switch to zero position!
Содержание
- 71 ОБЩАЯ ИНФОРМАЦИЯ; ЗАЩИТА ОКРУЖАЮЩЕЙ СРЕДЫ; Рассортируйте упаковочные материалы по типу
- 72 РЕКОМЕНДАЦИИ; – Не используйте ручку дверцы духовки для перемещения; отключать; В случае возгорания,
- 73 НИЖНИЙ ВЫДВИЖНОЙ ЯЩИК; ИСПОЛЬЗОВАНИЕ; ИСПОЛЬЗОВАНИЕ ГАЗОВЫХ ГОРЕЛОК; – Черный кружок подача газа выключена; РУЧНОЙ РОЗЖИГ
- 74 ГОРЕЛКИ; БЫСТРОДЕЙСТВУЮЩАЯ
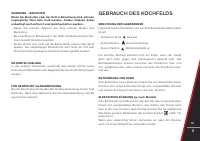
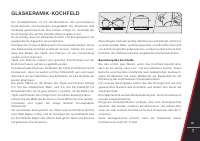
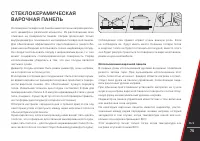
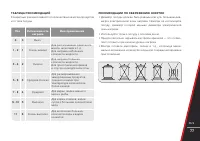
- 75 СТЕКЛОКЕРАМИЧЕСКАЯ; Использование варочной панели
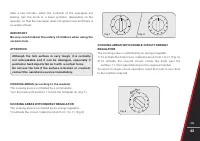
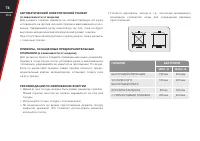
- 76 ЗОНЫ НАГРЕВА С РЕГУЛЯТОРОМ МОЩНОСТИ; Для включения первой круглой зоны поверните ручку
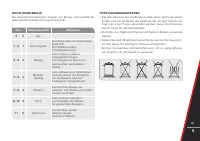
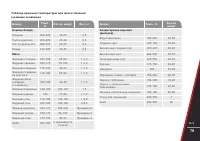
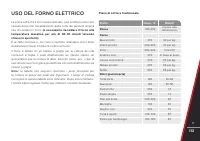
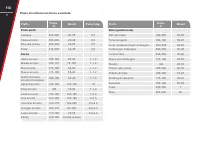
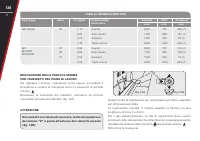
- 77 ТАБЛИЦА РЕКОМЕНДАЦИЙ
- 78 (необходимо прогревать духовку; В следующих таблицах приведены основные; Блюдо
- 80 СТАТИЧЕСКАЯ ДУХОВКА; нижним нагревательным элементом; Естественная конвекция; в диапазоне между 60°C и MAX.; Нижний нагревательный элемент; Данная функция особо подходит для приготовления блюд; Верхний нагревательный элемент
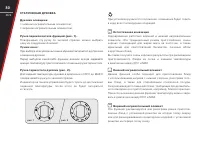
- 81 Гриль (опциональный вертел; Перед выбором какой-либо функции вначале; Ручка термостата духовки; При выборе всех указанных выше функций заго-; Использование духовки; для духовок с отдельными ручками термостата; или
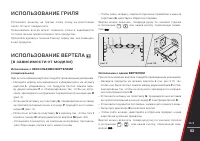
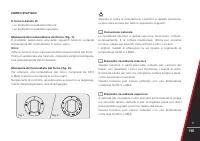
- 83 ИСПОЛЬЗОВАНИЕ ГРИЛЯ; Исполнение с одним ВЕРТЕЛОМ
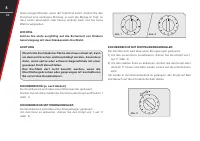
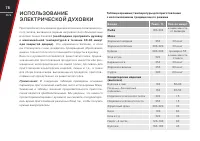
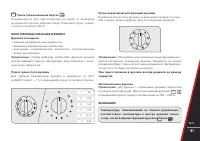
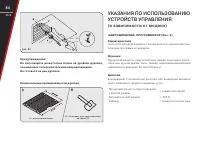
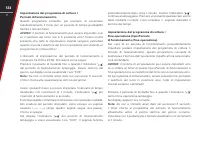
- 84 Опциональные принадлежности духовки; УКАЗАНИЯ ПО ИСПОЛЬЗОВАНИЮ; Характеристики; Автоматический режим
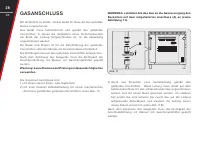
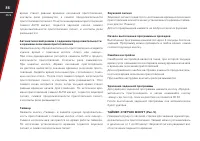
- 85 Настройка; Нажмите кнопку «Окончание времени приготовления».
- 87 Корректировка установленного времени таймера; колокольчика
- 88 Установка текущего времени суток; Установка текущего времени суток возможна; Установка времени таймера; Если вы не введете никаких значений в течение
- 89 Задание продолжительности приготовления; Задание программы приготовления; дополнительную отсрочку.
- 90 Включение блокировки кнопок; Для включения
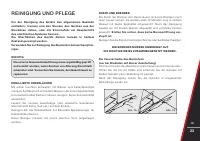
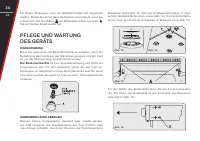
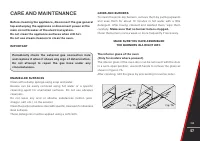
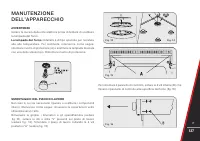
- 91 ЧИСТКА И УХОД; с помощью мягкой ткани.
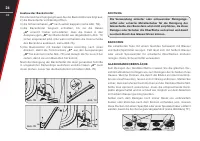
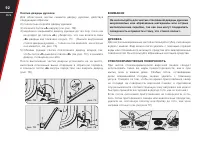
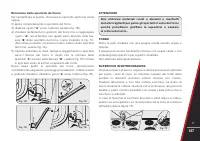
- 92 Снятие дверцы духовки
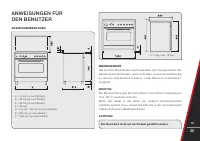
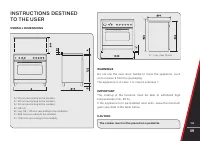
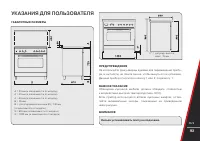
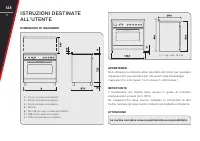
- 93 УКАЗАНИЯ ДЛЯ ПОЛЬЗОВАТЕЛЯ; ГАБАРИТНЫЕ РАЗМЕРЫ; Облицовка кухонной мебели должна обладать стойкостью; ВНИМАНИЕ
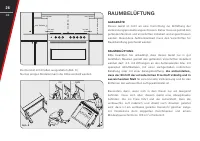
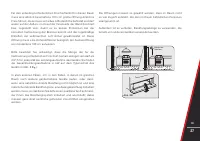
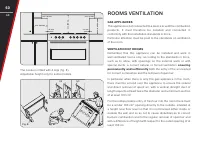
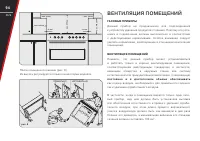
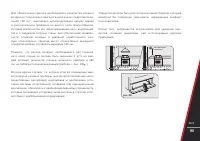
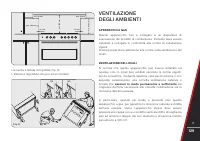
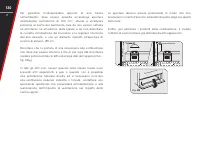
- 94 ГАЗОВЫЕ ПРИБОРЫ; Данный прибор не предназначен для подсоединения; ВЕНТИЛЯЦИЯ ПОМЕЩЕНИЙ; Помните, что данный прибор может устанавливаться; постоянно и в достаточном объеме обеспечивать
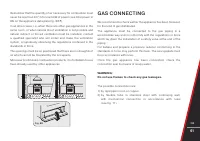
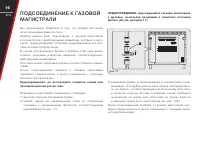
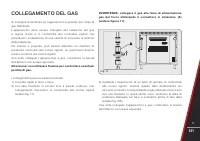
- 96 ПОДСОЕДИНЕНИЕ К ГАЗОВОЙ; Мы рекомендуем убедиться в том, что прибор рассчитан
- 97 Предупреждение: не используйте открытое пламя; не допускайте приложения к трубкам растягивающих
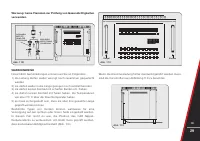
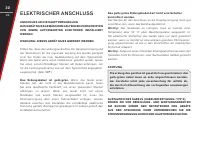
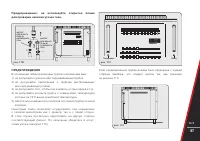
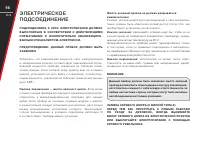
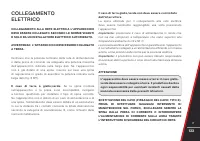
- 98 ЭЛЕКТРИЧЕСКОЕ; Провод заземления — желто-зеленого цвета.; Если вилка
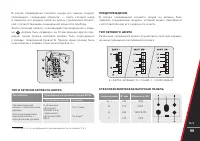
- 99 ТИП И СЕЧЕНИЕ СЕТЕВОГО ШНУРА; ПРЕДУПРЕЖДЕНИЕ
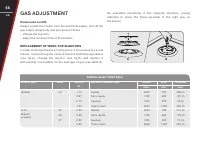
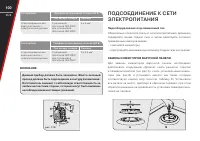
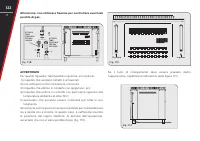
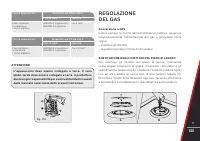
- 100 ПОДСОЕДИНЕНИЕ К СЕТИ; Переоборудование под сжиженный газ; Для замены инжекторов варочной панели необходимо
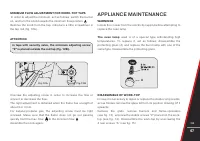
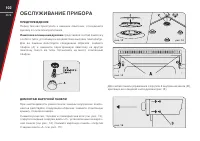
- 102 ОБСЛУЖИВАНИЕ ПРИБОРА; ПРЕДУПРЕЖДЕНИЯ; представляет собой лампочку; ДЕМОНТАЖ ВАРОЧНОЙ ПАНЕЛИ
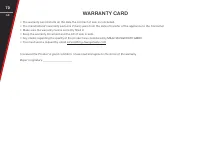
- 105 РАСШИФРОВКА СЕРИЙНОГО НОМЕРА.; ZZ YY XXXXXX; ГАРАНТИЙНЫЙ ТАЛОН; Проследите, чтобы гарантийный талон был правильно заполнен.
Характеристики

Остались вопросы?Не нашли свой ответ в руководстве или возникли другие проблемы? Задайте свой вопрос в форме ниже с подробным описанием вашей ситуации, чтобы другие люди и специалисты смогли дать на него ответ. Если вы знаете как решить проблему другого человека, пожалуйста, подскажите ему :)


