Велокомпьютеры VDO Z3 - инструкция пользователя по применению, эксплуатации и установке на русском языке. Мы надеемся, она поможет вам решить возникшие у вас вопросы при эксплуатации техники.
Если остались вопросы, задайте их в комментариях после инструкции.
"Загружаем инструкцию", означает, что нужно подождать пока файл загрузится и можно будет его читать онлайн. Некоторые инструкции очень большие и время их появления зависит от вашей скорости интернета.


12
EN
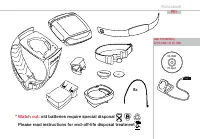
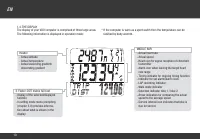
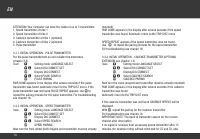
bike 1 & bike 2, as well as the total altitude difference for bike 1, bike
2, and the altitude difference walked. Reprogram this information after
inserting the new batteries.
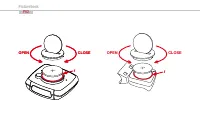
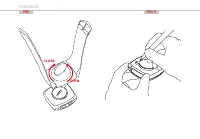
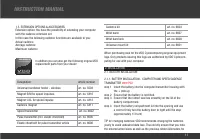
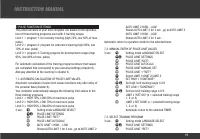
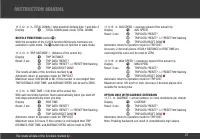
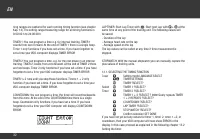
2.1.2 BATTERY INSTALLATION PULSE-CHEST BELT
>>> P03
Your VDO is shipped with the battery installed in the pulse-chest belt.
Proceed as follows when later inserting a replacement battery:
step 1 Insert the battery into the chest-belt housing with the +pole up.
step 2 Ensure that the battery is not tilted.
step 3 Strictly ensure that the rubber seal lies smoothly on the battery
compartment lid.
step 4 Insert the battery compartment lid into the opening and use
a coin to
fi
rmly turn the battery door to right until the stop
(approximately 1/3 turn)
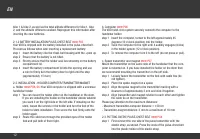
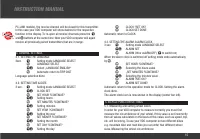
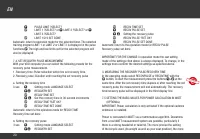
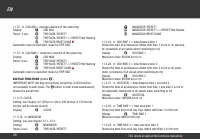
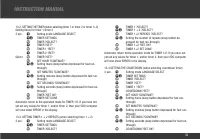
2.2. INSTALLATION - HOLDER/COMPUTER/TRANSMITTER/MAGNET
a. Holder
>>> P04 / 05
: Your VDO computer is shipped with a universal
handlebar holder.
step 1 You can mount the holder either on the handlebar or the stem.
If you are installing the holder on the handlebar decide whether
you want it on the right side or the left side. If installing on the
stem, loosen the screws in the holder and turn the foot of the
holder to stem installation. Then screw the foot
fi
rmly onto the
holder again.
step 2 Route the cable ties through the provided eyes of the holder
foot and pull both of them tight.
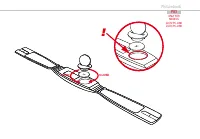
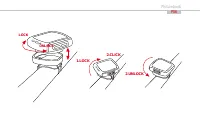
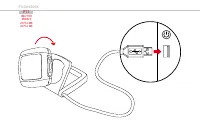
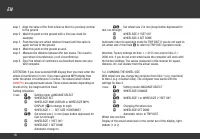
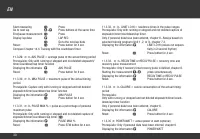
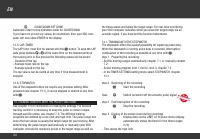
b. Computer
>>> P06
The VDO twist-click system securely connects the computer to the
handlebar holder.
step 1 Insert the computer, turned to the left approximately 45
degrees (10 o‘clock position) into the holder.
step 2 Twist the computer to the right until it audibly engages (clicks)
in the holder system (12 o‘clock position).
step 3 To remove the computer turn it to the left (do not press or pull).
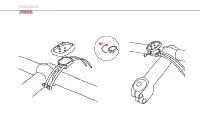
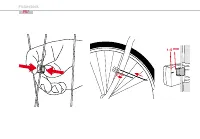
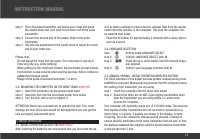
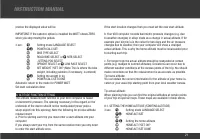
c. Speed transmitter and magnet
>>> P07
Mount the transmitter on the same side of the handlebar that the com-
puter is mounted on. If you have installed the holder on the stem then
we recommend mounting the transmitter on the left side.
step 1 Loosely fasten the transmitter on the fork with cable ties (do
not tighten).
step 2 Place the spoke magnet on a spoke
step 3 Align the spoke magnet to the transmitter marking with a
clearance of approximately 3 mm and click it together.
step 4 Align transmitter and magnet relative to each other and tighten
the cable tie on the transmitter.
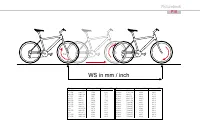
Please pay attention to the maximum distances:
- Maximum transmitter-computer distance = 120 cm
- Transmitter-magnet distance: 3 mm to a maximum of 10 mm
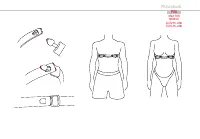
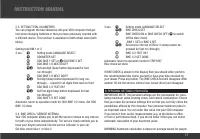
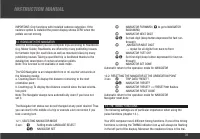
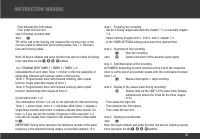
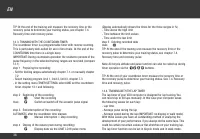
2.3. PUTTING ON THE PULSE-CHEST BELT
>>> P08
step 1 First connect the one side of the pulse transmitter with the
elastic strap, as shown. Press the ends of the pulse-chest belt
into the plastic holder of the elastic strap

