Триммеры Einhell GC-BC 52 I AS - инструкция пользователя по применению, эксплуатации и установке на русском языке. Мы надеемся, она поможет вам решить возникшие у вас вопросы при эксплуатации техники.
Если остались вопросы, задайте их в комментариях после инструкции.
"Загружаем инструкцию", означает, что нужно подождать пока файл загрузится и можно будет его читать онлайн. Некоторые инструкции очень большие и время их появления зависит от вашей скорости интернета.


GB
- 22 -
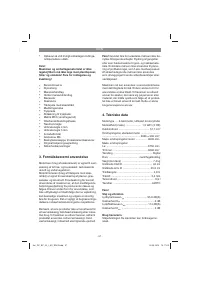
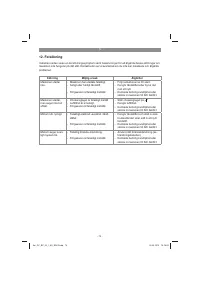
Functions
Vibration emission value a
h
= 7.02 m/s
2
K uncertainty = 1.5 m/s
2
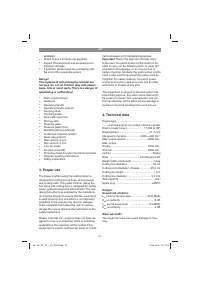
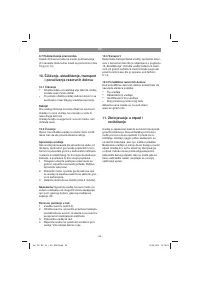
Keep the noise emissions and vibrations to a
minimum.
•
Only use appliances which are in perfect wor-
king order.
•
Service and clean the appliance regularly.
•
Adapt your working style to suit the appliance.
•
Do not overload the appliance.
•
Have the appliance serviced whenever ne-
cessary.
•
Switch the appliance off when it is not in use.
•
Wear protective gloves.
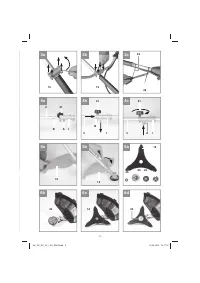
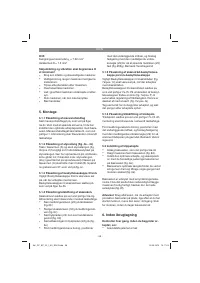
5. Assembly
5.1.1 Fitting the steady grip
Install the steady grip as shown in Figures 3a-3c.
Do not tighten the screws until you have set the
perfect working position with the carrying strap.
The steady grip should be aligned as shown in
Figure 1. To dismantle, proceed in reverse order.
5.1.2 Fitting the long handle (Fig. 4a – 4c)
Pull the locking lever (A) and push the long hand-
le (Fig. 4b/Item 2) carefully into the connecting
piece of the long handle. While doing so, make
sure that the drive shafts on the inside of the long
handle slide into each other (turn the spool head
slightly if required). The lug of the locking lever
(A) must latch into the hole (B). Now tighten the
handle screw (21) as shown in Figure 4c.
5.1.3 Fitting the blade guard hood
Important: The cutting blade guard hood must be
fi
tted if you wish to work with the cutting blade.
The guard hood for the cutting blade must be ins-
talled as shown in Figures 5a – 5b.
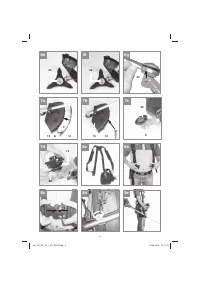
5.1.4 Fitting/Replacing the cutting blade
The
fi
tting of the cutting blade is shown in Figures
6a – 6g. To dismantle, proceed in reverse order.
•
Fit the carrier plate (22) onto the spline shaft
(Fig. 6b)
•
Securely fit the cutting blade (18) on the co-
ver ring (Fig. 6c)
•
Place the pressure plate (23) over the thread
of the spline shaft (Fig. 6d).
•
Plug on the cover of the pressure plate (24)
(Fig. 6e).
•
Look for the hole in the carrier plate, line up
with the notch underneath, lock with the sup-
plied Allen key (29), and tighten the nut (25)
(Fig. 6f/6g). Important: Left-hand thread
5.1.5 Fitting the cutting line guard hood to
the blade guard hood
Important: The cutting line guard hood must be
additionally
fi
tted if you want to work with the cut-
ting line (Fig. 7a/Item 14).
The guard hood for the cutting line must be ins-
talled as shown in Figures 7a – 7b. A blade (Fig.
7a/ Item F) on the underside of the guard hood
automatically cuts the cutting line to the optimum
length. This is covered by a guard (Fig. 7a/Item
G).
Remove the guard before you start working and
replace it when you have
fi
nished working.
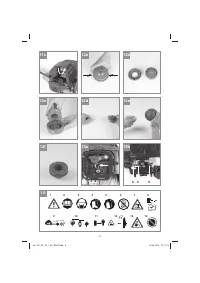
5.1.6 Fitting/Replacing the line spool
The procedure for
fi
tting the line spool is shown in
Figures 7c-7d. To dismantle, proceed in reverse
order.
Look for the hole in the carrier plate, line up with
the notch beneath it, lock with the supplied Allen
key (29), and screw the line spool onto the thread.
Important: Left-hand thread
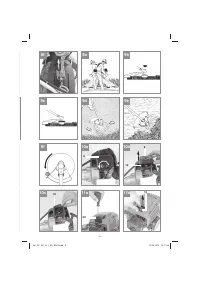
5.2 Setting the cutting height
•
Fit the carrying strap as shown in Figures 8a-
8c.
•
Hook the equipment to the carrying belt (Fig.
8d).
•
Adjust the perfect working and cutting posi-
tion using the various strap adjusters on the
carrying strap (Fig. 8e).
•
In order to establish the optimum length of
the carrying strap, you should then make a
few swinging movements without starting the
engine (Fig. 9a).
The carrying strap is
fi
tted with a quick-release
mechanism. Pull the red strap section (Fig. 8f) if
you need to remove the strap quickly.
Important: Always use the strap when working
with the equipment. Attach the strap as soon as
you have started the engine and it is running in
idle mode. Switch o
ff
the engine before you take
o
ff
the carrying strap.
Anl_GC_BC_52_I_AS_SPK9.indb 22
Anl_GC_BC_52_I_AS_SPK9.indb 22
09.05.2019 13:17:55
09.05.2019 13:17:55
Характеристики

Остались вопросы?Не нашли свой ответ в руководстве или возникли другие проблемы? Задайте свой вопрос в форме ниже с подробным описанием вашей ситуации, чтобы другие люди и специалисты смогли дать на него ответ. Если вы знаете как решить проблему другого человека, пожалуйста, подскажите ему :)


