Телевизоры Samsung TV - инструкция пользователя по применению, эксплуатации и установке на русском языке. Мы надеемся, она поможет вам решить возникшие у вас вопросы при эксплуатации техники.
Если остались вопросы, задайте их в комментариях после инструкции.
"Загружаем инструкцию", означает, что нужно подождать пока файл загрузится и можно будет его читать онлайн. Некоторые инструкции очень большие и время их появления зависит от вашей скорости интернета.


English -
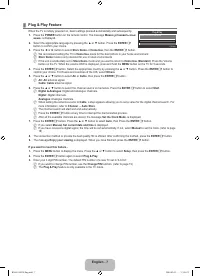
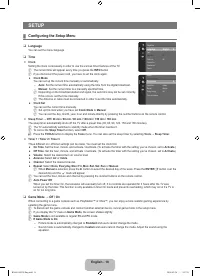
Plug & Play Feature
When the TV is initially powered on, basic settings proceed automatically and subsequently.
1.
Press the
POWER
button on the remote control. The message
Можно установить язык
меню.
is displayed.
2.
Select the appropriate language by pressing the ▲ or ▼ button. Press the
ENTER
E
button to conirm your choice.
3.
Press the ◄ or ► button to select
Store Demo
or
Home Use
, then the
ENTER
E
button.
We recommend setting the TV to
Home Use
mode for the best picture in your home environment.
Store Demo
mode is only intended for use in retail environments.
If the unit is accidentally set to
Store Demo
mode and you want to return to
Home Use
(
Standard
): Press the Volume
button on the TV. When the volume OSD is displayed, press and hold the
MENU
button on the TV for 5 seconds.
4.
Press the
ENTER
E
button. Select the appropriate country by pressing the ▲ or ▼ button. Press the
ENTER
E
button to
conirm your choice. For Russia and countries of the CIS, select
Others
.
.
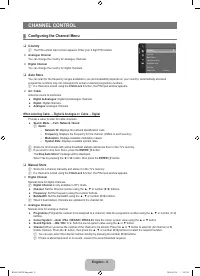
Press the ▲ or ▼ button to select
Air
or
Cable
, then press the
ENTER
E
button.
Air: Air
antenna signal.
Cable: Cable
antenna signal.
.
Press the ▲ or ▼ button to select the channel source to memorize. Press the
ENTER
E
button to select
Start
.
Digital & Analogue
: Digital and Analogue channels.
Digital
: Digital channels.
Analogue
: Analogue channels.
When setting the antenna source to
Cable
, a step appears allowing you to set a value for the digital channel search. For
more information, refer to
Channel → Auto Store
.
The channel search will start and end automatically.
Press the
ENTER
E
button at any time to interrupt the memorization process.
After all the available channels are stored, the message
Set the Clock Mode.
is displayed.
.
Press the
ENTER
E
button. Press the ▲ or ▼ button to select
Auto
, then Press the
ENTER
E
button.
If you select
Manual, Set current date and time
is displayed.
If you have received a digital signal, the time will be set automatically. If not, select
Manual
to set the clock. (refer to page
18)
8.
The connection method to provide the best quality HD is offered. After conirming the method, press the
ENTER
E
button.
9.
The message
Enjoy your viewing
is displayed. When you have inished, press the
ENTER
E
button.
If you want to reset this feature...
1.
Press the
MENU
button to display the menu. Press the ▲ or ▼ button to select
Setup
, then press the
ENTER
E
button.
2.
Press the
ENTER
E
button again to select
Plug & Play
.
3.
Enter your 4 digit PIN number. The default PIN number of a new TV set is ‘0-0-0-0’.
If you want to change PIN number, use the
Change PIN
function. (refer to page 19)
The
Plug & Play
feature is only available in the TV mode.
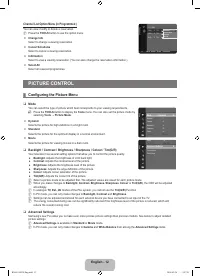
¦
N
N
N
N
N
N
N
N
N
N
N
N
N
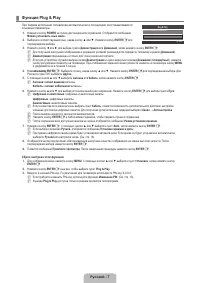
Plug & Play
Можно установить язык меню.
Язык
: Русский
►
E
Вход
BN68-01893F-Eng.indd 7
2009-03-02 12:54:32
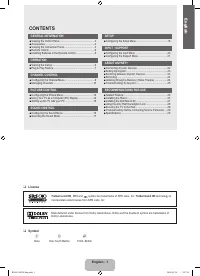
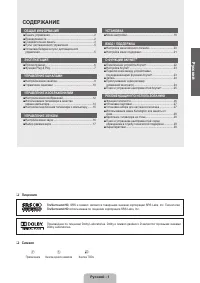
Содержание
- 33 Лицензия; Символ; СОДЕРЖАНИЕ; Ру
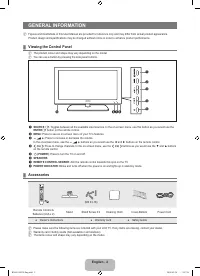
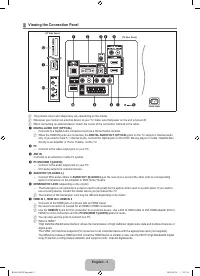
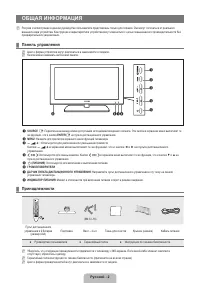
- 34 ОБЩАЯ ИНФОРМАЦИЯ; Панель управления
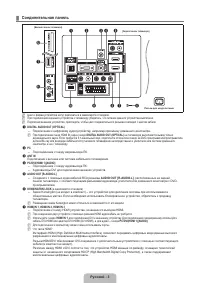
- 35 Соединительная панель
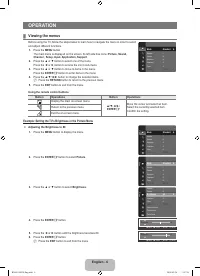
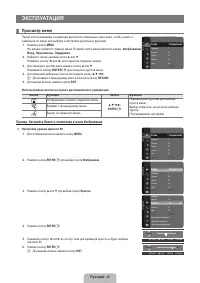
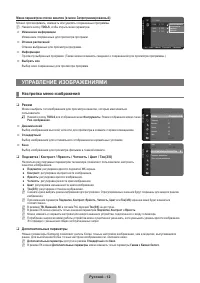
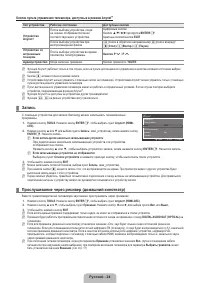
- 38 ЭКСПЛУАТАЦИЯ; Просмотр меню; Пример. Настройка Яркость телевизора в меню Изображение
- 40 УПРАВЛЕНИЕ КАНАЛАМИ; Настройка меню каналов
- 42 Управление каналами
- 44 Меню параметров списка каналов (в меню Запрограммированный); УПРАВЛЕНИЕ ИЗОБРАЖЕНИЯМИ; Настройка меню изображений
- 45 Параметры изображения
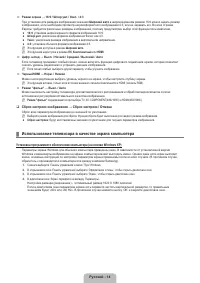
- 46 Сброс настроек изображения → Сброс настроек / Отмена; Использование телевизора в качестве экрана компьютера
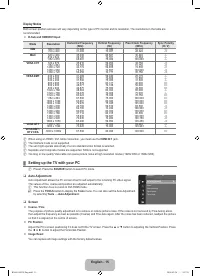
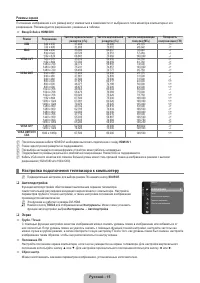
- 47 Режимы экрана; Настройка подключения телевизора к компьютеру
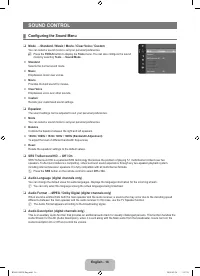
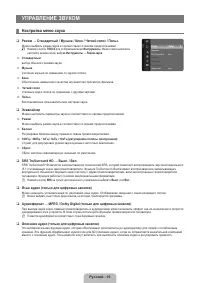
- 48 УПРАВЛЕНИЕ ЗВУКОМ; Настройка меню звука; Эквалайзер
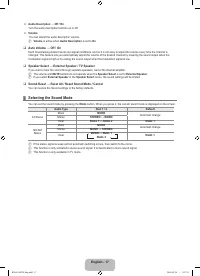
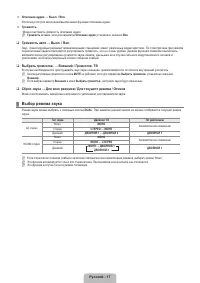
- 49 Сброс звука → Для всех режимов / Для текущего режима / Отмена; Выбор режима звука
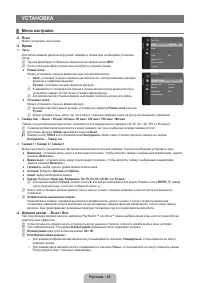
- 50 УСТАНОВКА; Меню настройки
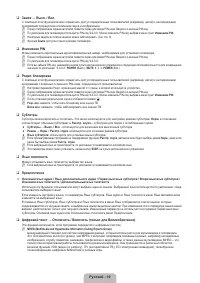
- 52 Общий интерфейc; Настройка меню входного сигнала
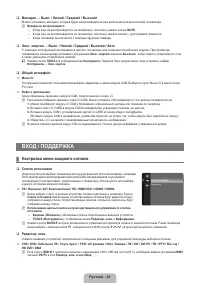
- 53 Настройка меню поддержки
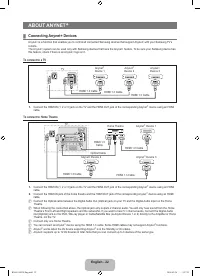
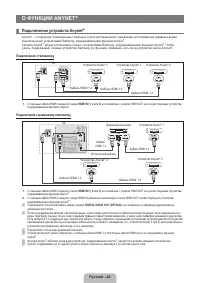
- 54 О ФУНКЦИИ ANYNET; Подключение устройств Anynet; Подключение к телевизору
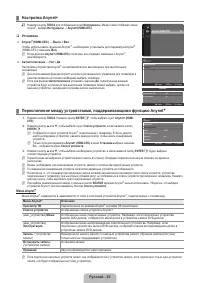
- 55 Настройка Anynet; Установка
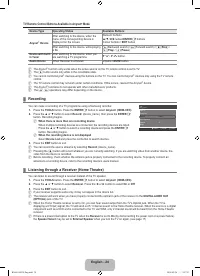
- 56 Кнопки пульта управления телевизора, доступные в режиме Anynet
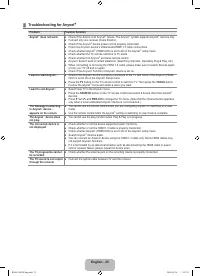
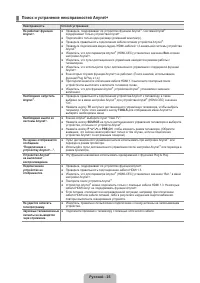
- 57 Поиск и устранение неисправностей Anynet
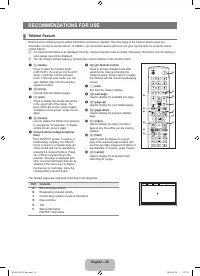
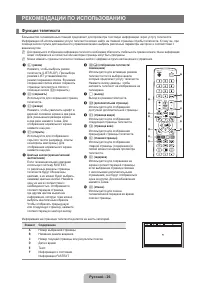
- 58 РЕКОМЕНДАЦИИ ПО ИСПОЛЬЗОВАНИЮ; Функция телетекста; Элемент Содержание
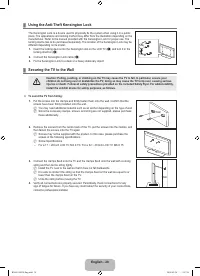
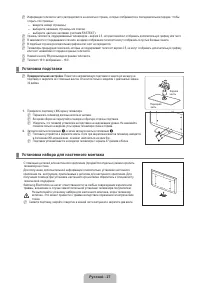
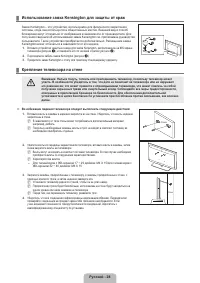
- 59 Установка подставки; Предварительная настройка; Установка набора для настенного монтажа
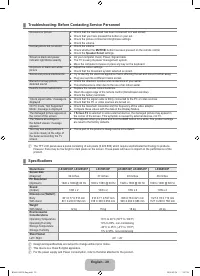
- 61 Характеристики


