Телевизоры Samsung TV - инструкция пользователя по применению, эксплуатации и установке на русском языке. Мы надеемся, она поможет вам решить возникшие у вас вопросы при эксплуатации техники.
Если остались вопросы, задайте их в комментариях после инструкции.
"Загружаем инструкцию", означает, что нужно подождать пока файл загрузится и можно будет его читать онлайн. Некоторые инструкции очень большие и время их появления зависит от вашей скорости интернета.


English - 24
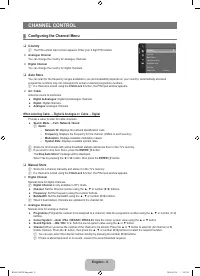
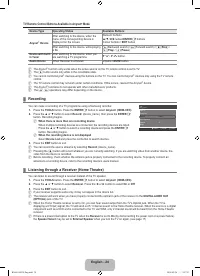
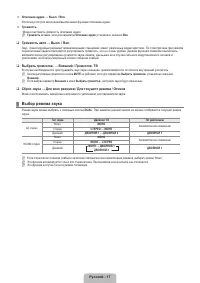
TV Remote Control Buttons Available in Anynet+ Mode
Device Type
Operating Status
Available Buttons
Anynet
+
Device
After switching to the device, when the
menu of the corresponding device is
displayed on the screen.
Numeric buttons
▲/▼/◄/►/wheel/
ENTER
E
buttons
Colour buttons /
EXIT
button
After switching to the device, while playing
a ile
π
(Backward search) /
µ
(Forward search) /
∫
(
Stop
) /
∂
(
Play
) /
∑
(
Pause
)
Device with built-
in Tuner
After switching to the device, when you
are watching a TV programme
P
>
/
P
<
button
Audio Device
When Receiver is activated
Volume
/
MUTE
button
The Anynet+ function only works when the active source on the TV remote control is set to TV.
The
∏
button works only while in the recordable state.
You cannot control Anynet+ devices using the buttons on the TV. You can control Anynet+ devices only using the TV remote
control.
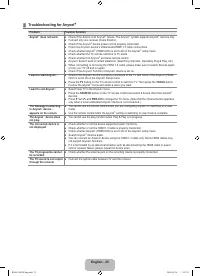
The TV remote control may not work under certain conditions. If this occurs, reselect the Anynet+ device.
The Anynet+ functions do not operate with other manufacturers’ products.
The
π
,
µ
operations may differ depending on the device.
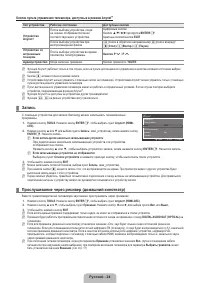
Recording
You can make a recording of a TV programme using a Samsung recorder.
1.
Press the
TOOLS
button. Press the
ENTER
E
button to select
Anynet+ (HDMI-CEC)
.
2.
Press the ▲ or ▼ button to select
Record
: (device_name), then press the
ENTER
E
button. Recording begins.
When there is more than one recording device
When multiple recording devices are connected, the recording devices are listed.
Press the ▲ or ▼ button to select a recording device and press the
ENTER
E
button. Recording begins.
When the recording device is not displayed
Select
Device List
and press the red button to search devices.
3.
Press the
EXIT
button to exit.
You can record the source streams by selecting
Record
: (device_name).
Pressing the
∫
button will record whatever you are currently watching. If you are watching video from another device, the
video from the device is recorded.
Before recording, check whether the antenna jack is properly connected to the recording device. To properly connect an
antenna to a recording device, refer to the recording device’s users manual.
Listening through a Receiver (Home Theatre)
You can listen to sound through a receiver instead of the TV speaker.
1.
Press the
TOOLS
button. Press the
ENTER
E
button to select
Anynet+ (HDMI-CEC)
.
2.
Press the ▲ or ▼ button to select
Receiver
. Press the ◄ or ► button to select
On
or
Off
.
3.
Press the
EXIT
button to exit.
If your receiver supports audio only, it may not appear in the device list.
The receiver will work when you have properly connected the optical in jack of the receiver to the
DIGITAL AUDIO OUT
(OPTICAL)
jack of the TV.
When the Home Theatre receiver is set to On, you can hear sound output from the TV’s Optical jack. When the TV is
displaying a DTV(air) signal, the TV will send out 5.1 channel sound to the Home theatre receiver. When the source is a digital
component such as a DVD and is connected to the TV via HDMI, only 2 channel sound will be heard from the Home Theatre
receiver.
If there is a power interruption to the TV when the
Receiver
is set to
On
(by disconnecting the power cord or a power failure),
the
Speaker Select
may be set to
External Speaker
when you turn the TV on again. (see page 17)
N
N
N
N
N
N
¦
N
N
N
N
N
¦
N
N
N
N
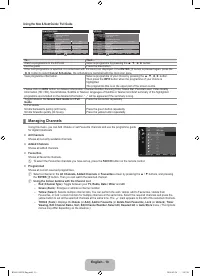
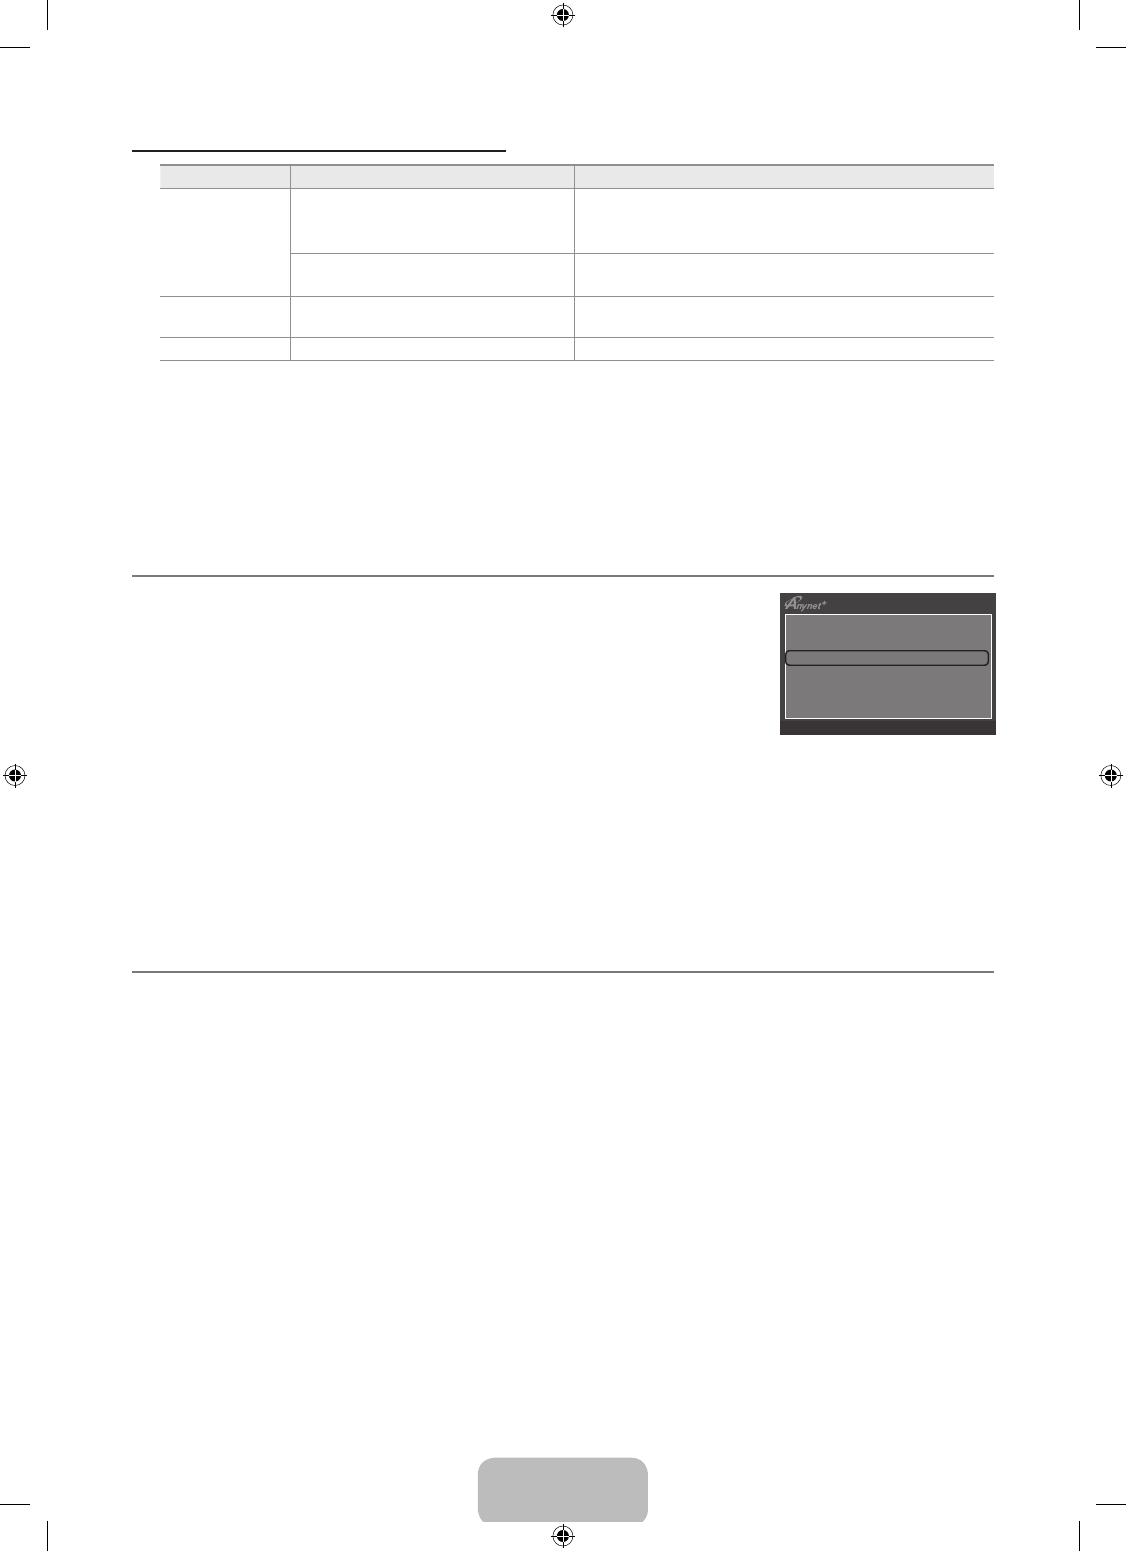
View TV
Device List
Record
:
DVDR
DVDR Operation
Receiver
:
On
Setup
U
Move
E
Enter
R
Return
BN68-01893F-Eng.indd 24
2009-02-24 2:57:23
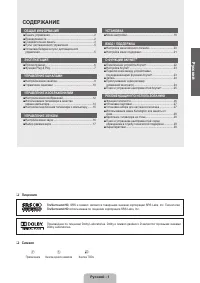
Содержание
- 33 Лицензия; Символ; СОДЕРЖАНИЕ; Ру
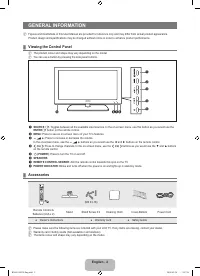
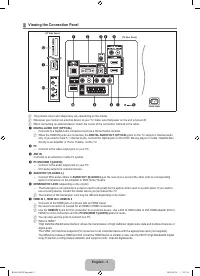
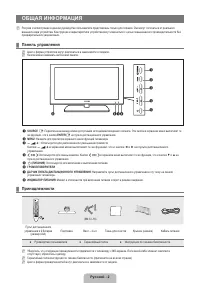
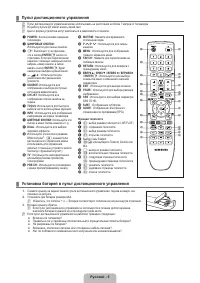
- 34 ОБЩАЯ ИНФОРМАЦИЯ; Панель управления
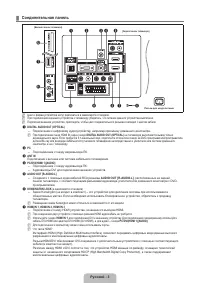
- 35 Соединительная панель
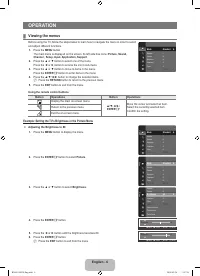
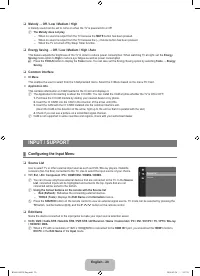
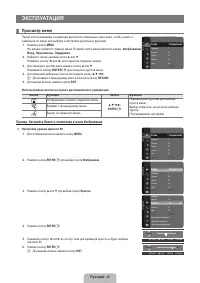
- 38 ЭКСПЛУАТАЦИЯ; Просмотр меню; Пример. Настройка Яркость телевизора в меню Изображение
- 40 УПРАВЛЕНИЕ КАНАЛАМИ; Настройка меню каналов
- 42 Управление каналами
- 44 Меню параметров списка каналов (в меню Запрограммированный); УПРАВЛЕНИЕ ИЗОБРАЖЕНИЯМИ; Настройка меню изображений
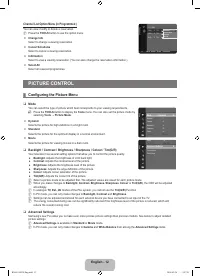
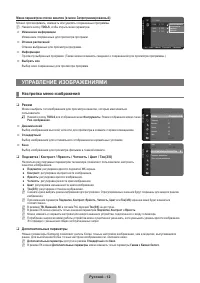
- 45 Параметры изображения
- 46 Сброс настроек изображения → Сброс настроек / Отмена; Использование телевизора в качестве экрана компьютера
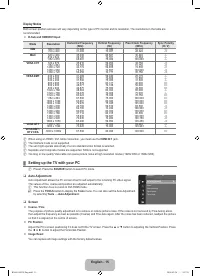
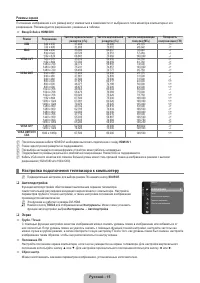
- 47 Режимы экрана; Настройка подключения телевизора к компьютеру
- 48 УПРАВЛЕНИЕ ЗВУКОМ; Настройка меню звука; Эквалайзер
- 49 Сброс звука → Для всех режимов / Для текущего режима / Отмена; Выбор режима звука
- 50 УСТАНОВКА; Меню настройки
- 52 Общий интерфейc; Настройка меню входного сигнала
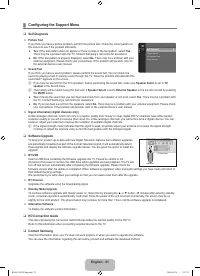
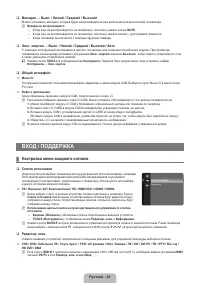
- 53 Настройка меню поддержки
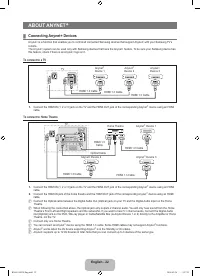
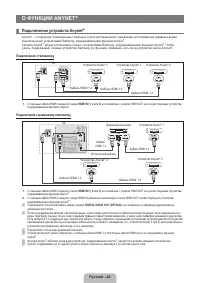
- 54 О ФУНКЦИИ ANYNET; Подключение устройств Anynet; Подключение к телевизору
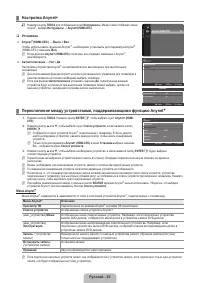
- 55 Настройка Anynet; Установка
- 56 Кнопки пульта управления телевизора, доступные в режиме Anynet
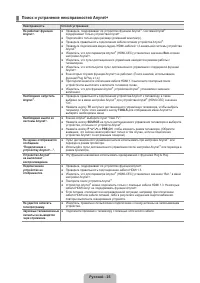
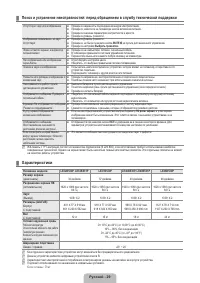
- 57 Поиск и устранение неисправностей Anynet
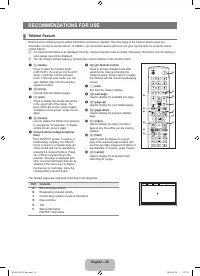
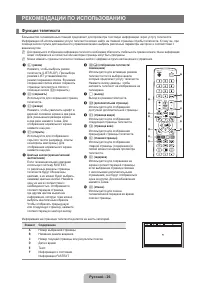
- 58 РЕКОМЕНДАЦИИ ПО ИСПОЛЬЗОВАНИЮ; Функция телетекста; Элемент Содержание
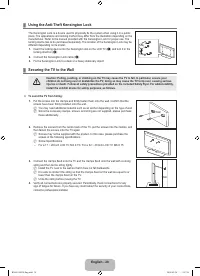
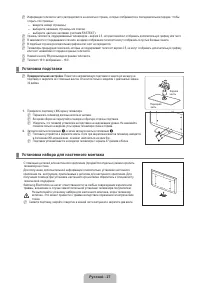
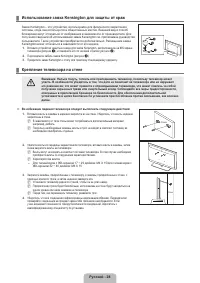
- 59 Установка подставки; Предварительная настройка; Установка набора для настенного монтажа
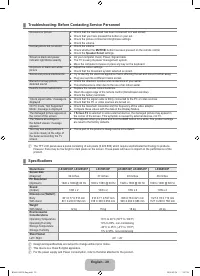
- 61 Характеристики


