Телевизоры Samsung TV - инструкция пользователя по применению, эксплуатации и установке на русском языке. Мы надеемся, она поможет вам решить возникшие у вас вопросы при эксплуатации техники.
Если остались вопросы, задайте их в комментариях после инструкции.
"Загружаем инструкцию", означает, что нужно подождать пока файл загрузится и можно будет его читать онлайн. Некоторые инструкции очень большие и время их появления зависит от вашей скорости интернета.


English -
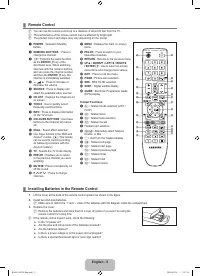
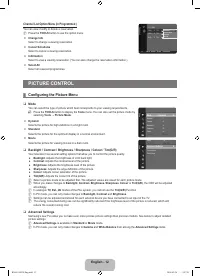
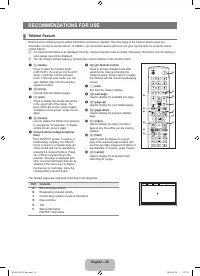
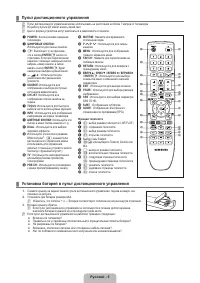
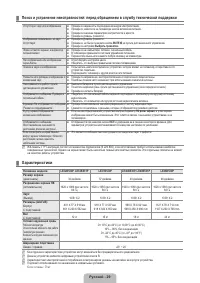
Remote Control
You can use the remote control up to a distance of about 23 feet from the TV.
The performance of the remote control may be affected by bright light.
The product colour and shape may vary depending on the model.
1
POWER
: Television Standby
button.
2
NUMERIC BUTTONS
: Press to
change the channel.
3
E
:
Performs the same function
as the
ENTER
E
key of the
directional keys. When switching
channels with the numeric buttons,
and you press the channel number
and then the
ENTER
E
key, the
channel is immediately switched.
4
Y
: Press to increase or
decrease the volume.
5
SOURCE
: Press to display and
select the available video sources.
6
CH LIST
: Displays the Channel List
on screen
7
TOOLS
: Use to quickly select
frequently used functions.
8
INFO
: Press to display information
on the TV screen.
9
COLOURS BUTTONS
: Use these
buttons in the Channel list menus
etc.
!
DUAL
: Sound effect selection
@
Use these buttons in the DMA and
Anynet+ modes. (
∏
: This remote
can be used to control recording
on Samsung recorders with the
Anynet+ feature)
#
TV
: Selects the TV mode directly.
$
PRE-CH :
Enables you to return
to the previous channel you were
watching.
%
MUTE
M
:
Press to temporarily cut
off the sound.
^
P
<
/
P
>
: Press to change
channels.
&
MENU
: Displays the main on-screen
menu
*
FAV.CH
: Press to switch to your
favourites channels.
(
RETURN
: Returns to the previous menu
)
UP▲ / DOWN▼ / LEFT◄ / RIGHT►
/ ENTER
E
: Use to select on-screen
menu items and change menu values.
a
EXIT
: Press to exit the menu.
b
P.SIZE
: Picture size selection
c
SRS
: SRS TS HD selection.
d
SUBT.
: Digital subtitle display
e
GUIDE
: Electronic Programme Guide
(EPG) display
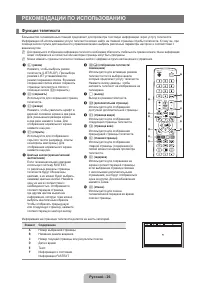
Teletext Functions
5
0
: Teletext mode selection (LIST /
FLOF)
6
8
: Teletext store
7
4
: Teletext size selection
8
5
: Teletext reveal
9
Fastext topic selection
0
/
: Alternately select Teletext,
Double, or Mix.
#
:
: Exit from the Teletext display
$
1
: Teletext sub page
^
2
: Teletext next page
3
: Teletext previous page
&
6
: Teletext index
(
9
: Teletext hold
a
7
: Teletext cancel
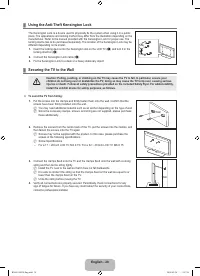
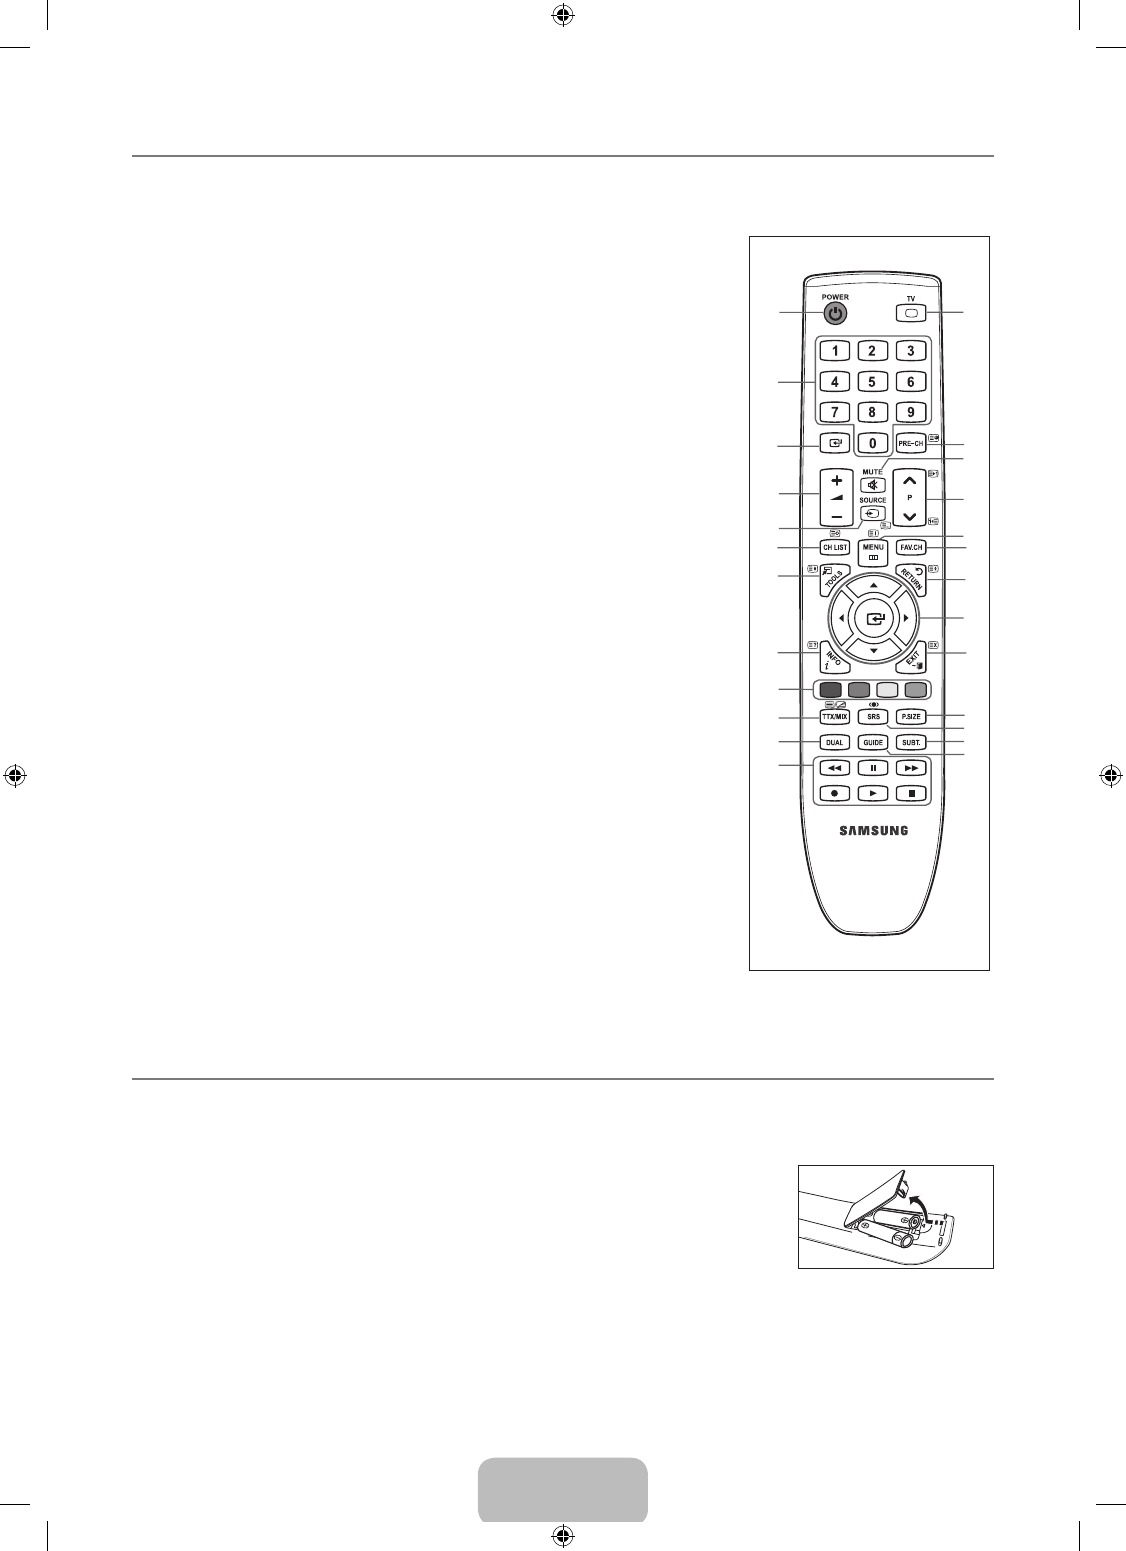
Installing Batteries in the Remote Control
1.
Lift the cover at the back of the remote control upward as shown in the igure.
2.
Install two AAA size batteries.
Make sure to match the ‘+’ and ‘–’ ends of the batteries with the diagram inside the compartment.
3.
Replace the cover.
Remove the batteries and store them in a cool, dry place if you won’t be using the
remote control for a long time.
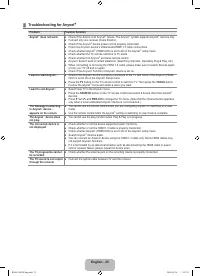
If the remote control doesn’t work, check the following:
Is the TV power on?
Are the plus and minus ends of the batteries reversed?
Are the batteries drained?
Is there a power outage or is the power cord unplugged?
Is there a special luorescent light or neon sign nearby?
¦
N
N
N
¦
N
N
N
●
●
●
●
●
1
2
3
4
5
6
7
8
9
0
!
@
#
$
%
^
(
)
a
b
c
d
e
&
*
I-II
BN68-01893F-Eng.indd 5
2009-02-24 2:57:19
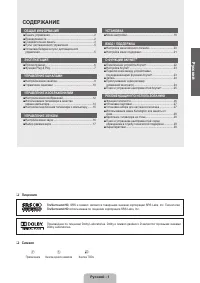
Содержание
- 33 Лицензия; Символ; СОДЕРЖАНИЕ; Ру
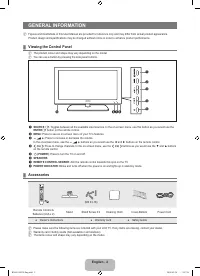
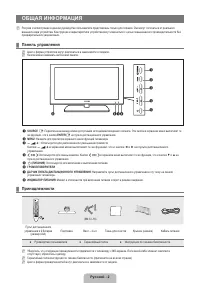
- 34 ОБЩАЯ ИНФОРМАЦИЯ; Панель управления
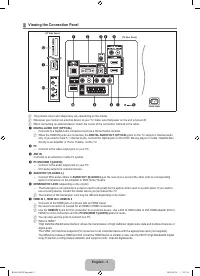
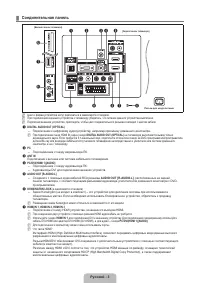
- 35 Соединительная панель
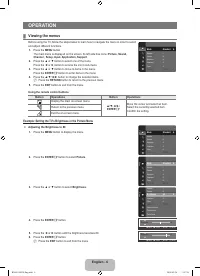
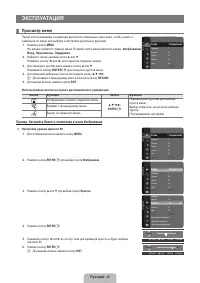
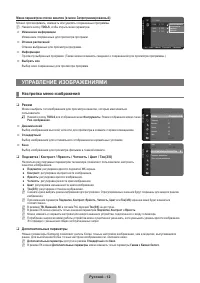
- 38 ЭКСПЛУАТАЦИЯ; Просмотр меню; Пример. Настройка Яркость телевизора в меню Изображение
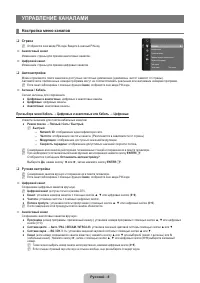
- 40 УПРАВЛЕНИЕ КАНАЛАМИ; Настройка меню каналов
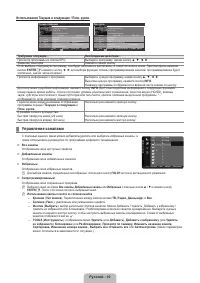
- 42 Управление каналами
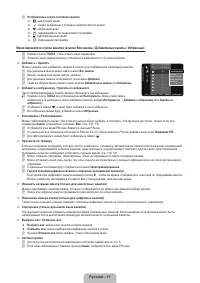
- 44 Меню параметров списка каналов (в меню Запрограммированный); УПРАВЛЕНИЕ ИЗОБРАЖЕНИЯМИ; Настройка меню изображений
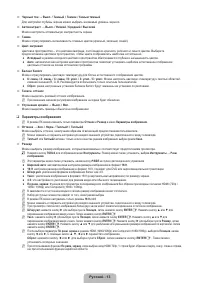
- 45 Параметры изображения
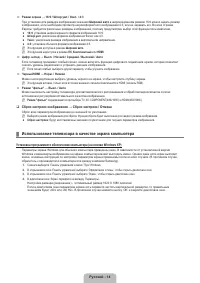
- 46 Сброс настроек изображения → Сброс настроек / Отмена; Использование телевизора в качестве экрана компьютера
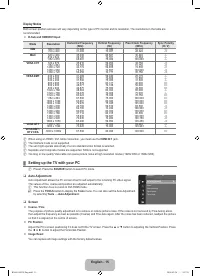
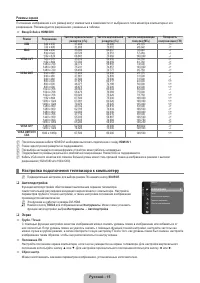
- 47 Режимы экрана; Настройка подключения телевизора к компьютеру
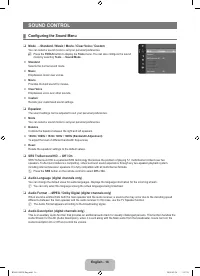
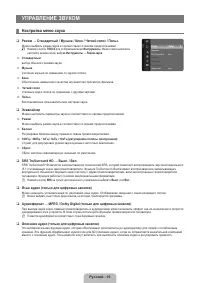
- 48 УПРАВЛЕНИЕ ЗВУКОМ; Настройка меню звука; Эквалайзер
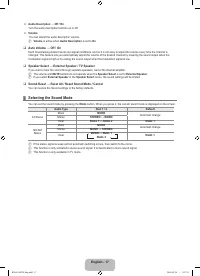
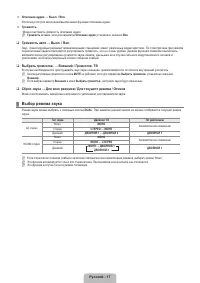
- 49 Сброс звука → Для всех режимов / Для текущего режима / Отмена; Выбор режима звука
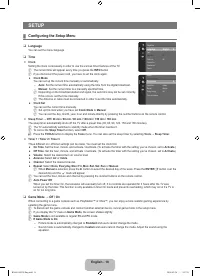
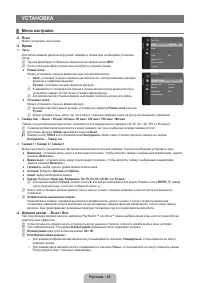
- 50 УСТАНОВКА; Меню настройки
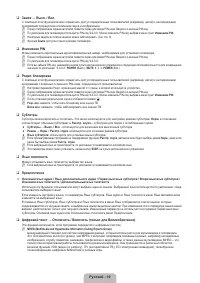
- 52 Общий интерфейc; Настройка меню входного сигнала
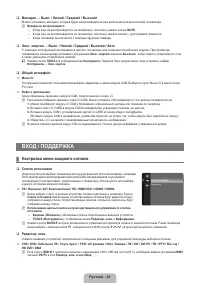
- 53 Настройка меню поддержки
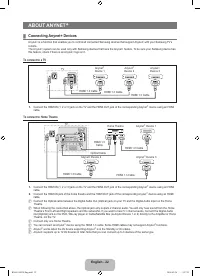
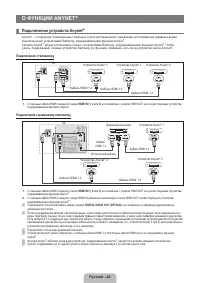
- 54 О ФУНКЦИИ ANYNET; Подключение устройств Anynet; Подключение к телевизору
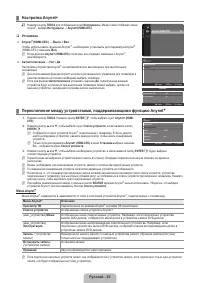
- 55 Настройка Anynet; Установка
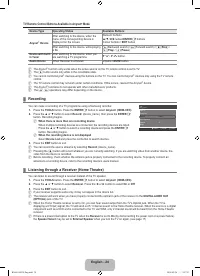
- 56 Кнопки пульта управления телевизора, доступные в режиме Anynet
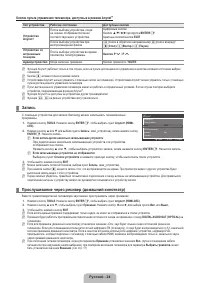
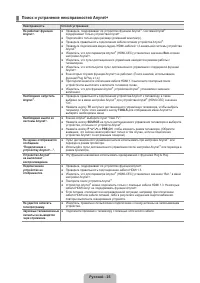
- 57 Поиск и устранение неисправностей Anynet
- 58 РЕКОМЕНДАЦИИ ПО ИСПОЛЬЗОВАНИЮ; Функция телетекста; Элемент Содержание
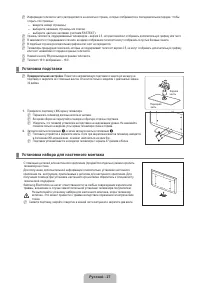
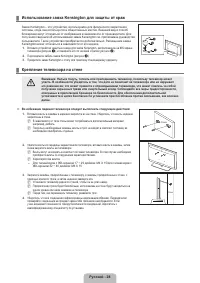
- 59 Установка подставки; Предварительная настройка; Установка набора для настенного монтажа
- 61 Характеристики


