Телевизоры Samsung TV - инструкция пользователя по применению, эксплуатации и установке на русском языке. Мы надеемся, она поможет вам решить возникшие у вас вопросы при эксплуатации техники.
Если остались вопросы, задайте их в комментариях после инструкции.
"Загружаем инструкцию", означает, что нужно подождать пока файл загрузится и можно будет его читать онлайн. Некоторые инструкции очень большие и время их появления зависит от вашей скорости интернета.


English - 28
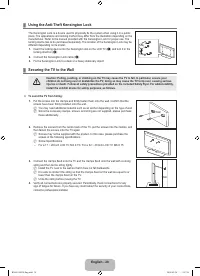
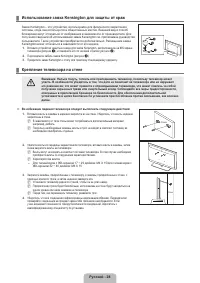
Using the Anti-Theft Kensington Lock
The Kensington Lock is a device used to physically ix the system when using it in a public
place. The appearance and locking method may differ from the illustration depending on the
manufacturer. Refer to the manual provided with the Kensington Lock for proper use. The
locking device has to be purchased separately. The location of the Kensington Lock may be
different depending on its model.
1.
Insert the locking device into the Kensington slot on the LCD TV (
1
) and turn it in the
locking direction (
2
).
2.
Connect the Kensington Lock cable (
3
).
3.
Fix the Kensington Lock to a desk or a heavy stationary object.
3
1
2
Securing the TV to the Wall
Caution: Pulling, pushing, or climbing on the TV may cause the TV to fall. In particular, ensure your
children do not hang over or destabilize the TV; doing so may cause the TV to tip over, causing serious
injuries or death. Follow all safety precautions provided on the included Safety Flyer. For added stability,
install the anti-fall device for safety purposes, as follows.
To avoid the TV from falling:
1.
Put the screws into the clamps and irmly fasten them onto the wall. Conirm that the
screws have been irmly installed onto the wall.
You may need additional material such as an anchor depending on the type of wall.
Since the necessary clamps, screws, and string are not supplied, please purchase
these additionally.
2.
Remove the screws from the centre back of the TV, put the screws into the clamps, and
then fasten the screws onto the TV again.
Screws may not be supplied with the product. In this case, please purchase the
screws of the following speciications.
Screw Speciications
For a 17 ~ 29 Inch LCD TV: M4 X 15 / For a 32 ~ 40 Inch LCD TV: M6 X 15
3.
Connect the clamps ixed onto the TV and the clamps ixed onto the wall with a strong
string and then tie the string tightly.
Install the TV near to the wall so that it does not fall backwards.
It is safe to connect the string so that the clamps ixed on the wall are equal to or
lower than the clamps ixed on the TV.
Untie the string before moving the TV.
4.
Verify all connections are properly secured. Periodically check connections for any
sign of fatigue for failure. If you have any doubt about the security of your connections,
contact a professional installer.
¦
¦
N
N
N
N
–
N
N
N
Wall
Wall
BN68-01893F-Eng.indd 28
2009-02-24 2:57:24
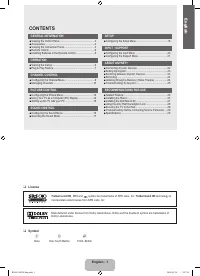
Содержание
- 33 Лицензия; Символ; СОДЕРЖАНИЕ; Ру
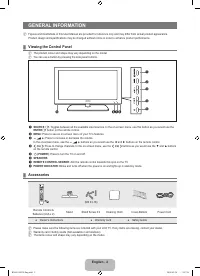
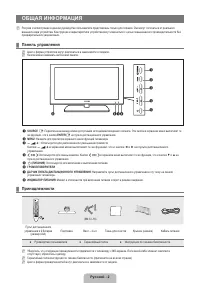
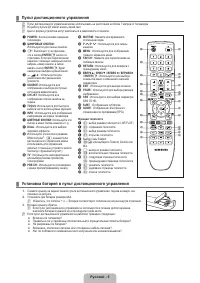
- 34 ОБЩАЯ ИНФОРМАЦИЯ; Панель управления
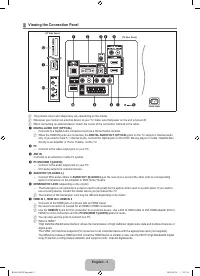
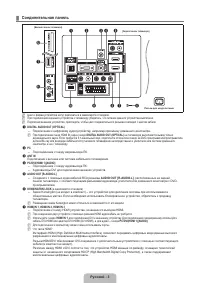
- 35 Соединительная панель
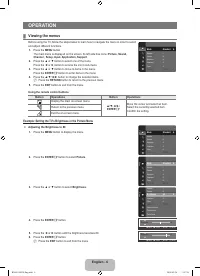
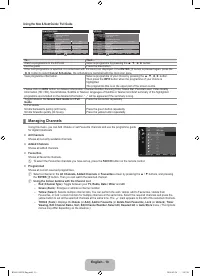
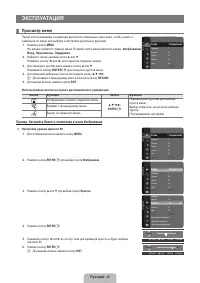
- 38 ЭКСПЛУАТАЦИЯ; Просмотр меню; Пример. Настройка Яркость телевизора в меню Изображение
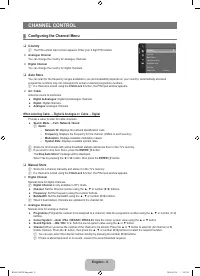
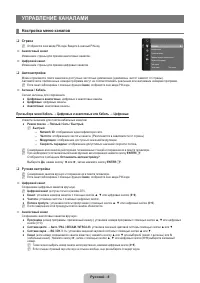
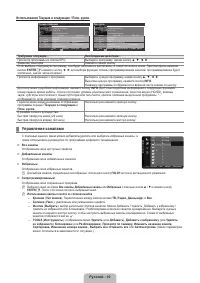
- 40 УПРАВЛЕНИЕ КАНАЛАМИ; Настройка меню каналов
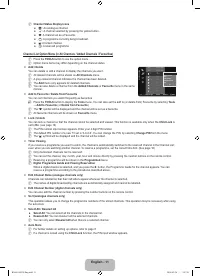
- 42 Управление каналами
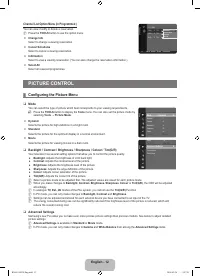
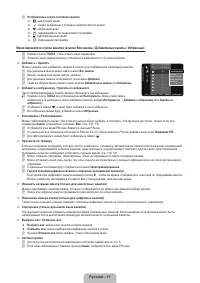
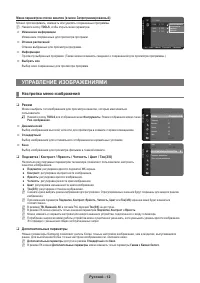
- 44 Меню параметров списка каналов (в меню Запрограммированный); УПРАВЛЕНИЕ ИЗОБРАЖЕНИЯМИ; Настройка меню изображений
- 45 Параметры изображения
- 46 Сброс настроек изображения → Сброс настроек / Отмена; Использование телевизора в качестве экрана компьютера
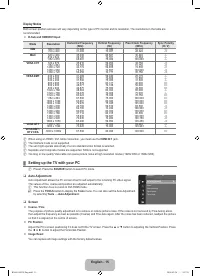
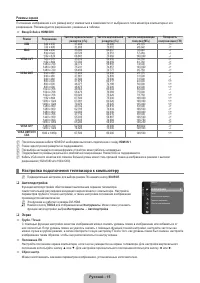
- 47 Режимы экрана; Настройка подключения телевизора к компьютеру
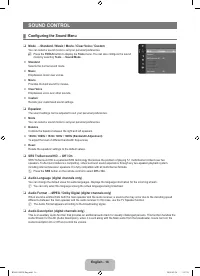
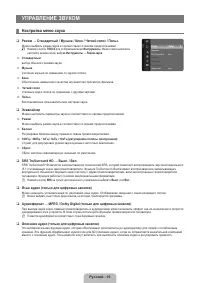
- 48 УПРАВЛЕНИЕ ЗВУКОМ; Настройка меню звука; Эквалайзер
- 49 Сброс звука → Для всех режимов / Для текущего режима / Отмена; Выбор режима звука
- 50 УСТАНОВКА; Меню настройки
- 52 Общий интерфейc; Настройка меню входного сигнала
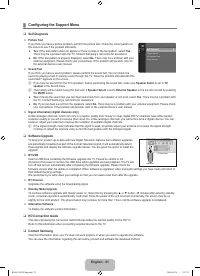
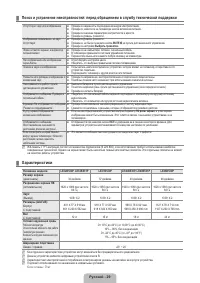
- 53 Настройка меню поддержки
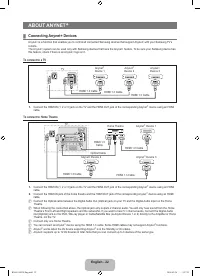
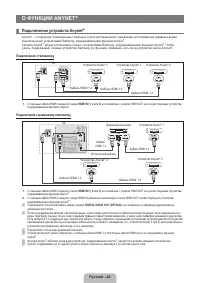
- 54 О ФУНКЦИИ ANYNET; Подключение устройств Anynet; Подключение к телевизору
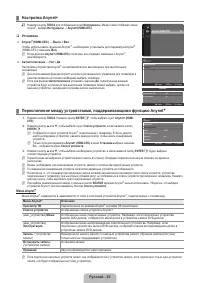
- 55 Настройка Anynet; Установка
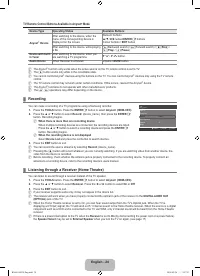
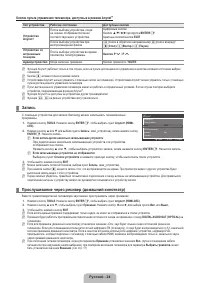
- 56 Кнопки пульта управления телевизора, доступные в режиме Anynet
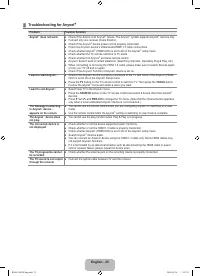
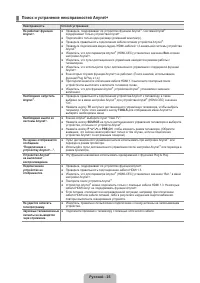
- 57 Поиск и устранение неисправностей Anynet
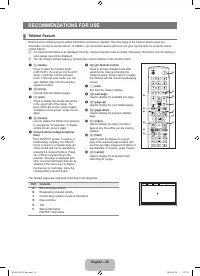
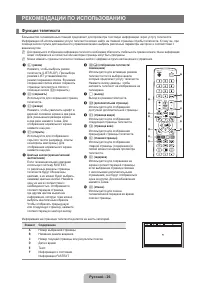
- 58 РЕКОМЕНДАЦИИ ПО ИСПОЛЬЗОВАНИЮ; Функция телетекста; Элемент Содержание
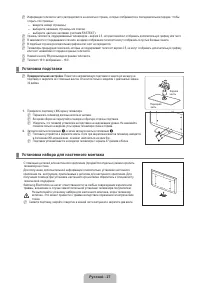
- 59 Установка подставки; Предварительная настройка; Установка набора для настенного монтажа
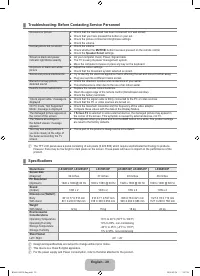
- 61 Характеристики


