Системы видеонаблюдения TP-LINK VIGI NVR1008 - инструкция пользователя по применению, эксплуатации и установке на русском языке. Мы надеемся, она поможет вам решить возникшие у вас вопросы при эксплуатации техники.
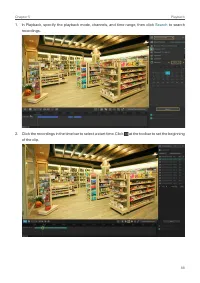
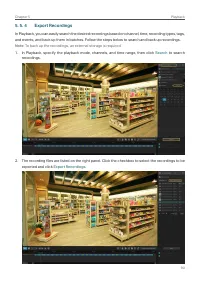
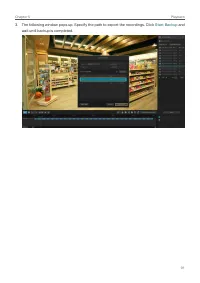
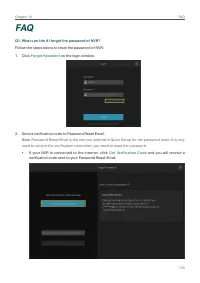
Если остались вопросы, задайте их в комментариях после инструкции.
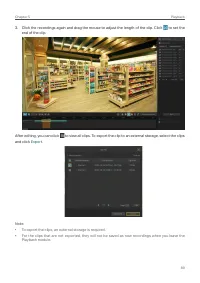
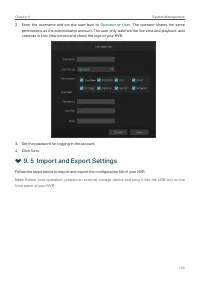
"Загружаем инструкцию", означает, что нужно подождать пока файл загрузится и можно будет его читать онлайн. Некоторые инструкции очень большие и время их появления зависит от вашей скорости интернета.


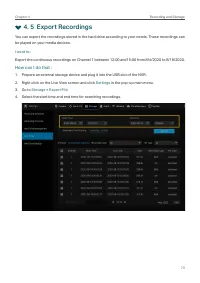


42
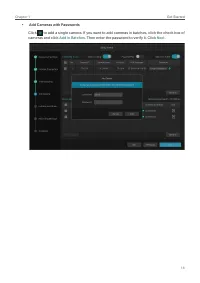
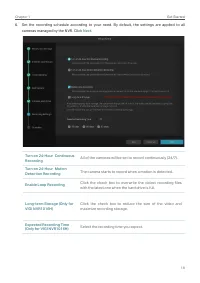
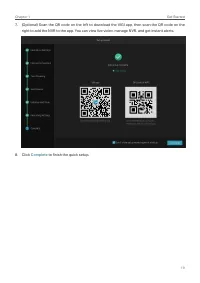
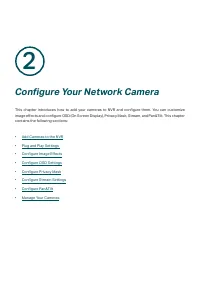
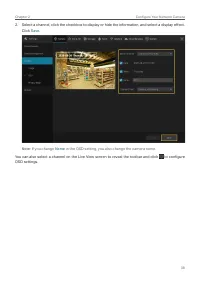
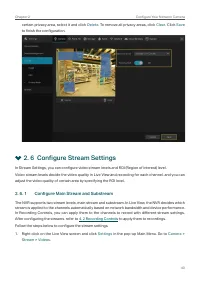
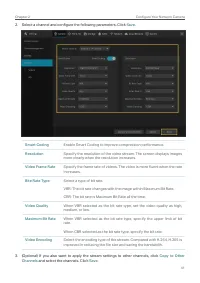
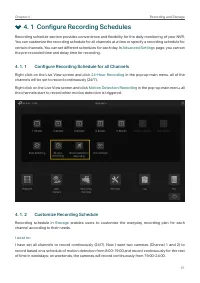
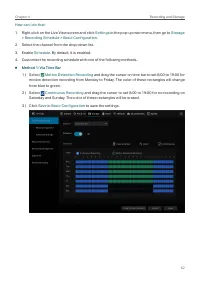
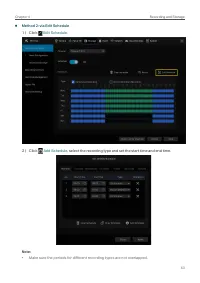
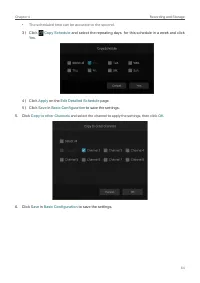
Chapter 2
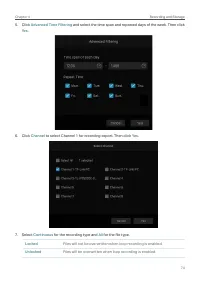
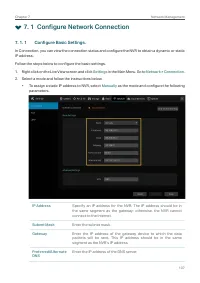
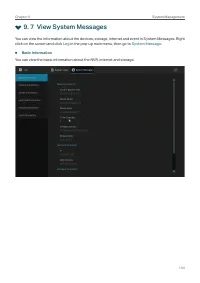
Configure Your Network Camera
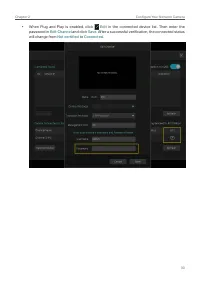
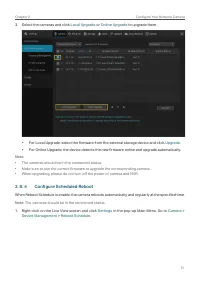
2. 6. 2
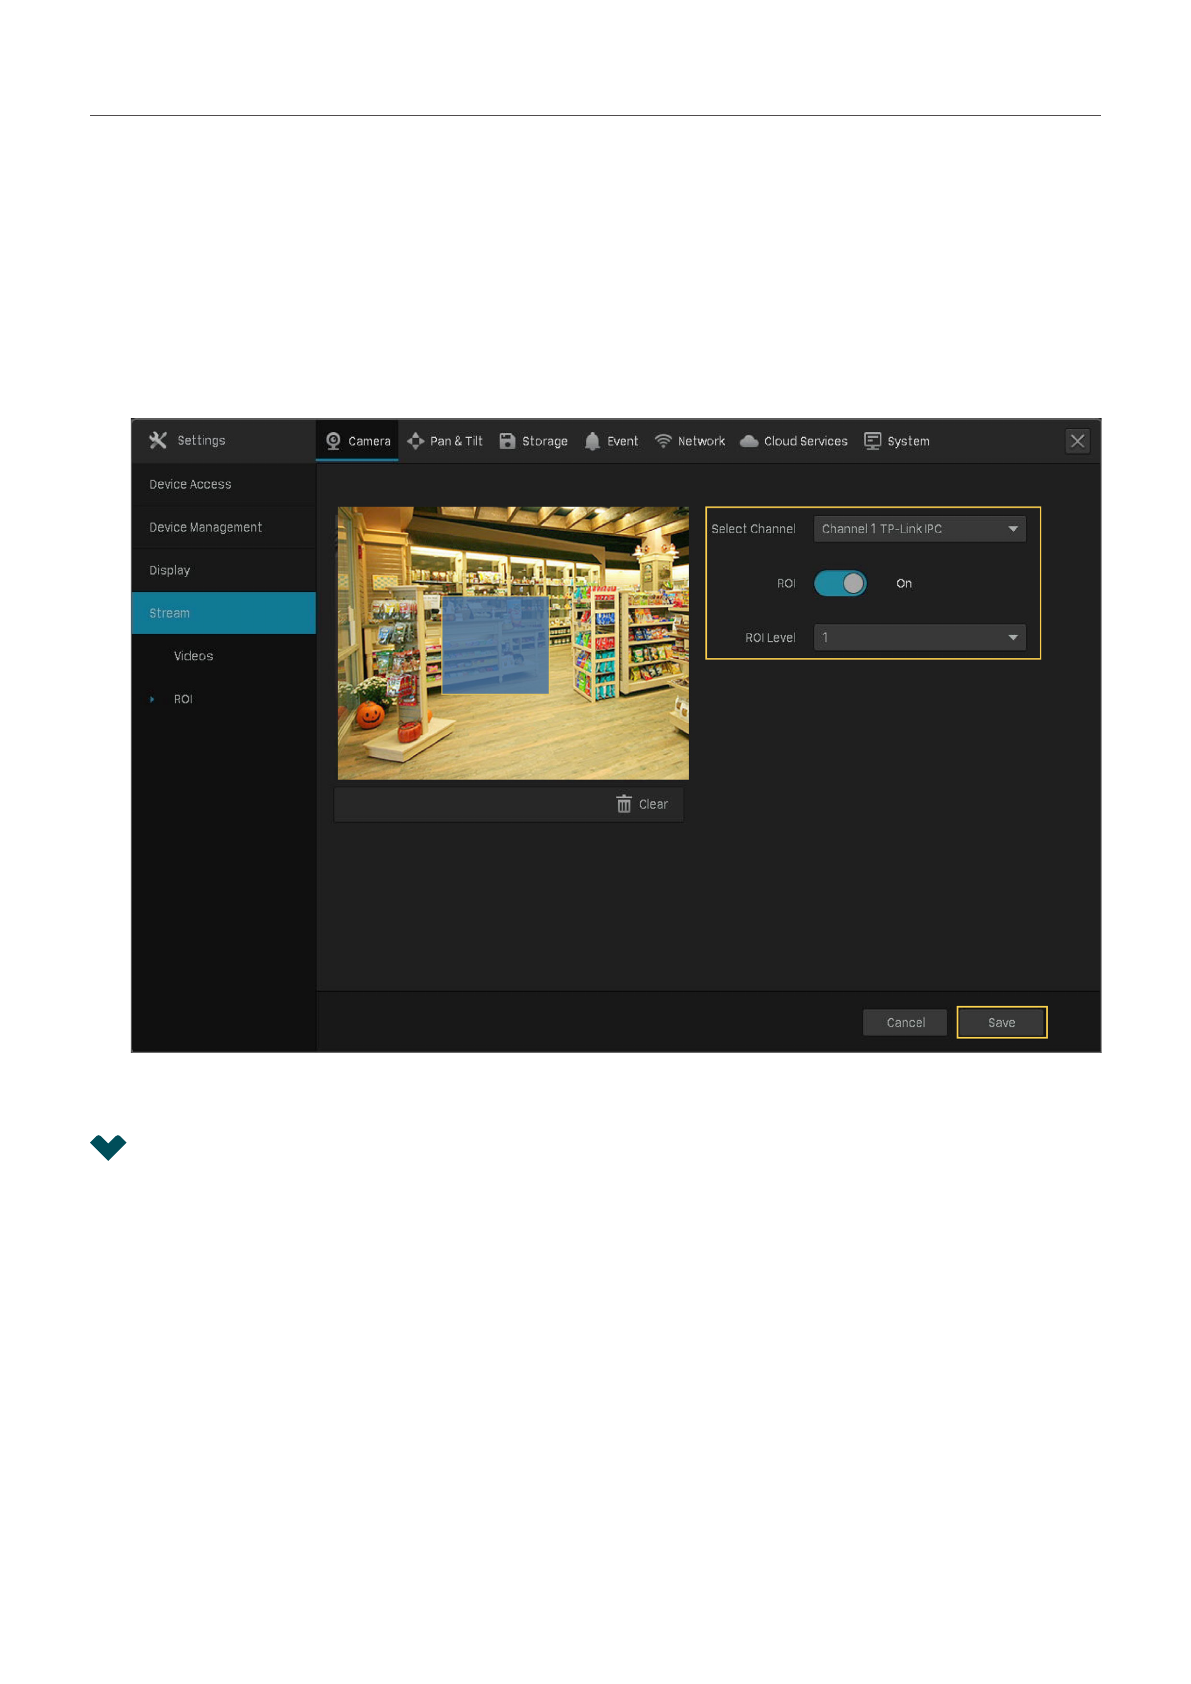
Configure ROI
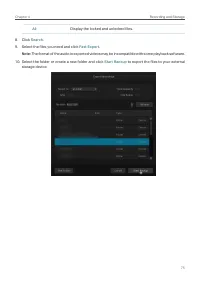
In ROI, you can configure the interest level of a specified area in each channel. The level 1–6 is ranked
from low to high. The higher the ROI level, the better image quality.
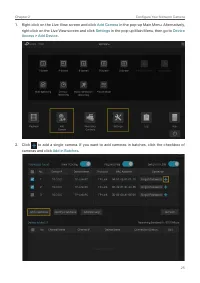
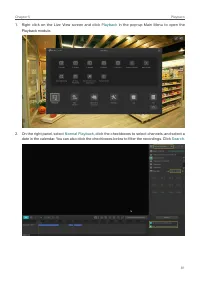
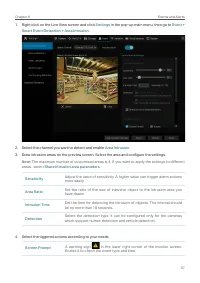
1. Right click on the Live View screen and click
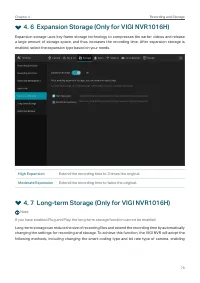
Settings
in the pop-up Main Menu. Go to
Camera
>
Stream
>
ROI
.
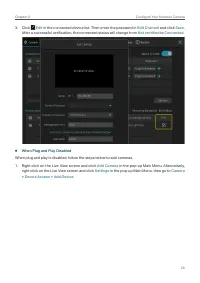
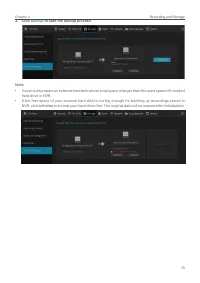
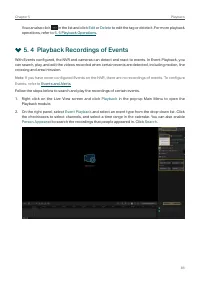
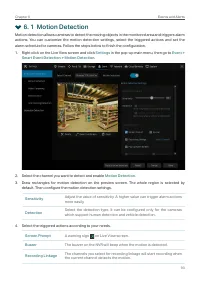
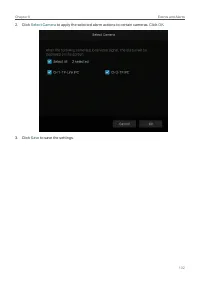
2. Select a channel and enable ROI. Draw an area on the preview screen (the blue square in the picture
below). Use the mouse to adjust the size and location of areas. Specify the ROI level and click
Save
.
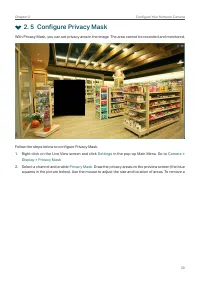
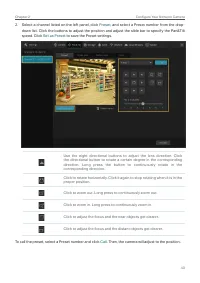
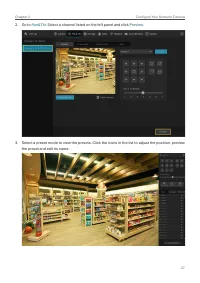
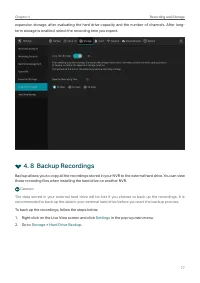
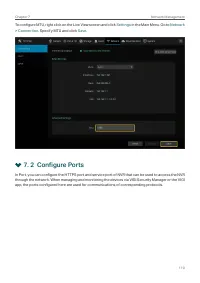
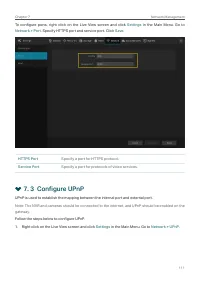
2. 7 Configure Pan&Tilt
In Pan&Tilt, you can preset the positions, paths and pattern for each channel and call a preset to change
the status of lens quickly and conveniently. Also, you can enable Park to trigger the preset automatically
when there is no operation.
Note
: Only the cameras with Pan&Tilt support this feature.
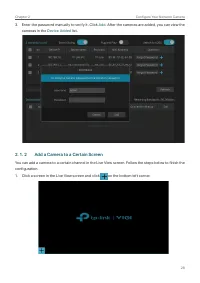
2. 7. 1
Preset and Call Positions
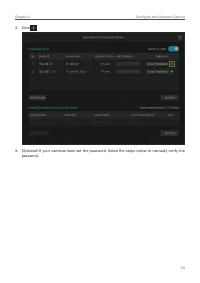
The settings of a position include the direction of lens, the status of zoom and focus, and the rotation
speed. Follow the steps below to preset a position.
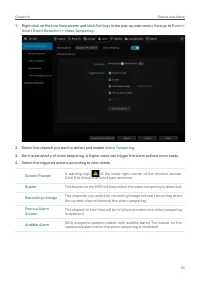
1. Right click on the Live View screen and click
Settings
in the pop-up Main Menu. Go to
Pan&Tilt
.
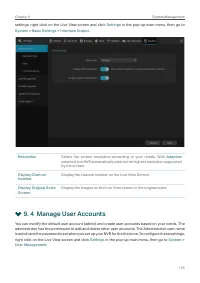
Характеристики

Остались вопросы?Не нашли свой ответ в руководстве или возникли другие проблемы? Задайте свой вопрос в форме ниже с подробным описанием вашей ситуации, чтобы другие люди и специалисты смогли дать на него ответ. Если вы знаете как решить проблему другого человека, пожалуйста, подскажите ему :)

