
Шуруповерты Stanley SCH201D2K - инструкция пользователя по применению, эксплуатации и установке на русском языке. Мы надеемся, она поможет вам решить возникшие у вас вопросы при эксплуатации техники.
Если остались вопросы, задайте их в комментариях после инструкции.
"Загружаем инструкцию", означает, что нужно подождать пока файл загрузится и можно будет его читать онлайн. Некоторые инструкции очень большие и время их появления зависит от вашей скорости интернета.

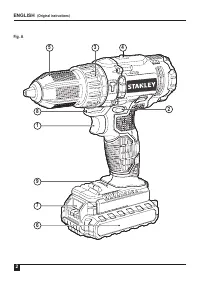


ENGLISH
(Original instructions)
9
mental abilities, or for lack of experience and/or for want
of knowledge or skills unless they are supervised by a
person responsible for their safety. Children should never
be left alone to play with this product.
Electrical Safety
The electric motor has been designed for one voltage only.
Always check that the battery pack voltage corresponds to the
voltage on the rating plate. Also make sure that the voltage of
your charger corresponds to that of your mains.
Your
STANLEY
charger is double insulated in
accordance with EN 60335; therefore no earth
wire is required.
If the supply cord is damaged, it must be replaced by a
specially prepared cord available through the
STANLEY
service organisation.
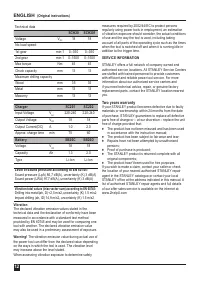
Using an Extension Cable
An extension cord should not be used unless absolutely
necessary. Use an approved extension cable suitable for
the power input of your charger (see
Technical Data
). The
minimum conductor size is 1 mm
2
; the maximum length is 30
m.
When using a cable reel, always unwind the cable completely.
Assembly and adjustments
WARNING:
Prior to assembly and adjustment,
always remove the battery pack. Always switch
off the tool before inserting or removing the
battery pack.
WARNING:
Use only
STANLEY
battery packs
and chargers.
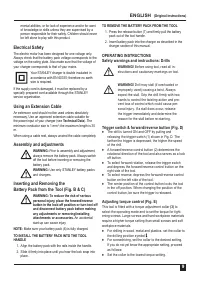
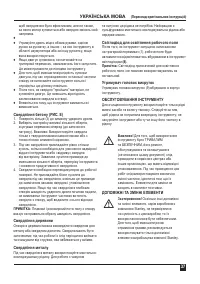
Inserting and Removing the
Battery Pack from the Tool (Fig. B & C)
WARNING: To reduce the risk of serious
personal injury, place the forward/reverse
button in the lock-off position or turn tool off
and disconnect battery pack before making
any adjustments or removing/installing
attachments or accessories.
An accidental
start-up can cause injury.
NOTE:
Make sure your battery pack (6) is fully charged.
TO INSTALL THE BATTERY PACK INTO THE TOOL
HANDLE
1. Align the battery pack with the rails inside the handle.
2. Slide it firmly into place until you hear the lock snap into
place.
TO REMOVE THE BATTERY PACK FROM THE TOOL
1. Press the release button (7) and firmly pull the battery
pack out of the tool handle.
2. Insert battery pack into the charger as described in the
charger section of this manual.
OPERATING INSTRUCTIONS
Safety warnings and instructions: Drills
@
WARNING!
Before using tool, read all in-
structions and cautionary markings on tool.
@
WARNING!
Drill may stall (if overloaded or
improperly used) causing a twist. Always
expect the stall. Grip the drill firmly with two
hands to control the twisting action and pre-
vent loss of control which could cause per-
sonal injury. If a stall does occur, release
the trigger immediately and determine the
reason for the stall before re-starting.
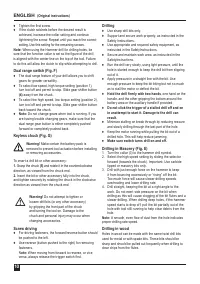
Trigger switch & forward/reverse button (Fig. D)
♦
The drill is turned ON and OFF by pulling and
releasing the trigger switch (1) shown in Fig. D. The
farther the trigger is depressed, the higher the speed
of the drill.
♦
A forward/reverse control button (2) determines the
rotational direction of the tool and also serves as a lock
off button.
♦
To select forward rotation, release the trigger switch
and depress the forward/reverse control button on the
right side of the tool.
♦
To select reverse, depress the forward/reverse control
button on the left side of the tool.
♦
The center position of the control button locks the tool
in the off position. When changing the position of the
control button, be sure the trigger is released.
Adjusting torque control (Fig. E)
This tool is fitted with a torque adjustment collar
(3)
to
select the operating mode and to set the torque for tight-
ening screws. Large screws and hard workpiece materials
require a higher torque setting than small screws and soft
workpiece materials.
♦
For drilling in wood, metal and plastics, set the collar to
the drilling position symbol .
♦
For screwdriving, set the collar to the desired setting.
If you do not yet know the appropriate setting, proceed
as follows:
♦
Set the collar to the lowest torque setting.
Содержание
- 15 Русский язык
- 16 Год изготовления
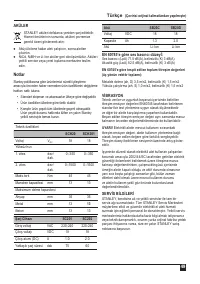
- 19 Аккумулятор
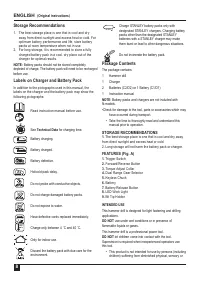
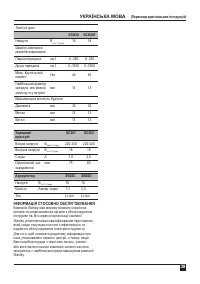
- 20 «Технические; Комплект поставки; РЕКОМЕНДАЦИИ ПО ХРАНЕНИЮ
- 21 ИНСТРУКЦИИ ПО ЭКСПЛУАТАЦИИ
- 22 Курковый пусковой выключатель и
- 23 Заворачивание; The work light is for lighting the immediate work; Хранение насадок
- 24 безопасности; ДОПОЛНИТЕЛЬНЫЕ ПРИНАДЛЕЖНОСТИ; Аккумуляторы; ПРИМЕЧАНИЯ
- 25 Зарядное; Информация по техническому обслуживанию
- 27 Гарантийные условия


