
Шуруповерты Hilti UH 700 2091317 - инструкция пользователя по применению, эксплуатации и установке на русском языке. Мы надеемся, она поможет вам решить возникшие у вас вопросы при эксплуатации техники.
Если остались вопросы, задайте их в комментариях после инструкции.
"Загружаем инструкцию", означает, что нужно подождать пока файл загрузится и можно будет его читать онлайн. Некоторые инструкции очень большие и время их появления зависит от вашей скорости интернета.


7. Adjust the pressure applied to the power tool ac-
cording to the material you are working on. This will
ensure the optimum rate of drilling progress.
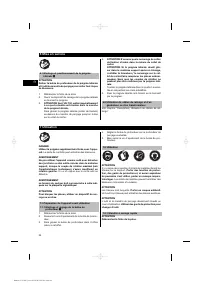
7.2.3.4 Mixing
1. Turn the function selector switch to the 1st gear
rotary drilling position until it engages. It may be
necessary to turn the drive spindle slightly.
2. Bring the side handle into the desired position and
check that it is fitted correctly and secured.
3. Plug the supply cord into the power outlet.
4. Position the mixing paddle in the container holding
the substance to be mixed.
5. To begin mixing, press the control switch slowly.
6. Press the control switch fully to continue working at
full power.
7. Guide the mixing paddle carefully in order to avoid
splashing and spillage.
7.2.3.5 Screwdriving
NOTE
Set the forward / reverse switch to suit the screwdriving
operation to be carried out.
1. Turn the function selector switch to the 1st or 2nd
gear rotary drilling position until it engages. It may
be necessary to turn the drive spindle slightly.
2. Bring the side handle into the desired position and
check that it is fitted correctly and secured.
3. Plug the supply cord into the power outlet.
4. Press the control switch slowly until the screw grips
and is guided by the material into which it is being
driven.
5. Continue pressing the control switch, applying
power appropriate to the material you are working
on.
6. Reduce speed toward the end of the screwdriving
operation in order to avoid damage.
7.2.4 Control switch with electronic speed control
The speed of the power tool can be varied continuously
up to maximum speed by slowly increasing pressure on
the control switch.
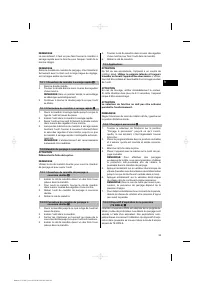
7.2.5 Lockbutton for sustained operation
The lockbutton for sustained operation is used to lock
the control switch in the “on” position. The motor then
runs constantly at full speed.
7.2.5.1 Switching on in sustained operating
mode
11
1. Press the control switch and hold it in this position.
2. Press the lockbutton and hold it in this position.
3. Release the control switch.
4. Release the lockbutton.
7.2.5.2 Switching off after sustained operation
Press the control switch again to release the lockbutton.
7.2.6 Forward / reverse
12
CAUTION
Do not operate the forward / reverse switch while the
motor is running.
Turn the switch lever to the “forward” or “reverse” posi-
tion, depending on the work to be carried out.
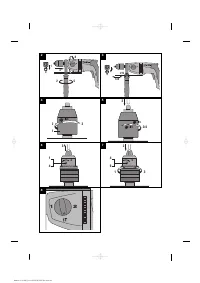
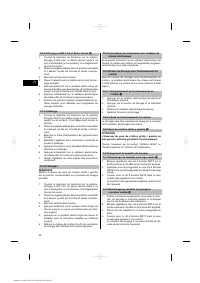
7.3 Changing the chuck
7.3.1 Removing the keyless chuck
13
1. Grip the flat section of the drive spindle with a 17
mm AF open-end wrench.
2. Grip the hexagonal section of the keyless chuck with
a 19 mm AF ring or open-end wrench.
3. Turn the 19 mm AF open-end wrench in a counter-
clockwise direction.
The keyless chuck will be unscrewed from the drive
spindle.
7.3.2 Removing the key chuck
14
1. Insert a short length of hexagonal steel in the chuck
and then tighten the chuck jaws until the hexagonal
steel is held securely (use the chuck key).
2. Grip the flat section of the drive spindle with a 17
mm AF open-end wrench.
3. Grip the hexagonal steel with a suitable wrench.
4. Turn the 17 mm AF open-end wrench in a counter-
clockwise direction.
The key chuck will be unscrewed from the drive
spindle.
7.3.3 Fitting the keyless chuck
1. Screw the keyless chuck onto the drive spindle by
hand as far as it will go.
2. Grip the flat section of the drive spindle with a 17
mm AF open-end wrench.
3. Grip the hexagonal section of the keyless chuck with
a 19 mm AF ring or open-end wrench.
4. Tighten the chuck to the specified torque (see tech-
nical data).
7.3.4 Fitting the key chuck
1. Insert a short length of hexagonal steel in the chuck
and then tighten the chuck jaws until the hexagonal
steel is held securely (use the chuck key).
2. Screw the key chuck onto the drive spindle by hand
as far as it will go.
3. Grip the flat section of the drive spindle with a 17
mm AF open-end wrench.
4. Grip the hexagonal steel with a suitable wrench.
5. Tighten the chuck to the specified torque (see tech-
nical data).
en
23
Printed: 03.12.2015 | Doc-Nr: PUB / 5071288 / 000 / 02


