
Обогреватели Ballu-Biemmedue FARM 235Т 230V-3-50/60 Hz - инструкция пользователя по применению, эксплуатации и установке на русском языке. Мы надеемся, она поможет вам решить возникшие у вас вопросы при эксплуатации техники.
Если остались вопросы, задайте их в комментариях после инструкции.
"Загружаем инструкцию", означает, что нужно подождать пока файл загрузится и можно будет его читать онлайн. Некоторые инструкции очень большие и время их появления зависит от вашей скорости интернета.


EN
L-L 230.03-BM
29 / 64
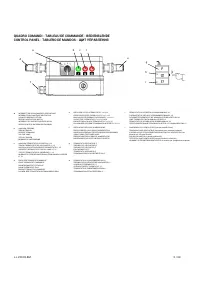
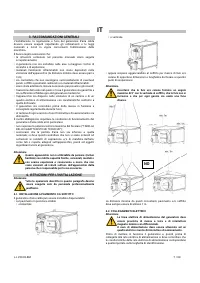
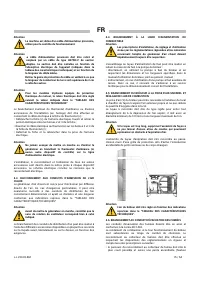
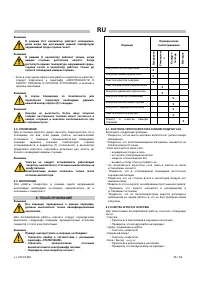
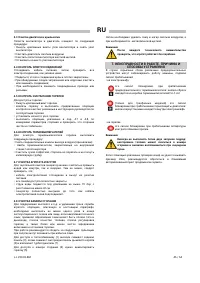
Any room thermostat or other accessories (such as a timer) are
connected to the system by connecting the electrical cable to the
thermostat plug (c):
• Take the plug (c) out of the electrical panel, open the plug and
remove the jumper between terminals 2 and 3.
• Connect the thermostat electrical cable to terminals 2 and 3 of the
thermostat plug (c).
• Close the plug again and plug it back into the panel.
Warning
Never attempt to switch the heater on or off by connecting
the room thermostat (or other control devices) to the
electrical power line.
The installation and connection of all the other accessories are
described in the specific instructions included with each accessory,
together with operating instructions.
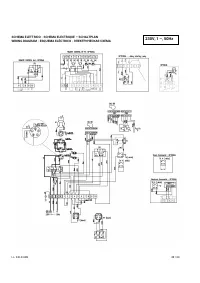
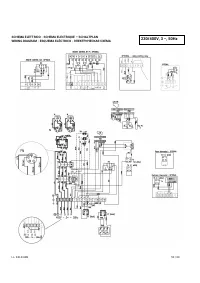
The electrical diagram shown in this manual refers to the electrical
connection only.
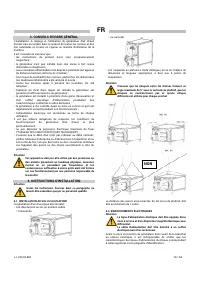
4.3. CONNECTION TO HOT AIR DELIVERY DUCTS
The space heater is set to operate with direct distribution of air.
Nevertheless, it can be connected to appropriately sized air
distribution channels, if required, with maximum diameter and
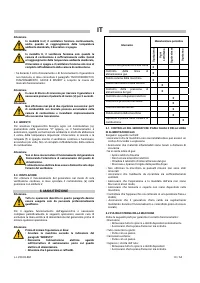
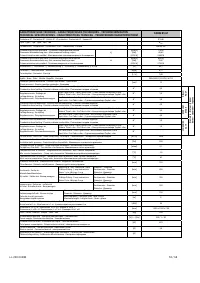
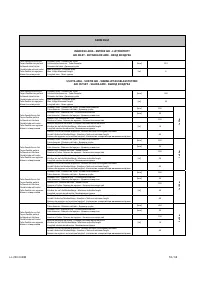
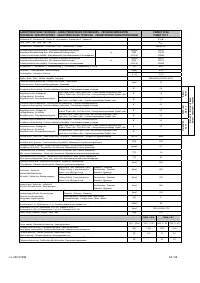
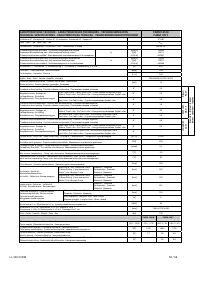
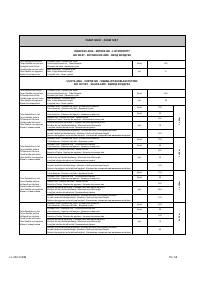
length as shown in the “TABLE OF TECHNICAL CHARACTERISTICS.”
Warning
Before starting the heater, check that the direction of
rotation of the fan matches the direction shown on the fan
itself.
The air distribution channels can be connected by using the various
available accessories, placing the connections on the front, side, or
top as required.
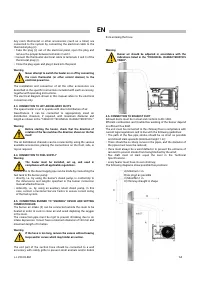
4.4. CONNECTION TO FUEL SUPPLY
Warning
The heater must be installed, set up, and used in
compliance with all applicable regulations.
Connection to the diesel supply pipe can be made by connecting the
fuel tank to the burner pump:
• directly, i.e., by using the burner’s diesel pump, in conformity to
the dimensions and lengths specified in the burner instruction
manual attached hereto.
• indirectly, i.e., by using an auxiliary return diesel pump. In this
case, contact a Customer Service Centre to ensure correct sizing
of the fuel system.
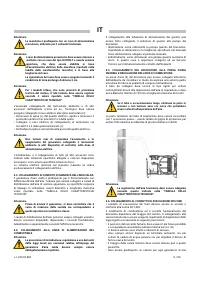
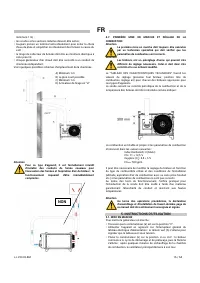
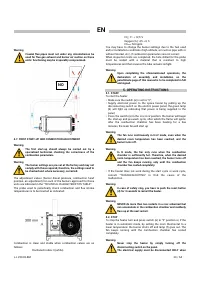
4.5. CONNECTING BURNER TO “SNORKEL” DEVICE AND SETTING
COMBUSTION AIR
The burner air intake (3) can be connected outside the room to be
heated in order to suck in clean air and avoid depleting the oxygen
in the room.
The connection pipe must be rigid to prevent shrinking due to air
intake depression. It must have a minimum diameter of 100 mm and
maximum length of 6 metres.
Warning
If the hose is too long, remove the excess without leaving
loops and/or curves which may hinder air suction.
The end part of the suction hose should be connected to a wall
accessory with safety grille to prevent small animals and/or debris
from entering the hose.
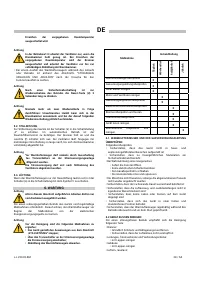
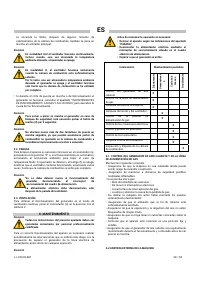
Warning
Burner air should be adjusted in accordance with the
indications listed in the “TECHNICAL CHARACTERISTICS
TABLE”.
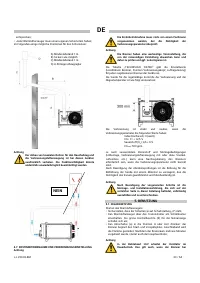
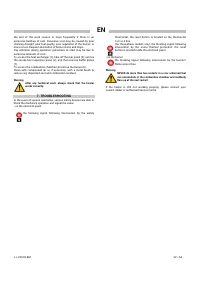
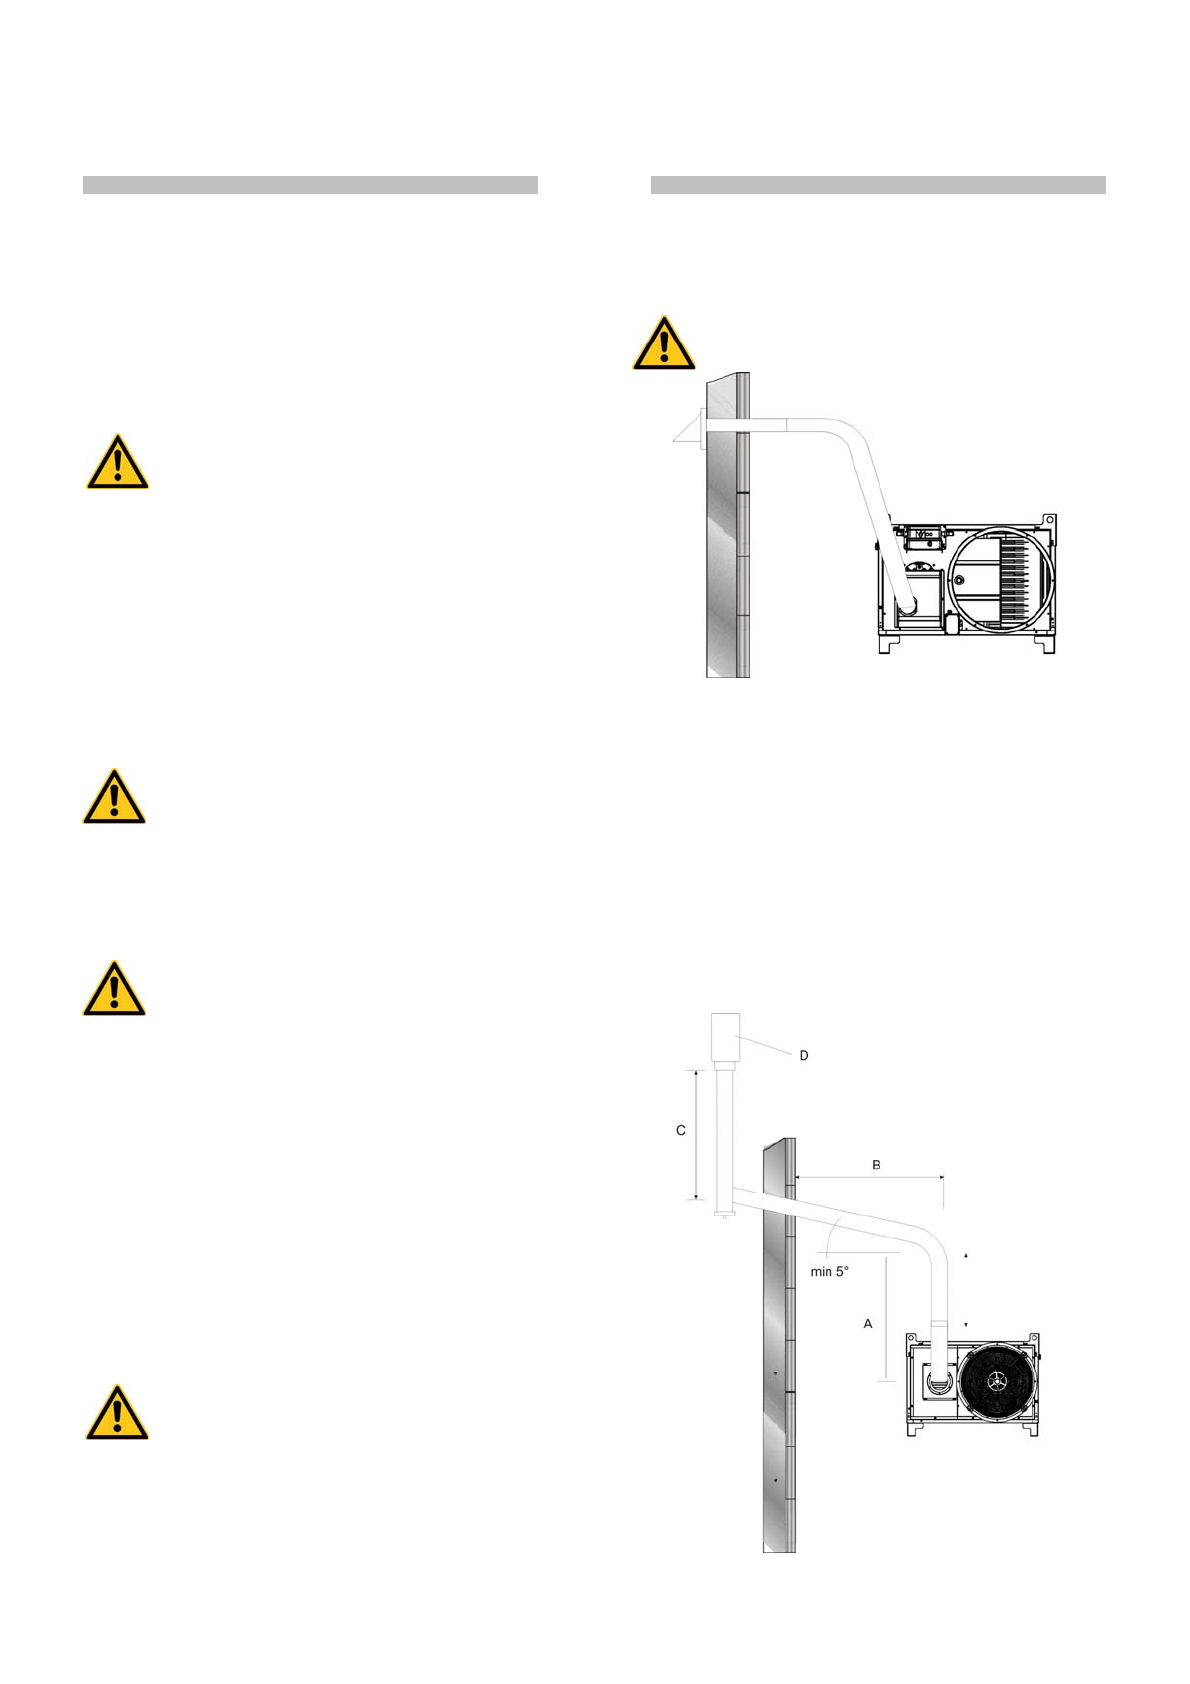
4.6. CONNECTION TO EXHAUST DUCT
Exhaust ducts must be in steel and conform to EN 1443.
Efficient combustion and trouble-free working of the burner depend
on efficient flue draft.
The unit must be connected to the chimney flue in compliance with
current legal regulations and in line with the following guidelines:
• The path of the flue pipe smoke should be as short as possible
and should slant upwards (minimum height 1 m);
• There should be no sharp curves in the pipes, and the diameter of
the pipes must never be reduced;
• there must always be a wind deflector to prevent the entrance of
rain and to prevent smoke from being blocked by the wind;
• flue draft must at least equal the level in the Technical
Specifications.
• every heater must have its own chimney;
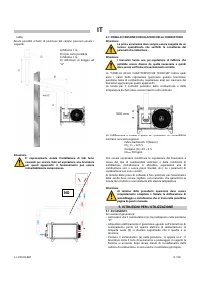
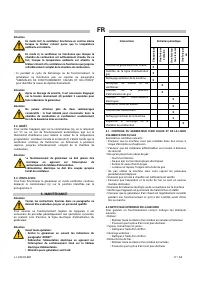
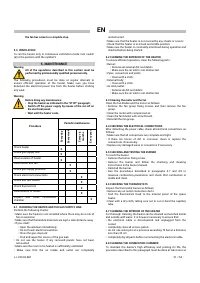
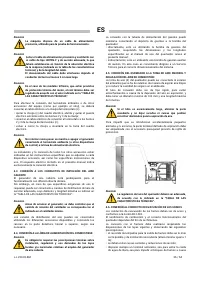
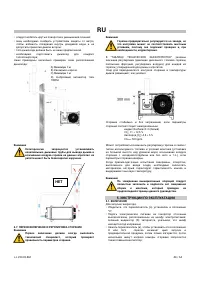
The following diagrams show possible flue positions:
A) Minimum 1 m
B) As short as possible
C) Minimum 1 m
D) Chimney draught H shape


