Материнские платы GIGABYTE GA H67A USB3 B3 rev 1 0 - инструкция пользователя по применению, эксплуатации и установке на русском языке. Мы надеемся, она поможет вам решить возникшие у вас вопросы при эксплуатации техники.
Если остались вопросы, задайте их в комментариях после инструкции.
"Загружаем инструкцию", означает, что нужно подождать пока файл загрузится и можно будет его читать онлайн. Некоторые инструкции очень большие и время их появления зависит от вашей скорости интернета.


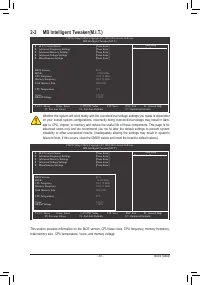
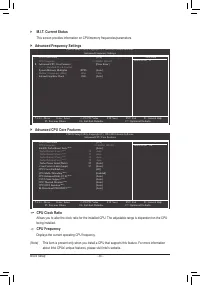
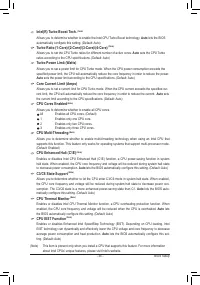
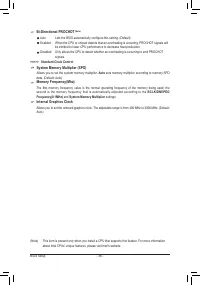
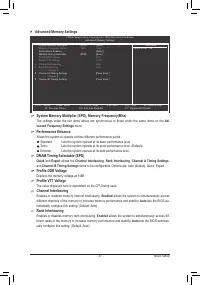
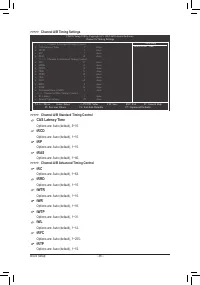
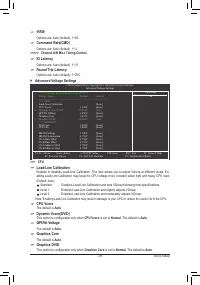
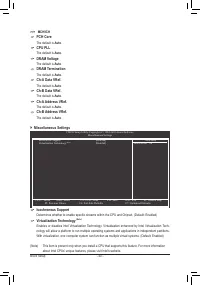
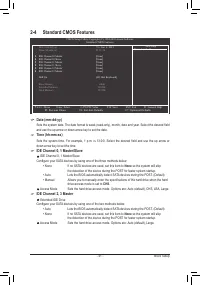


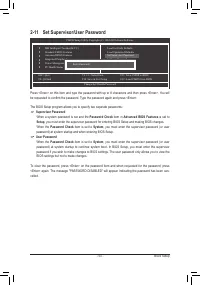
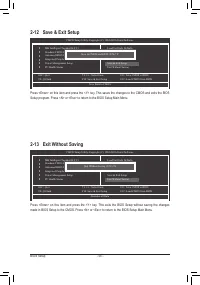


BIOS Setup
- 44 -
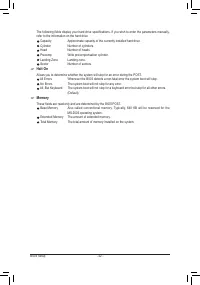
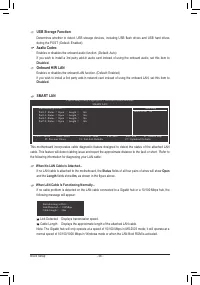
HDD S.M.A.R.T. Capability
Enables or disables the S.M.A.R.T. (Self Monitoring and Reporting Technology) capability of your hard
drive. This feature allows your system to report read/write errors of the hard drive and to issue warnings
when a third party hardware monitor utility is installed. (Default: Disabled)
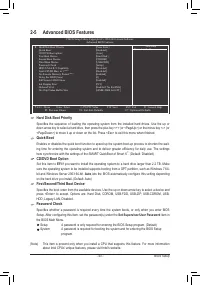
Limit CPUID Max. to 3
(Note)
Allows you to determine whether to limit CPUID maximum value. Set this item to
Disabled
for Windows
XP operating system; set this item to
Enabled
for legacy operating system such as Windows NT4.0.
(Default: Disabled)
No-Execute Memory Protect
(Note)
Enables or disables Intel Execute Disable Bit function. This function may enhance protection for the
computer, reducing exposure to viruses and malicious buffer overflow attacks when working with its sup
-
porting software and system. (Default: Enabled)
Delay For HDD (Secs)
Allows you to set a delay time for the BIOS to initialize the hard drive as the system boots up. The ad-
justable range is from 0 to 15 seconds. (Default: 0)
Full Screen LOGO Show
Allows you to determine whether to display the GIGABYTE Logo at system startup.
Disabled
displays
normal POST message. (Default: Enabled)
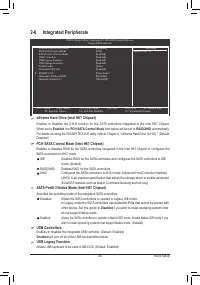
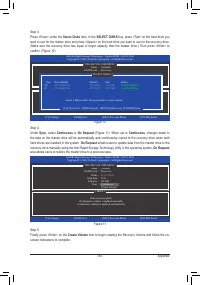
Init Display First
Specifies the first initiation of the monitor display from the installed PCI graphics card, PCI Express
graphics card or the onboard graphics.
PCI
Sets the PCI graphics card as the first display. (Default)
Onboard
Sets the onboard graphics as the first display.
PCIE x16
Sets the PCI Express graphics card on the PCIEX16 slot as the first display.
PCIE x4
Sets the PCI Express graphics card on the PCIEX4 slot as the first display.
Onboard VGA
Enables or disables the onboard graphics function.
Enable If No Ext PEG
Activates the onboard graphics only when no PCI Express graphics card is installed. (Default)
Always Enable
Always activates the onboard graphics, whether or not a PCI Express graphics card is installed. If you
wish to set up a dual view configuration, set this item to Always Enable.
On-Chip Frame Buffer Size
Frame buffer size is the total amount of system memory allocated solely for the onboard graphics con-
troller. MS-DOS, for example, will use only this memory for display. Options are:32MB+2MB for GTT~
480MB+2MB for GTT. (Default: 64MB+2MB for GTT)
(Note) This item is present only when you install a CPU that supports this feature. For more information
about Intel CPUs' unique features, please visit Intel's website.


