Материнские платы GIGABYTE GA 8GEMT4 - инструкция пользователя по применению, эксплуатации и установке на русском языке. Мы надеемся, она поможет вам решить возникшие у вас вопросы при эксплуатации техники.
Если остались вопросы, задайте их в комментариях после инструкции.
"Загружаем инструкцию", означает, что нужно подождать пока файл загрузится и можно будет его читать онлайн. Некоторые инструкции очень большие и время их появления зависит от вашей скорости интернета.


- 4 -
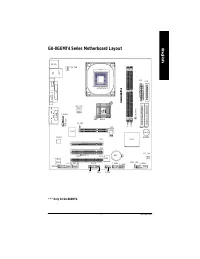
GA-8GEMT4 Series Motherboard
English
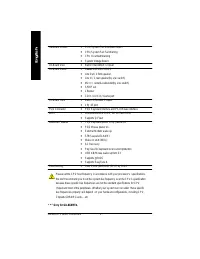
þ
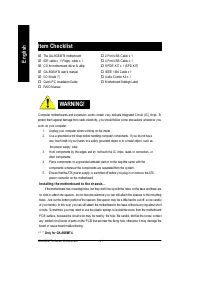
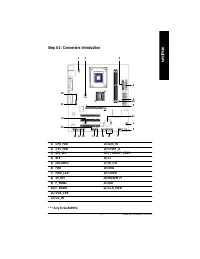
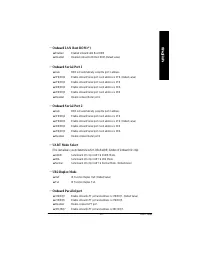
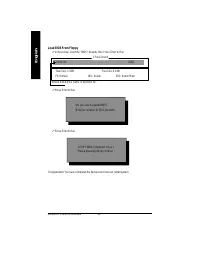
The GA-8GEM T4 motherboard
o
2 Port U SB C able x 1
þ
IDE cable x 1/ Floppy cable x 1
o
4 Port U SB C able x 1
þ
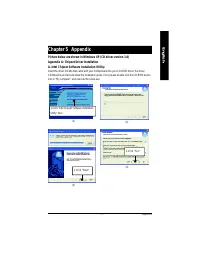
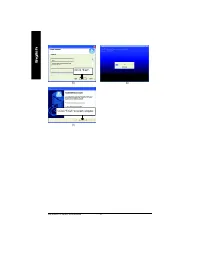
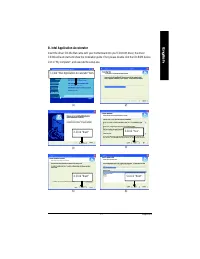
C D for motherboard driv er & utility
o
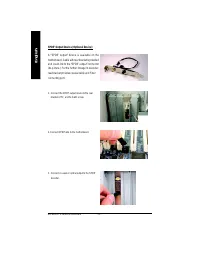
SPDIF-KIT x 1 (SPD-KIT)
þ
GA-8GEM T4 user’s manual
o
IEEE 1394 C able x 1
þ
I/O Shield (*)
o
Audio C ombo Kit x 1
o
Quick PC Installation Guide
o
M otherboard Settings Label
o
RAID M anual
Item Checklist
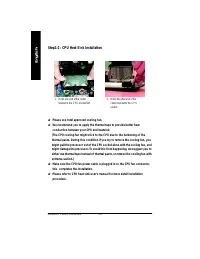
C omputer motherboards and ex pansion cards contain v ery deli cate Integr ated C ircui t (IC ) chi ps. To
protect them against damage from static electricity , y ou should follow some precautions w henev er y ou
w ork on y our computer.
1.
U nplug y our computer w hen w orking on the inside.
2.
U se a grounded w rist strap before handling computer components. If y ou do not hav e
one, touch both of y our hands to a safely grounded object or to a metal object, such as
the pow er supply case.
3.
H old components by the edges and try not touch the IC chips, leads or connectors, or
other components.
4.
Place components on a grounded antistatic pad or on the bag that came w ith the
components w henev er the components are separated from the sy stem.
5.
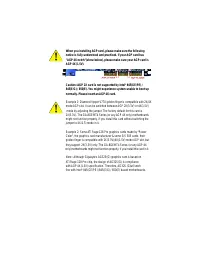
Ensure that the ATX pow er supply is sw itched off before y ou plug in or remov e the ATX
pow er connector on the motherboard.
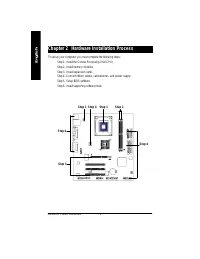
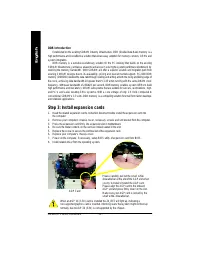
If the motherboard has mounting holes, but they don’t line up w ith the holes on the base and there are
no slots to attach the spacers, do not become alarm ed y ou can still attach the spacers to the mounting
holes. Just cut the bottom portion of the spacers (the spacer may be a little hard to cut off, so be careful
of y our hands). In this w ay y ou can still attach the motherboard to the base without w orry ing about short
circuits. Sometimes y ou may need to use the plastic springs to isolate the screw from the motherboard
PC B surface, because the circuit w ire may be near by the hole. Be careful, don’t let the screw contact
any printed circuit w rite or parts on the PC B that are near the fix ing hole, otherw ise it may damage the
board or cause board malfunctioning.
I nstalling the motherboard to the chassis…
WARNING!
“ * ” Only for GA-8GEMT 4.


