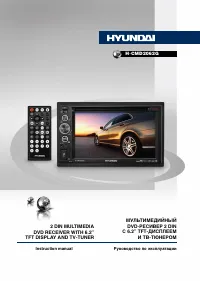
Магнитолы Hyundai Electronics H-CMD2062G - инструкция пользователя по применению, эксплуатации и установке на русском языке. Мы надеемся, она поможет вам решить возникшие у вас вопросы при эксплуатации техники.
Если остались вопросы, задайте их в комментариях после инструкции.
"Загружаем инструкцию", означает, что нужно подождать пока файл загрузится и можно будет его читать онлайн. Некоторые инструкции очень большие и время их появления зависит от вашей скорости интернета.


15
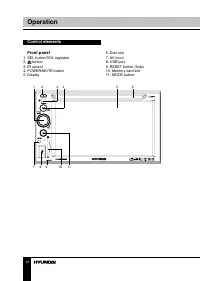
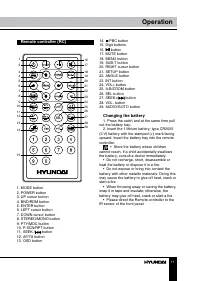
Operation
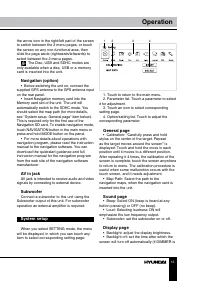
buttons on the RC to select the date.
Touch left upper corner to exit calendar.
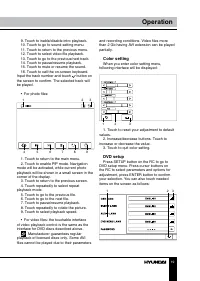
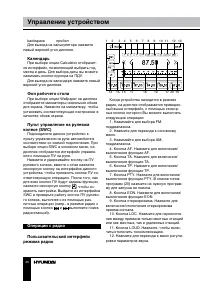
Wallpaper
After you select this item, several beckground
pictures will be show. Touch any of them to
select it as the display wallpaper image.
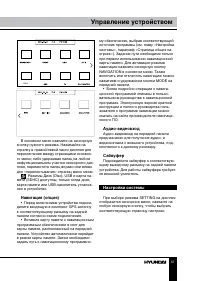
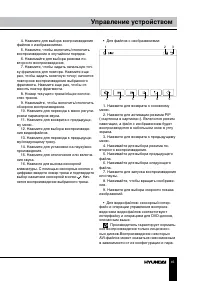
SWC
Connect this unit to your steering wheel
controller according to the Connection
diagram. Touch SWC icon in the main menu;
SWC interface will be displayed.
While holding down the button on the
steering wheel together with the corresponding
button on the SWC interface, each completed
setting will be indicated. After all the buttons
on the steering wheel and the corresponding
button on the SWC interface completed, then
press button to save the settings. Exit the
SWC interface and check each operation from
the steering wheel buttons (e.g., in radio mode,
press
or
buttons to search station
backward or forward.
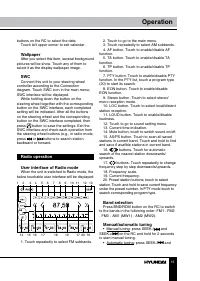
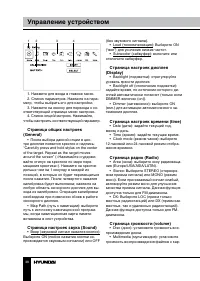
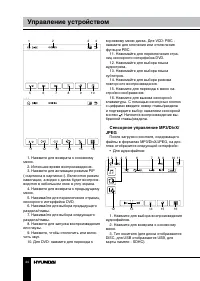
Radio operation
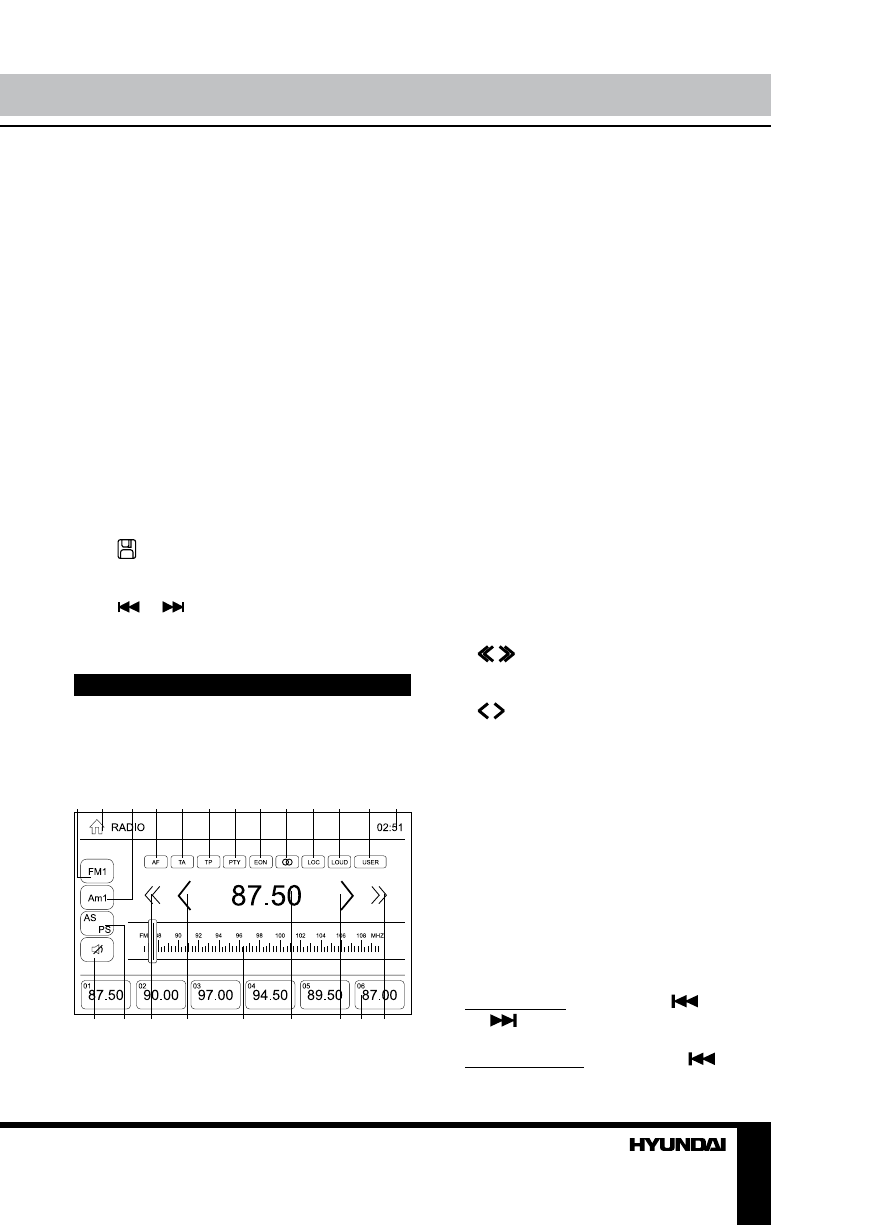
User interface of Radio mode
When the unit is switched to Radio mode, the
below touchable user interface will be displayed:
1
2
3 4
5
6
7
8
9 10 11 12 13
14 15
18
16
17
17
16
19
20
1. Touch repeatedly to select FM subbands.
2. Touch to go to the main menu.
3. Touch repeatedly to select AM subbands.
4. AF button. Touch to enable/disable AF
function.
5. TA button. Touch to enable/disable TA
function.
6. TP button. Touch to enable/disable TP
function.
7. PTY button. Touch to enable/disable PTY
function. In the PTY list, touch a program type
(20) to start its search.
8. EON button. Touch to enable/disable
EON function.
9. Stereo button. Touch to select stereo/
mono reception mode.
10. LOC button. Touch to select local/distant
station reception.
11. LOUD button. Touch to enable/disable
loudness.
12. Touch to go to sound setting menu.
13. Current time indication.
14. Mute button; touch to switch sound on/off.
15. AS/PS button. Touch to scan all saved
stations in current band. Touch and hold to find
and save 6 availble stations in current band.
16. / buttons. Touch for automatic
search of the nearest station downwards/
upwards.
17. / buttons. Touch repeatedly to change
frequency step by step downwards/upwards.
18. Frequency scale.
19. Current frequency.
20. Preset station buttons; touch to select
station. Touch and hold to save current frequency
under the preset number. In PTY mode touch to
search corresponding program type.
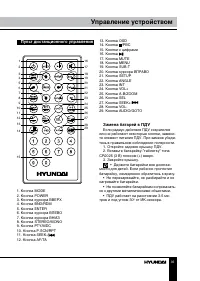
Band selection
Press BND/RDM button on the RC to switch
to the bands in the following order: FM1 - FM2
- FM3 - AM1 (MW1) - AM2 (MW2).
Manual/automatic tuning
• Manual tuning: press SEEK-/
and
SEEK+/
on the RC and hold for 2 seconds
to start manual tuning.
• Automatic tuning: press SEEK-/
and
Содержание
- 25 Уважаемый покупатель!; Установка/Подключение
- 26 параметрам; Общая информация; Обращение с компакт-дисками
- 27 Утилизация изделия
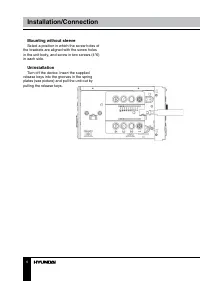
- 28 • Убедитесь, что источник питания и
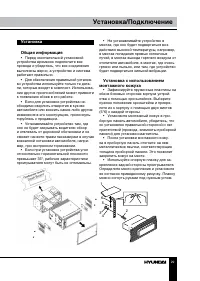
- 29 Установка
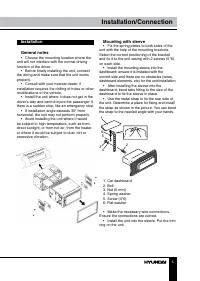
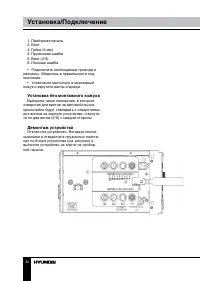
- 30 • Подключите необходимые провода и; Установка без монтажного кожуха; Выберите такое положение, в котором; Демонтаж устройства
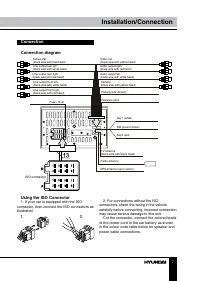
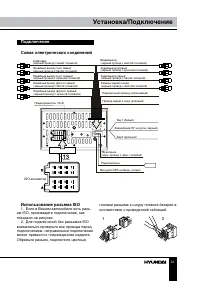
- 31 Подключение; Для подключений без разъемов ISO
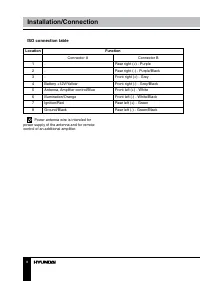
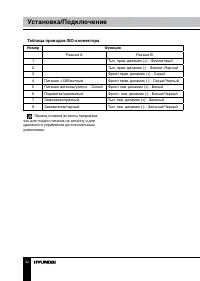
- 32 Таблица проводов ISO-коннектора; Номер; Разъем A
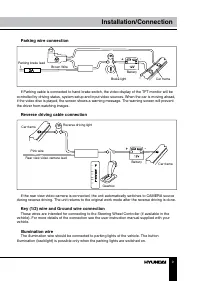
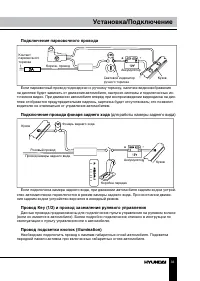
- 33 Подключение парковочного провода
- 34 Элементы управления
- 35 Пульт дистанционного управления
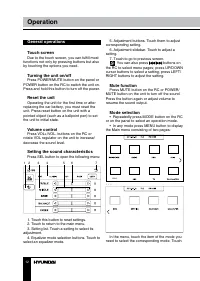
- 36 Основные операции
- 37 Сабвуфер
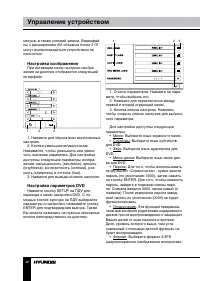
- 38 ответствующей странице меню настроек.; Страница общих настроек; • После выбора данной опции в цен-; Страница настроек дисплея; уровень яркости дисплея.
- 39 Страница настроек RDS
- 40 Календарь
- 42 Стерео/моно прием сигнала
- 43 разъемам
- 44 JPEG
- 46 Настройка изображения
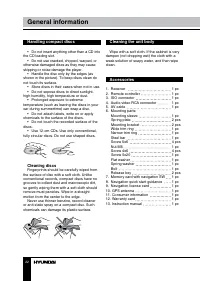
- 48 Комплект поставки; Управление устройством/Общая информация; Воспроизведение по заданным
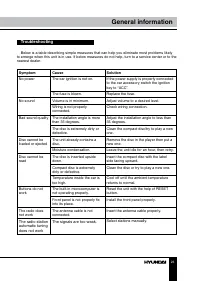
- 50 Руководство по устранению; Неисправность
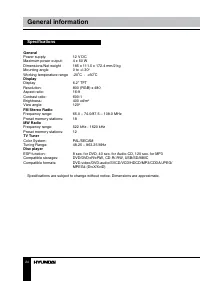
- 51 Технические характеристики; Общие

