Котел Ferroli Divatop H C - инструкция пользователя по применению, эксплуатации и установке на русском языке. Мы надеемся, она поможет вам решить возникшие у вас вопросы при эксплуатации техники.
Если остались вопросы, задайте их в комментариях после инструкции.
"Загружаем инструкцию", означает, что нужно подождать пока файл загрузится и можно будет его читать онлайн. Некоторые инструкции очень большие и время их появления зависит от вашей скорости интернета.
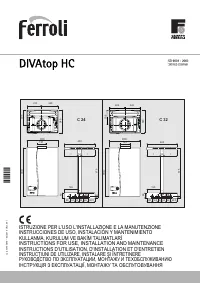
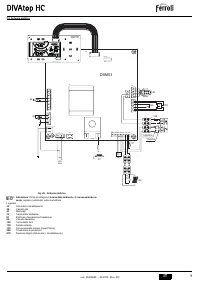


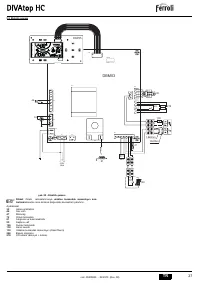


DIVAtop HC
30
EN
cod. 3540S840 - 02/2010 (Rev. 00)
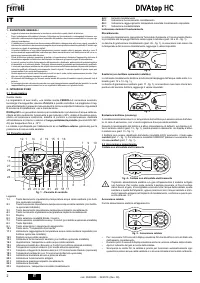
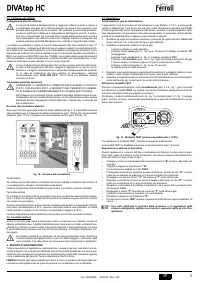
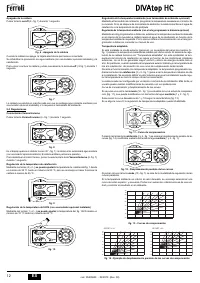
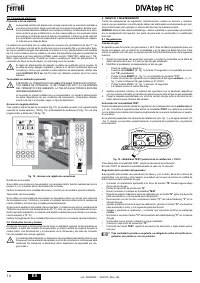
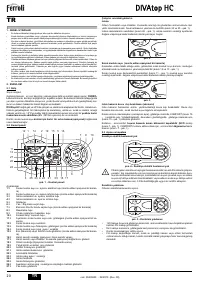
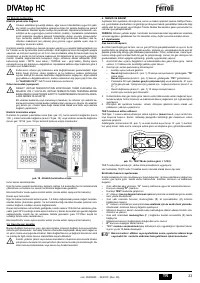
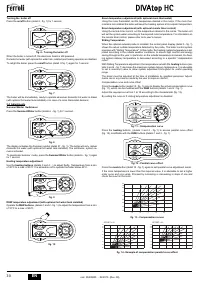
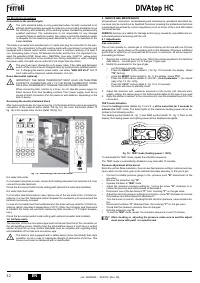
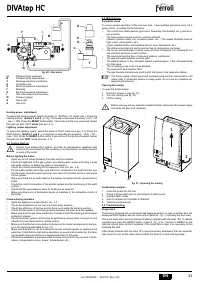
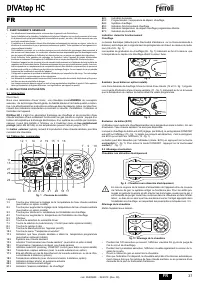
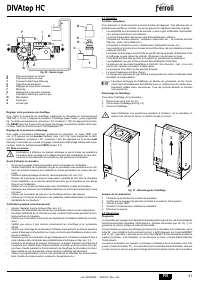
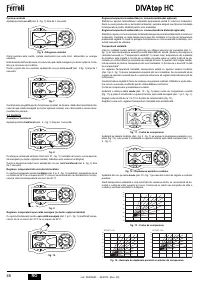
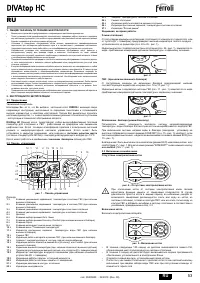
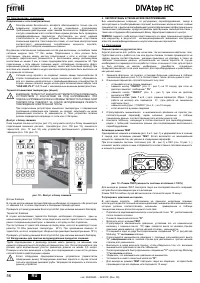
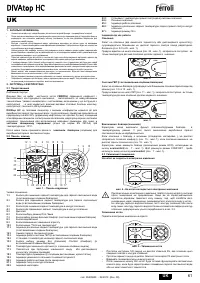
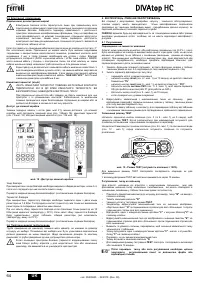
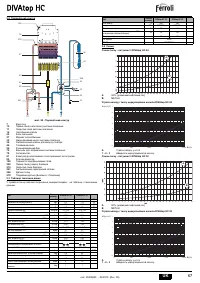
Turning the boiler off
Press the
on/off
button (detail 9 - fig. 1) for 1 second.
fig. 6 - Turning the boiler off
When the boiler is turned off, the electronic board is still powered.
Domestic hot water (with optional hot water tank installed) and heating operation are disabled.
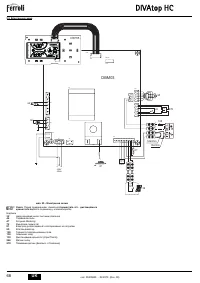
To relight the boiler, press the
on/off
button (detail 9 fig. 1) again for 1 second.
fig. 7
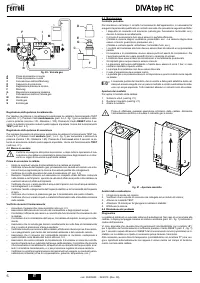
The boiler will be immediately ready to operate whenever domestic hot water is drawn
(with optional hot water tank installed) or in case of a room thermostat demand.
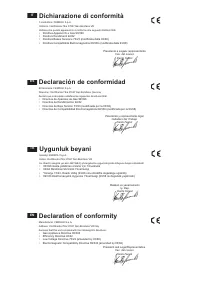
2.4 Adjustments
Summer/Winter Switchover
Press the
Summer/Winter
button (detail 6 - fig. 1) for 1 second.
fig. 8
The display activates the Summer symbol (detail 27 - fig. 1): The boiler will only deliver
domestic hot water (with optional hot water tank installed). The antifreeze system re-
mains activated.
To deactivate Summer mode, press the
Summer/Winter
button (detail 6 - fig. 1) again
for 1 second.
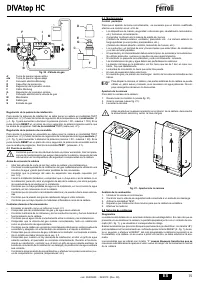
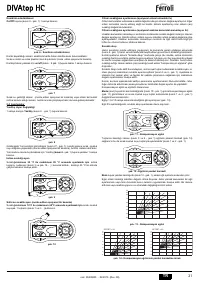
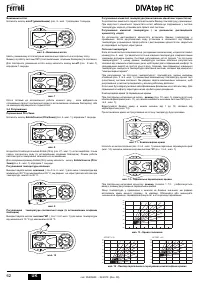
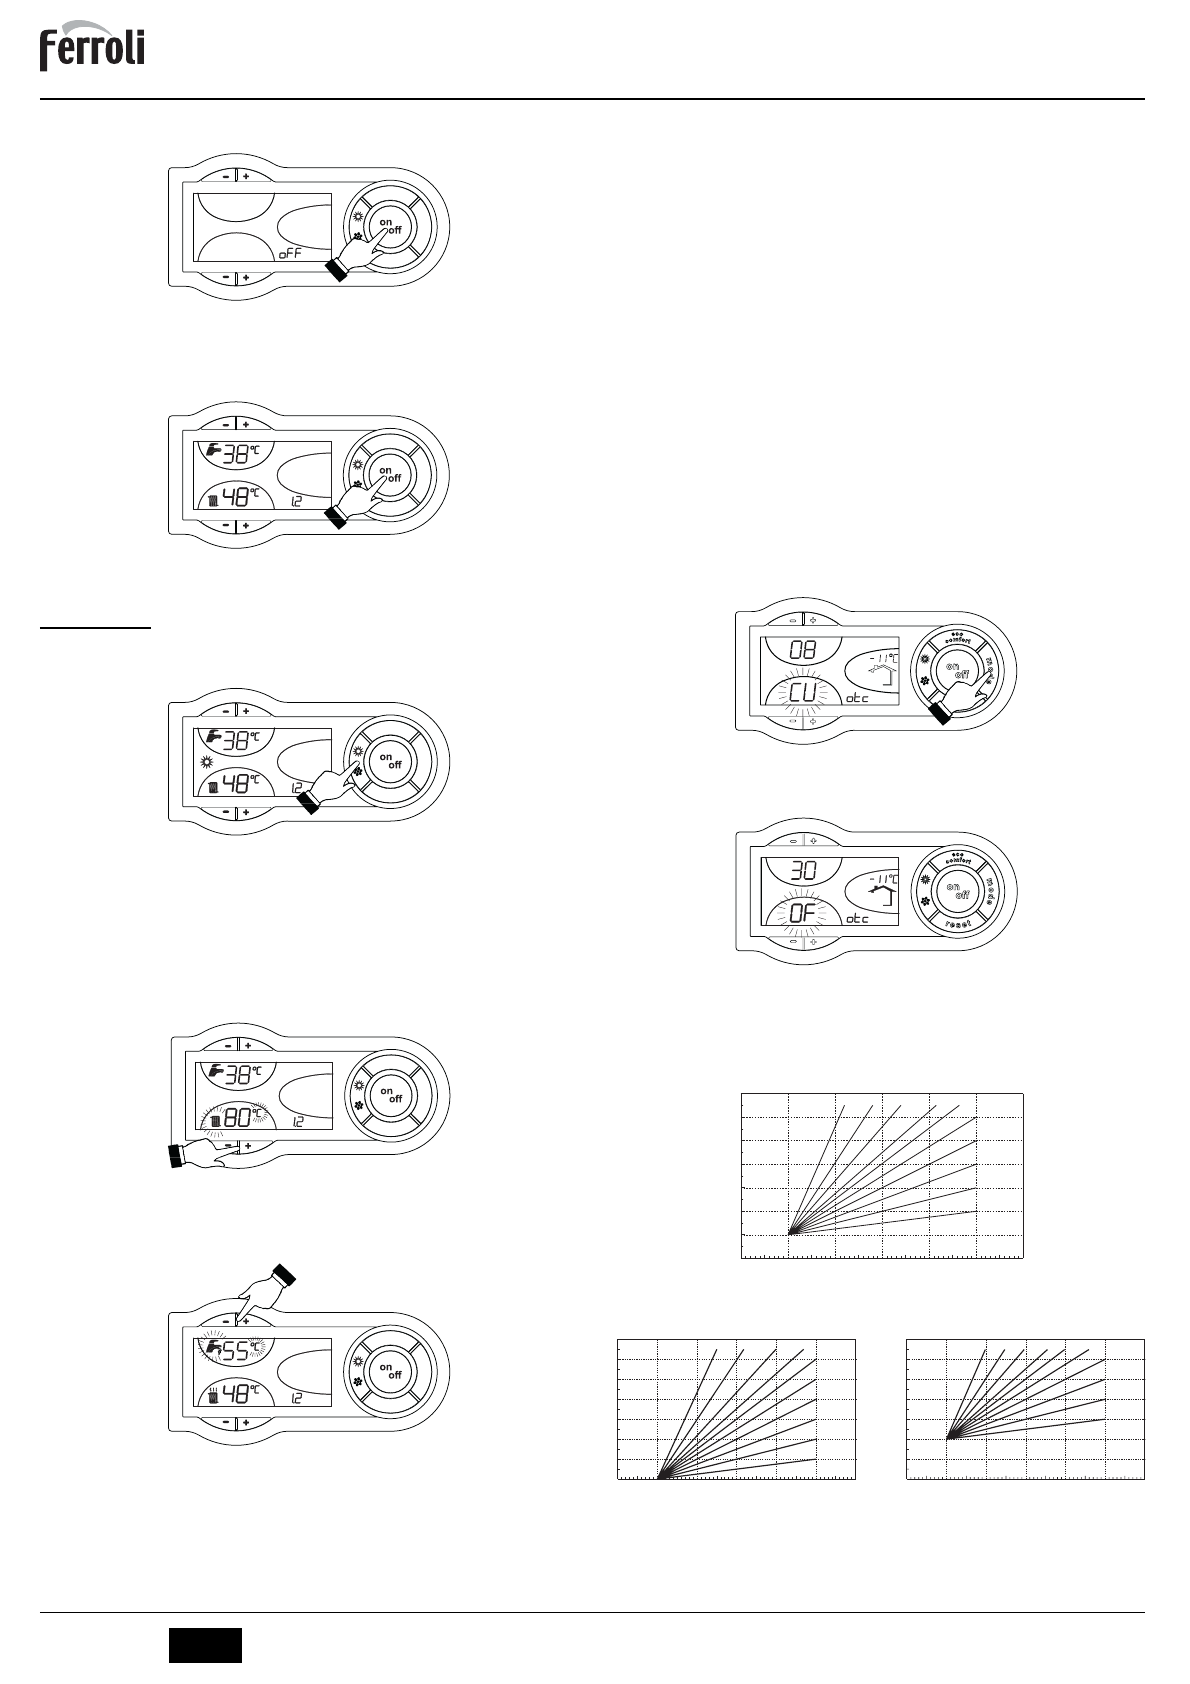
Heating temperature adjustment
Use the
heating buttons
(details 3 and 4 - ) to adjust thefig. 1temperature from a min.
of 30°C to a max. of 85°C; it is advisable not to operate the boiler below 45°C.
fig. 9
DHW temperature adjustment (with optional hot water tank installed)
Operate the
DHW buttons
(details 1 and 2 - fig. 1) to adjust the temperature from a min.
of 10°C to a max. of 65°C.
fig. 10
Room temperature adjustment (with optional room thermostat)
Using the room thermostat, set the temperature desired in the rooms. If the room ther-
mostat is not installed the boiler will keep the heating system at its setpoint temperature.
Room temperature adjustment (with optional remote timer control)
Using the remote timer control, set the temperature desired in the rooms. The boiler unit
will set the system water according to the required room temperature. For information on
the remote timer control, please refer to its user's manual.
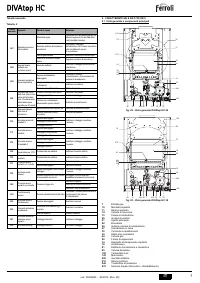
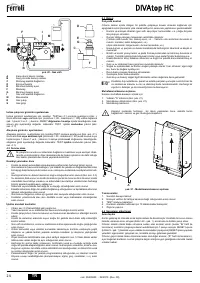
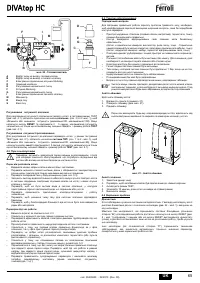
Sliding Temperature
When the optional external probe is installed, the control panel display (detail 5 - fig. 1)
shows the actual outside temperature detected by the probe. The boiler control system
operates with "Sliding Temperature". In this mode, the heating system temperature is ad-
justed according to the outside weather conditions, to ensure high comfort and energy
saving throughout the year. In particular, as the outside temperature increases, the heat-
ing system delivery temperature is decreased according to a specific "compensation
curve".
With Sliding Temperature adjustment, the temperature set with the
heating
buttons (de-
tails 3 and 4 - fig. 1) becomes the maximum system delivery temperature. It is advisable
to set a maximum value to allow system adjustment throughout its useful operating
range.
The boiler must be adjusted at the time of installation by qualified personnel. Adjust-
ments can in any case be made by the user to improve comfort.
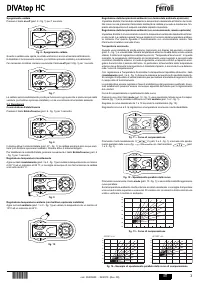
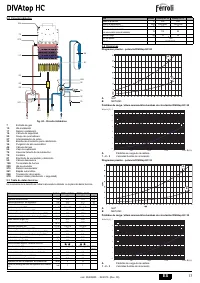
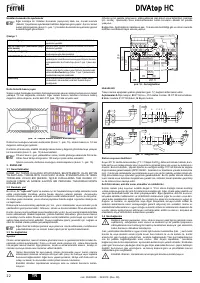
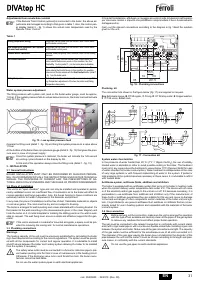
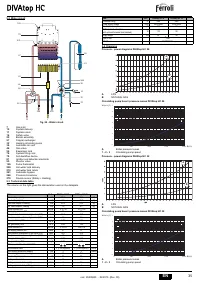
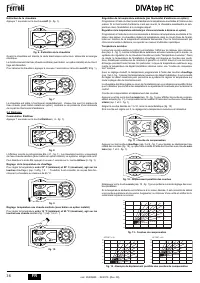
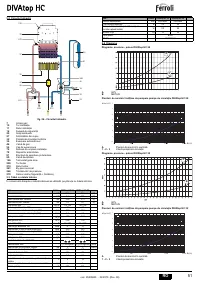
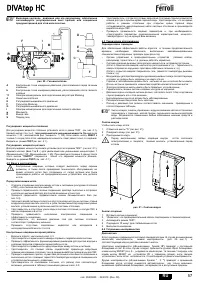
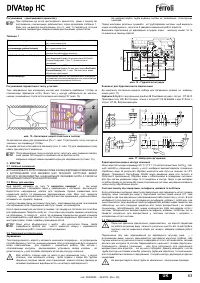
Compensation curve and curve offset
Press the
mode
button (detail 10 - fig. 1) once to display the actual compensation curve
(fig. 11), which can be modified with the
DHW
buttons (details 1 and 2 - fig. 1).
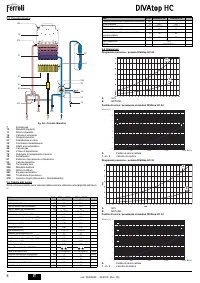
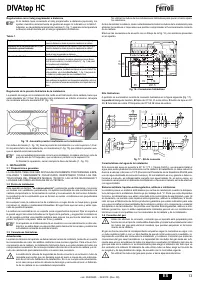
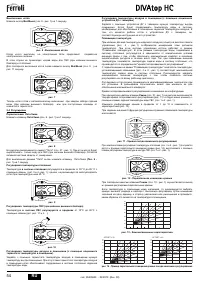
Adjust the required curve from 1 to 10 according to the characteristic (fig. 13).
By setting the curve to 0, sliding temperature adjustment is disabled.
fig. 11 - Compensation curve
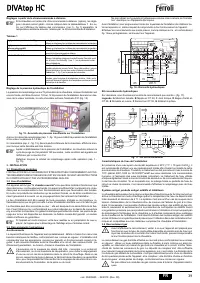
Press the
heating
buttons (details 3 and 4 - fig. 1) to access parallel curve offset
(fig. 14), modifiable with the
DHW
buttons (details 1 and 2 - fig. 1).
fig. 12 - Parallel curve offset
Press the
mode
button (detail 10 - fig. 1) again to exit parallel curve adjustment mode.
If the room temperature is lower than the required value, it is advisable to set a higher
order curve and vice versa. Proceed by increasing or decreasing in steps of one and
check the result in the room.
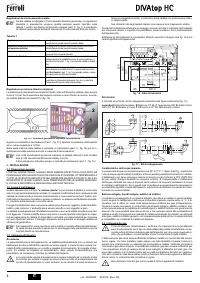
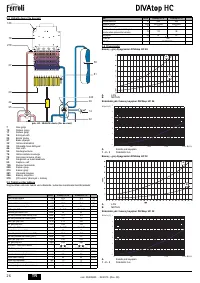
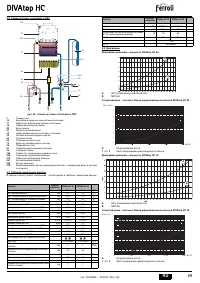
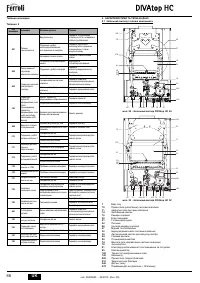
fig. 13 - Compensation curves
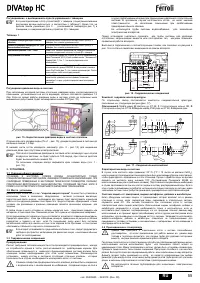
fig. 14 - Example of compensation parallel curve offset
eco
comfort
m
o
de
r e s e t
eco
comfort
m
o
de
r e s e t
eco
bar
eco
co mfort
m
o
de
r e s e t
eco
bar
eco
comfort
m
o
de
r e s e t
eco
bar
eco
comfort
m
od
e
r e s e t
eco
bar
20
30
40
50
60
70
80
90
85
20
10
0
-10
-20
1
2
3
4
5
6
8
9
10
7
20
30
40
50
60
70
80
90
85
20
10
0
-10
-20
1
2
3
4
5
6
8
9
10
7
20
10
0
-10
-20
20
30
40
50
60
70
80
90
85
1
2
3
4
5
6
8
9
10
7
OFFSET = 20
OFFSET = 40

