
Холодильник Liebherr CBNes 3957 Premium - инструкция пользователя по применению, эксплуатации и установке на русском языке. Мы надеемся, она поможет вам решить возникшие у вас вопросы при эксплуатации техники.
Если остались вопросы, задайте их в комментариях после инструкции.
"Загружаем инструкцию", означает, что нужно подождать пока файл загрузится и можно будет его читать онлайн. Некоторые инструкции очень большие и время их появления зависит от вашей скорости интернета.


u
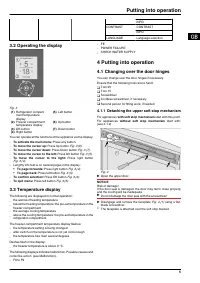
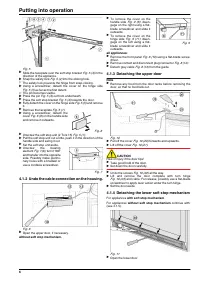
Insert middle bearing pin
Fig. 13 (41) through middle turn
hinge
Fig. 13 (42) into the lower door.
with soft stop mechanism.
u
Attach the washer
Fig. 13 (44) to the middle bearing pin
Fig. 13 (41).
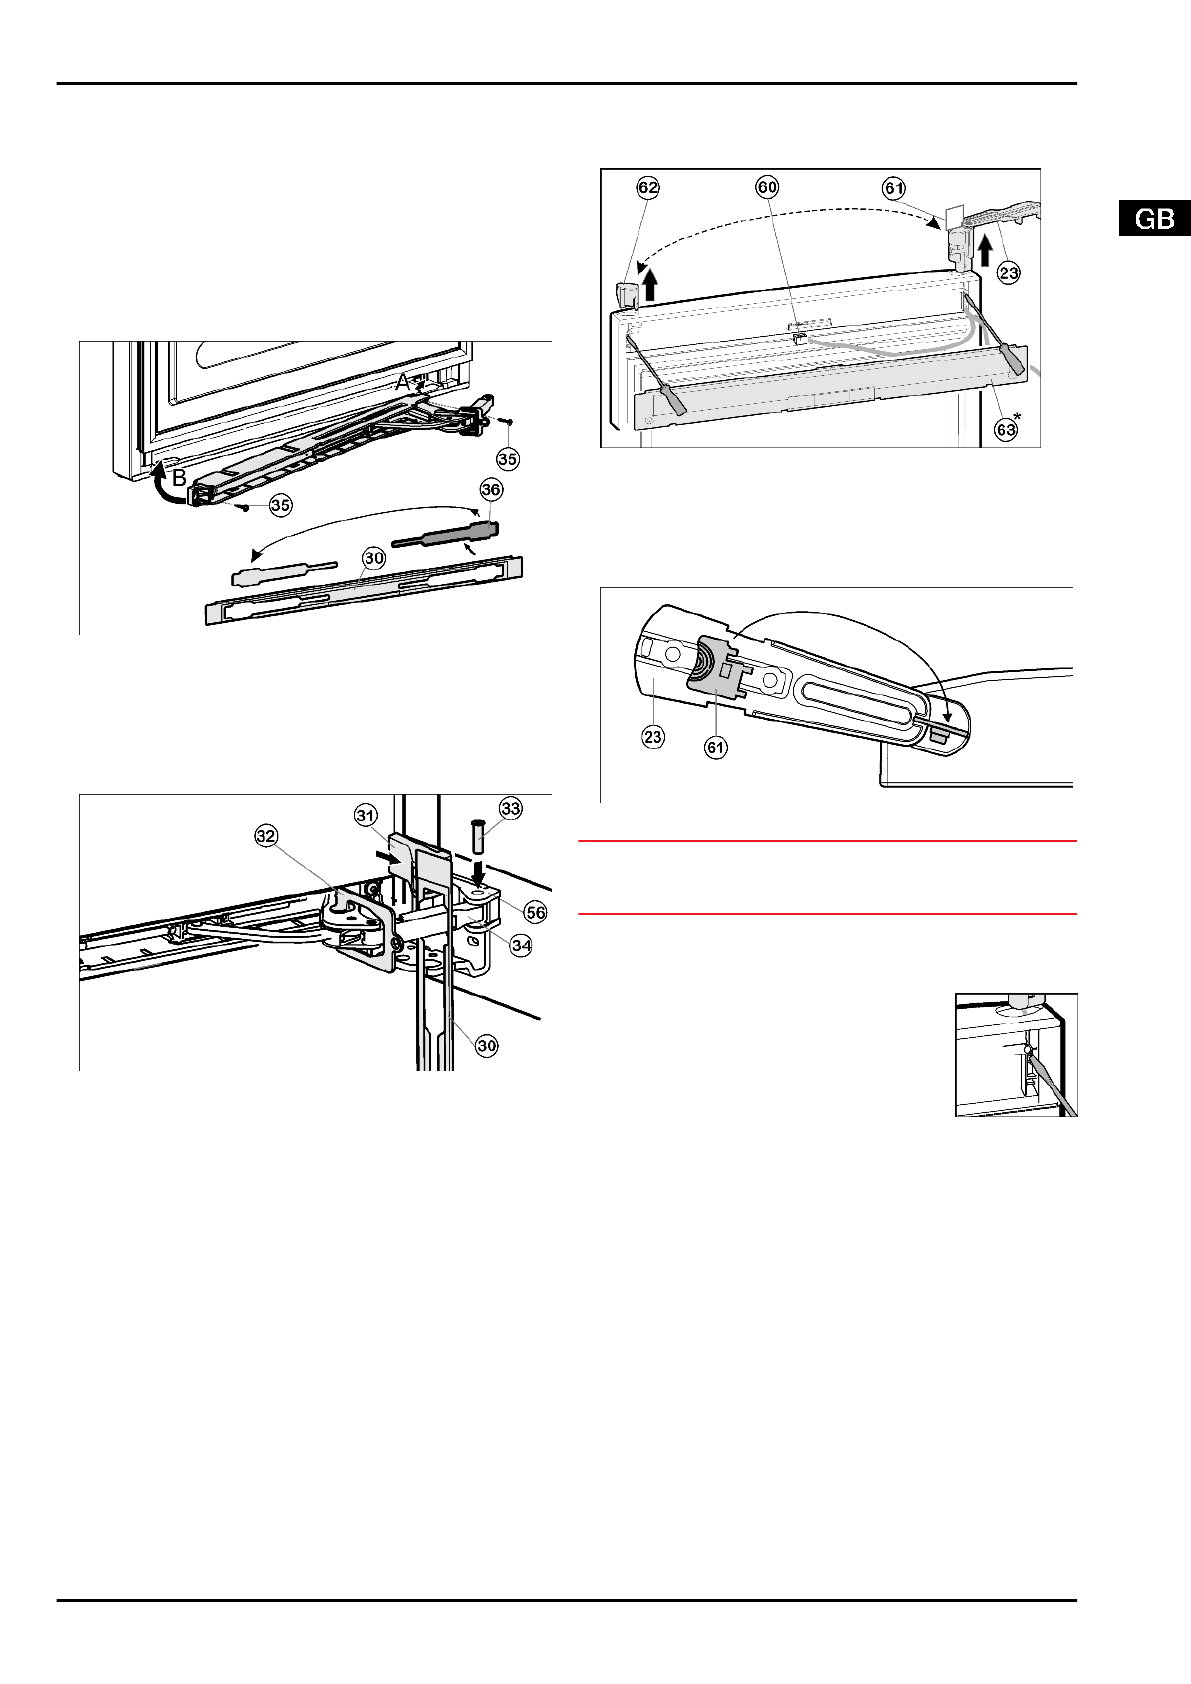
4.1.11 Fitting the lower soft stop mechanism
For appliances with soft stop mechanism.
For appliances without soft stop mechanism continue with:
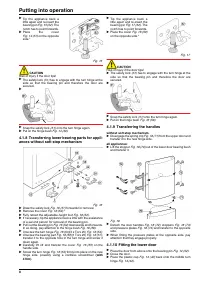
Fig. 19
u
Remove the cover
Fig. 19 (36) from the faceplate
Fig. 19 (30) and re-insert it at the other side.
u
Engage the soft stop unit with the joint on the hinge side (A)
and swivel into place (B).
w
The screw holes at the left and right have to register.
u
Screw down the soft stop unit (2 Torx 15)
Fig. 19 (35).
Fig. 20
u
Attach the faceplate
Fig. 20 (30) to the soft stop bracket so
that the catches face forwards and the front faces the appli-
ance.
u
Draw the soft stop bracket
Fig. 20 (34) towards the bearing
part
Fig. 20 (56) and insert the pin Fig. 20 (33) from above so
that the square sits in the recess.
u
Attach and engage the cover
Fig. 20 (31).
w
Pay attention that the cover fits properly so that the door closes
properly and the pin is secured.
u
Twist the safety lock
Fig. 20 (32) for removal.
u
Snap the faceplate
Fig. 20 (30) onto the door.
u
Close the lower door.
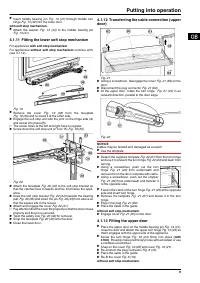
4.1.12 Transferring the cable connection (upper
door)
Fig. 21
u
Using a screwdriver, disengage the cover
Fig. 21 (63) on the
door.
u
Disconnect the plug connector
Fig. 21 (60).
u
At the upper door, rotate the turn hinge
Fig. 21 (23) in an
outward direction, parallel to the door edge.
Fig. 22
NOTICE
Cables may be twisted and damaged as a result!
u
Use the template.
u
Detach the supplied template
Fig. 22 (61) from the turn hinge
and use it to prevent the turn hinge
Fig. 22 (23) and bush from
turning.
u
Using a screwdriver, push out the turn
hinge
Fig. 21 (23) from underneath and
remove it from the door complete with cable.
u
Using a screwdriver, push out the stopper
Fig. 21 (62) from underneath and transfer it
to the opposite side.
u
Feed in the cable of the turn hinge
Fig. 21 (23) at the opposite
side and insert turn hinge.
u
Remove the template
Fig. 21 (61) and fasten it in the turn
hinge.
u
Plug in the plug
Fig. 21 (60).
u
Place the cable in the guide.
without soft stop mechanism.
u
Engage cover
Fig. 21 (63) on the door.
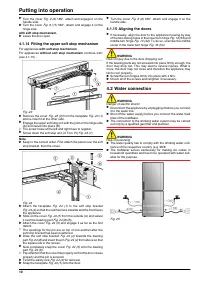
4.1.13 Fitting the upper door
u
Place the upper door on the middle bearing pin
Fig. 13 (41),
close the door and attach the upper turn hinge
Fig. 10 (23) so
that it engages with the upper side of the appliance.
u
Screw the turn hinge
Fig. 10 (23) firmly into place (with
4 Nm). Possibly make preliminary holes with a bradawl or use
a cordless screwdriver.
u
Snap on the cover
Fig. 10 (20) and cover Fig. 10 (21).
u
Re-connect the plug connector
Fig. 8 (12).
u
Place the cable in the guide.
u
Re-fit the cover
Fig. 8 (10).
without soft stop mechanism.
Putting into operation
9
Характеристики

Остались вопросы?Не нашли свой ответ в руководстве или возникли другие проблемы? Задайте свой вопрос в форме ниже с подробным описанием вашей ситуации, чтобы другие люди и специалисты смогли дать на него ответ. Если вы знаете как решить проблему другого человека, пожалуйста, подскажите ему :)


