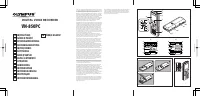
Диктофоны Olympus VN-850PC - инструкция пользователя по применению, эксплуатации и установке на русском языке. Мы надеемся, она поможет вам решить возникшие у вас вопросы при эксплуатации техники.
Если остались вопросы, задайте их в комментариях после инструкции.
"Загружаем инструкцию", означает, что нужно подождать пока файл загрузится и можно будет его читать онлайн. Некоторые инструкции очень большие и время их появления зависит от вашей скорости интернета.


7
EN
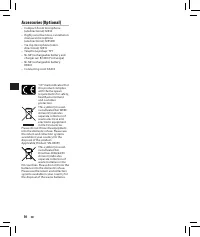
• Do not use the batteries if you
i nd something wrong with them
such as leakage, color change or
deformity.
• Unplug the charger if the charging
is still incomplete after the
specii ed time it should take.
• Should any batteries liquid get on
skin or clothing, promptly wash it
of with clean water.
• Keep batteries away from i re.
f
Caution:
• Do not subject batteries to strong
shocks.
• When using rechargeable batteries
that have not been used for a
while, be sure to recharge them
before use.
• Rechargeable batteries have
limited lifetime. When the
operating time becomes shorter
even if the rechargeable battery is
fully charged under the specii ed
condition, replace it with a new
one.
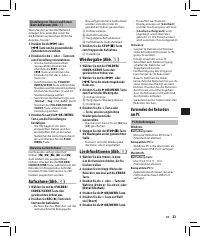
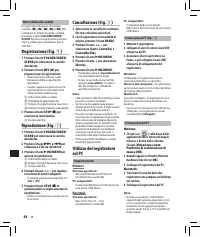
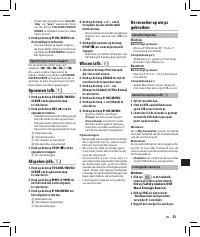
Getting started
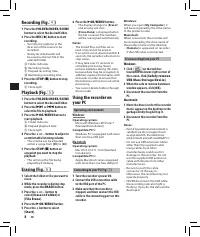
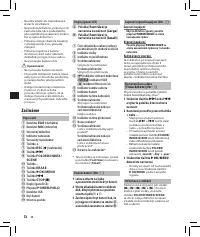
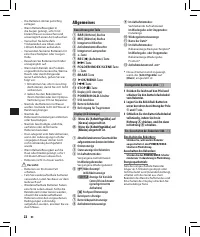
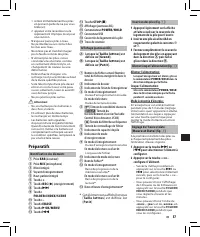
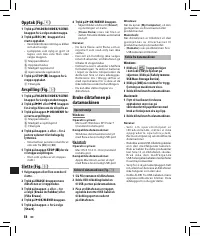
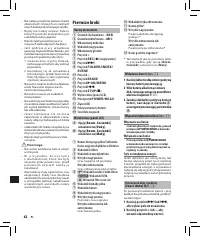
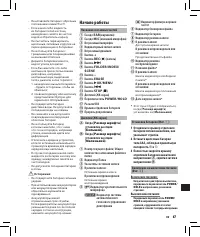
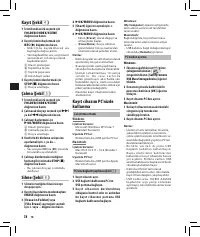
Identification of parts
1
EAR
(Earphone) jack
2
MIC
(Microphone) jack
3
Built-in microphone
4
Recording indicator light
5
Built-in speaker
6
+
button
7
REC
(
s
) (Record) button
8
9
button
9
FOLDER/INDEX/SCENE
button
0
–
button
!
ERASE
button
@
`
OK/MENU
button
#
0
button
$
STOP
(
4
) button
%
Display (LCD panel)
^
POWER/HOLD
switch
&
USB connector
*
Battery cover
(
Strap hole
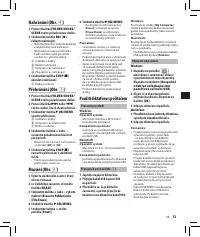
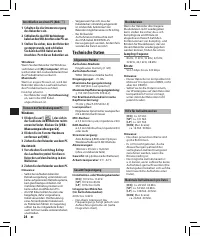
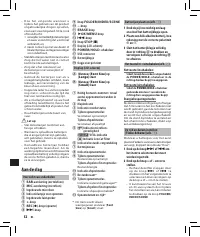
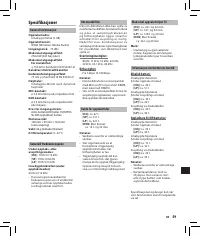
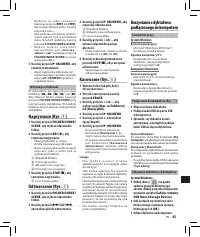
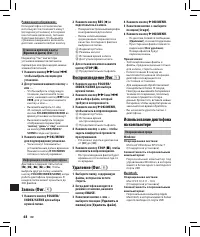
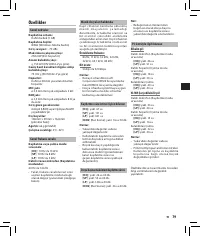
Display (LCD panel)
A
: When the [
Font Size
] is set to
[
Large
]
B
: When the [
Font Size
] is set to
[
Small
]
1
Current file number/ Total number
of recorded files in the folder
2
Folder indicator
3
Recorder status indicator
4
During recording mode:
Elapsed recording time
During playback mode:
Elapsed playback time
5
[
?
] Microphone Sensitivity
indicator
[
!
] VCVA indicator
[
0
] Low Cut Filter indicator
6
File lock indicator
7
Battery indicator
8
Recording mode indicator
9
During recording mode:
Remaining recording time
During playback or stop mode:
File length
0
Playback mode indicator
!
File name
*
@
During recording mode:
Remaining memory bar
indicator
*
During playback or stop mode:
Playback position bar indicator
*
#
Recording date and time
*
*
This item will be displayed when
the [
Font Size
] is set to [
Small
]
only.
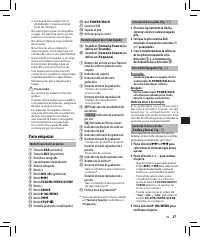
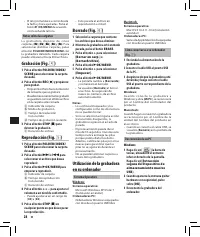
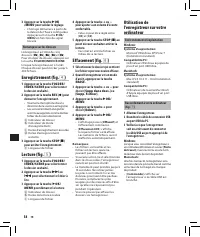
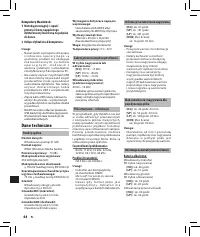
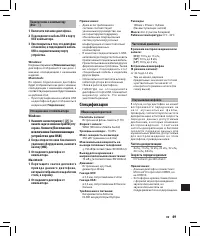
Inserting batteries (Fig.
1
)
1
Lightly press down on the arrow
and slide the battery cover open.
2
Insert size-AAA alkaline battery,
observing the correct
=
and
-
polarities.
3
Close the battery cover completely
by pressing to the direction
A
,
then sliding to the direction
B
.
Turning on/off the power (Fig.
2
)
Turning on the power:
While the recorder is turned off, slide the
POWER /HOLD
switch in the direction
indicated by the arrow.
Turning off the power:
Slide the
POWER /HOLD
switch in the
direction indicated by the arrow for 1
second or longer.
Power save mode:
If the recorder is stopped/not used
for over 5 minutes after it is turned
on, it goes into standby (power-save)
mode, and the display shuts off. To
exit standby mode and turn on the
display, press any button.
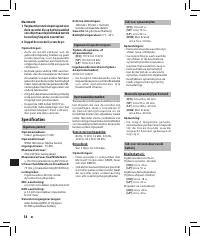
Setting time and date
[
Time & Date
] (Fig.
3
)
W h e n yo u i ns t a l l b at te r i e s f o r th e
f irst time or each time you replace
the bat teries, the “Hour ” indication
will flash.
1
Press the
9
or
0
button to
select the item to set.
2
Press the + or − button to set.
• Follow the same steps by
pressing the
9
or
0
button
to select the next item, and press
the
+
or
−
button to set.
• You can select between 12 and
24 hours display by pressing the
FOLDER/INDEX/SCENE
button
while setting the hour and
minute.
• You can select the order of the
“
month
”, “
day
” and “
year
” by
pressing the
FOLDER/INDEX/
SCENE
button while setting
them.
3
Press the
`
OK /MENU
button to
complete the setting.
• The clock will start from the
set date and time. Press the
`
OK/MENU
button according to
the time signal.
Notes on the Folders
The recorder provides five folders,
[
F
], [
G
], [
H
], [
I
] and [
W
]. To
change the folder selection, press
the
FOLDER/INDEX/SCENE
button
while the recorder is stopped. Each
folder can store up to 200 files.

