
Варочная панель De Dietrich DTG 701 X - инструкция пользователя по применению, эксплуатации и установке на русском языке. Мы надеемся, она поможет вам решить возникшие у вас вопросы при эксплуатации техники.
Если остались вопросы, задайте их в комментариях после инструкции.
"Загружаем инструкцию", означает, что нужно подождать пока файл загрузится и можно будет его читать онлайн. Некоторые инструкции очень большие и время их появления зависит от вашей скорости интернета.


39
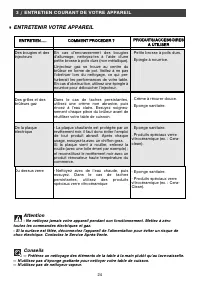
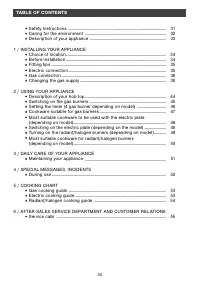
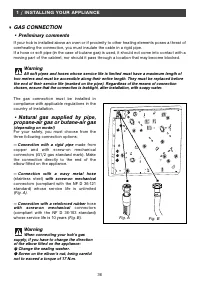
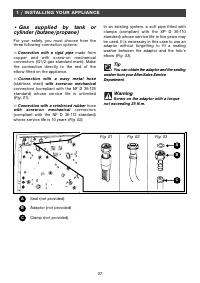
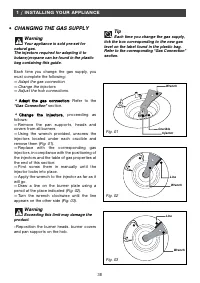
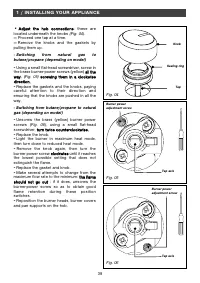
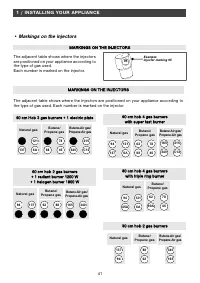
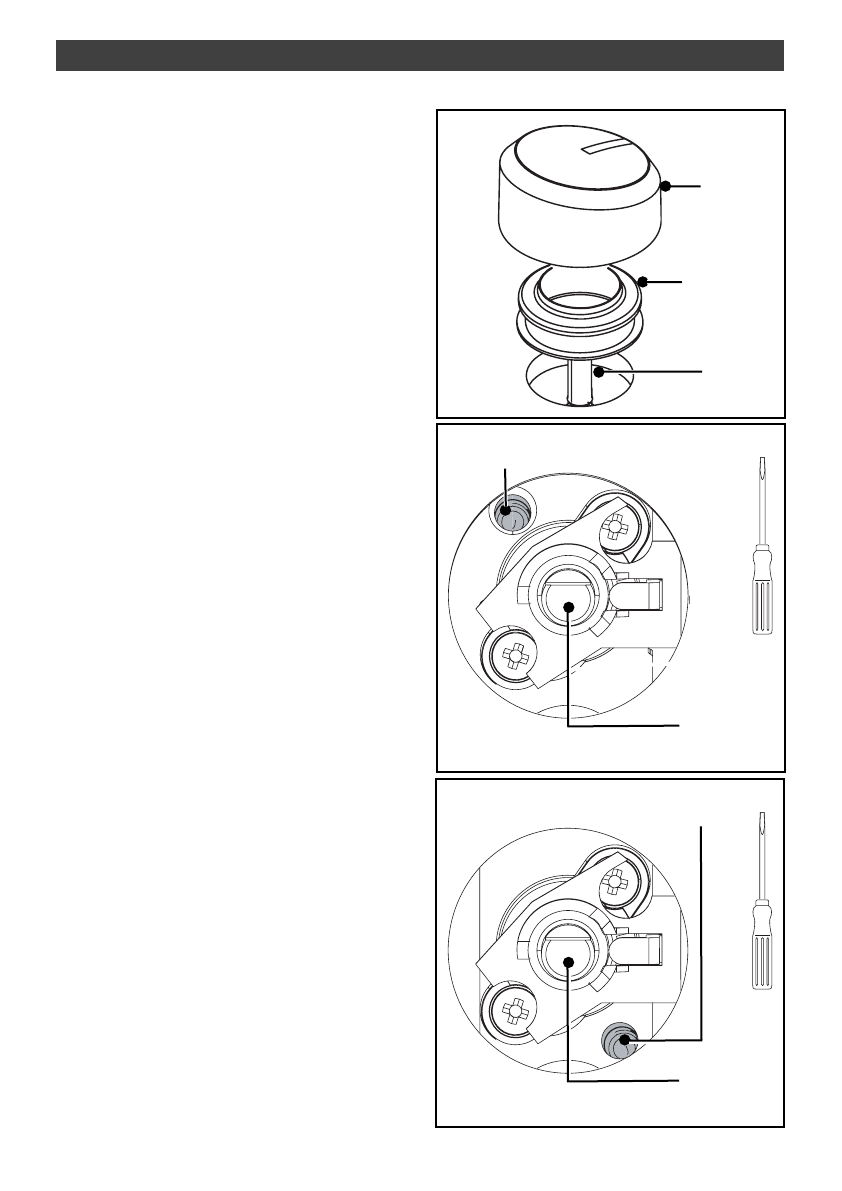
1 / INSTALLING YOUR APPLIANCE
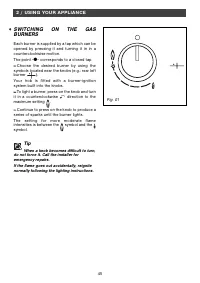
•
A
Ad
djju
us
stt tth
he
e h
ho
ob
b c
co
on
nn
ne
ec
cttiio
on
ns
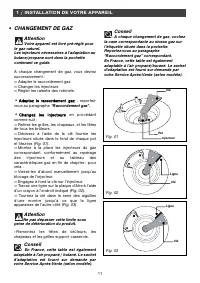
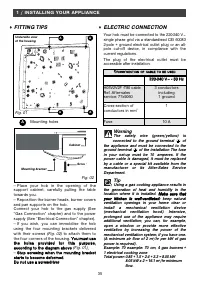
s: these are
located underneath the knobs
(Fig. 04).
—
Proceed one tap at a time.
—
Remove the knobs and the gaskets by
pulling them up.
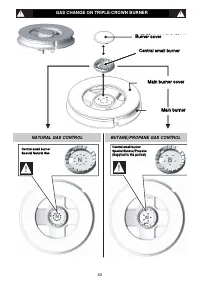
- Switching from natural gas to
butane/propane (depending on model)
-
Using a small flat-head screwdriver, screw in
the brass burner-power screws (yellow) a
allll tth
he
e
w
wa
ayy,
(Fig. 05) ssc
crre
ew
wiin
ng
g tth
he
em
m iin
n a
a c
cllo
oc
ck
kw
wiis
se
e
d
diirre
ec
cttiio
on
n..
-
Replace the gaskets and the knobs, paying
careful attention to their direction and
ensuring that the knobs are pushed in all the
way.
- Switching from butane/propane to natural
gas (depending on model)
-
Unscrew the brass (yellow) burner power
screws
(Fig. 06), using a small flat-head
screwdriver, ttu
urrn
n ttw
wiic
ce
e c
co
ou
un
ntte
errc
cllo
oc
ck
kw
wiis
se
e..
-
Replace the knob.
-
Light the burner in maximum heat mode,
then turn down to reduced heat mode.
-
Remove the knob again, then turn the
burner power screw c
cllo
oc
ck
kw
wiis
se
e until it reaches
the lowest possible setting that does not
extinguish the flame.
-
Replace the gasket and knob.
-
Make several attempts to change from the
maximum flow rate to the minimum: tth
he
e fflla
am
me
e
s
sh
ho
ou
ulld
d n
no
ott g
go
o o
ou
utt ; if it does, unscrew the
burner-power screw so as to obtain good
flame retention during these position
switches.
-
Reposition the burner heads, burner covers
and pan supports on the hob.
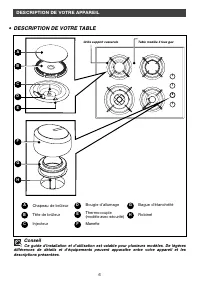
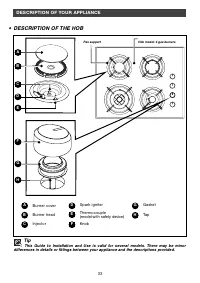
Knob
Sealing ring
Tap
Fig. 04
Fig. 05
Tap axis
Burner power
adjustment screw
Fig. 06
Tap axis
Burner power
adjustment screw
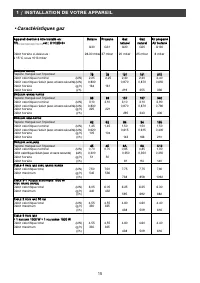
Характеристики

Остались вопросы?Не нашли свой ответ в руководстве или возникли другие проблемы? Задайте свой вопрос в форме ниже с подробным описанием вашей ситуации, чтобы другие люди и специалисты смогли дать на него ответ. Если вы знаете как решить проблему другого человека, пожалуйста, подскажите ему :)


