
Увлажнители Stadler Form Eva - инструкция пользователя по применению, эксплуатации и установке на русском языке. Мы надеемся, она поможет вам решить возникшие у вас вопросы при эксплуатации техники.
Если остались вопросы, задайте их в комментариях после инструкции.
"Загружаем инструкцию", означает, что нужно подождать пока файл загрузится и можно будет его читать онлайн. Некоторые инструкции очень большие и время их появления зависит от вашей скорости интернета.


a new cotton pad (commercially available) and add drops of the desired
fragrance.
12. If the water level indicator (16) changes to red, the water must be re-
filled. Remove the water tank (6) and fill it with clean, cold tap water
up to the maximum mark. After replacing the water tank, the appliance
automatically resumes operation after a few seconds. The water tank
can also be refilled during operation.
13. If you find the lamps too bright (in a bedroom, for example), you may
reduce the light intensity by pressing the night mode key (21):
• Normal mode (default mode)
• Dimmed mode (push once)
• Lights-out mode (push twice)
• By pushing the dimmer button once more, you can go back into nor-
mal mode.
If there is no water in the appliance, the red water level symbol (16)
lights up in all modes. The red light cannot be dimmed.
14. If two dots are shown (22) on the display (15), Eva cannot establish a
radio connection to the Remote Sensor
TM
(2). Eva still functions thanks
to a humidity sensor within the appliance. Press any button on the Re-
mote Sensor
TM
(2) to activate it. Make sure that the Remote Sensor
TM
(2) is within a 10 m radius of Eva. Walls, doors and floors between Eva
and the Remote Sensor
TM
(2) can disrupt the radio connection. The Re-
mote Sensor
TM
(2) should be optimally positioned at a distance between
3 – 5 m from Eva and on an elevated surface in the middle of the room
(see «Setup/operation» No. 3). The two dots on the display (22) could
also indicate that the batteries in the Remote Sensor
TM
(2) need replac-
ing (see «Setup/operation» No. 2).
Note:
Should you see droplets (or other signs of dampness) on or around
the unit, this condensed water is from the humidifier. This means that the
air can no longer absorb the moisture from the humidifier. Please activate
the auto mode with a desired humidity of 45 %. Water droplets should then
stop forming.
Cleaning
Prior to any maintenance, cleaning and after each use, switch off the appli-
ance and unplug the mains cable (1) from the socket.
Attention:
Never submerge the appliance in water (danger of short-circuit).
If pre-heating is turned on (the warm mode LED is on (13)), the water inside
the appliance is heated: the water in the water tray (9) and the heating plate
(17) become hot. Avoid touching the water and the heating plate!
• For external cleaning, rub with a damp cloth and then dry thoroughly.
•
Run the cleaning mode at least once per month.
The appliance must
be off for at least 15 minutes prior to internal cleaning! Then remove the
water tank (6), the mist chamber (23), the silicone cover (18), the Silver
Cube (24) and the fragrance container (20). Fill a cup with 200 ml of tap
water mixed with descaling agent (mix according to the manufacturer’s
instructions). Pour the liquid carefully into the water tray (9) by holding
the cup directly over the water tray (see page 5). Do not pour the liquid
into the water tray from high above the tray! Be sure that no liquid enters
the air inlet opening (26). This will damage the appliance and will void any
claim to the warranty.
• To start the cleaning mode, the mains cable must be connected to a sock-
et. Press and hold the night mode button (21) on the underside of the right
corner for 5 seconds to activate the cleaning mode. Now the water level
symbol (16) on the appliance will blink red. The cleaning mode runs for
around 5 minutes and automatically turns off afterwards (the water level
symbol stops blinking).
• Check in the water tray (9) if the limescale on the ultrasonic membrane
(19) and the heating plate (17) has dissolved.
Attention
: the water and
the heating plate are hot, risk of scalding!
• If limescale residue remains, the ultrasonic membrane (19) and the heat-
ing plate (17) can be cleaned with the help of the cleaning brush (25)
(front- and backside). Do not try to scrape them with a hard object.
• For stubborn limescale, we recommend descaling the appliance by run-
ning the cleaning mode (21) several times in a row. Leave the descaling
agent in the water tray for a maximum of 20 minutes and pour it out after-
wards as described below.
•
Important
: Pour the descaling agent out over the left front corner of the
appliance (see the arrow on the appliance). No water may enter the air
inlet opening (26). This will damage the appliance and will void any claim
to the warranty.
• To rinse, now fill the cup with 200 ml of tap water and carefully pour the
liquid into the water tray (9) by holding the cup directly over the water tray
(see page 5). Do not pour the liquid into the water tray from high above
the tray! Pour the water out over the left front corner of the appliance.
Repeat the process until there is no more descaling agent in the water
tray (9). Place the Silver Cube (24), silicone cover (18), mist chamber (23),
water tank (6) and fragrance container (20) back into the appliance. If the
water tank is not sitting right, check if the upper part of the mist chamber
(23) is properly mounted.
• Clean the water tank (6) thoroughly every two weeks with a soft brush or
sponge and warm water. Use diluted descaling agent (mix according to
the manufacturer’s instructions) for lime deposits. Rinse the water tank
afterwards with clean, cold tap water thoroughly.
Replacement of the anticalc cartridge
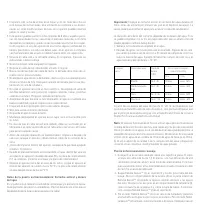
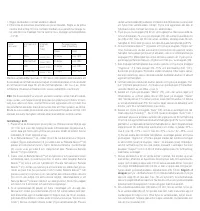
• Please find the recommended replacement interval in the table (see “Be-
fore setup”).
•
Tip
: the efficiency of the cartridge (8) can be inspected with a simple
test. Hold a small mirror in the mist (27) for a few seconds. If white de-
posits (calcium carbonate) appear on the mirror, then the cartridge needs
changing.
• The anticalc cartridge is located on the inner side of the tank lid (7). First,
screw the tank lid (7) off the water tank (6) and then screw the cartridge
off the tank lid. Dispose of the cartridge in the domestic waste (8). Prior to
screwing the new anticalc cartridge into the inside of the tank lid, soak it
in water (not in the water tank!) for 24 hours.
• Keep the tank lid (7) when replacing the cartridge!
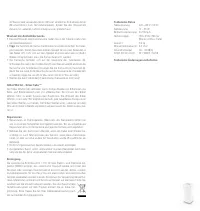
Silver Cube™
The Silver Cube
TM
(24) prevents the growth of germs and bacteria in the
humidifier due to the continuous release of silver ions. The use of silver
cubes leads to a hygienic room climate. The lifetime of the silver is around
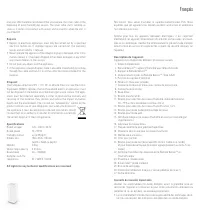
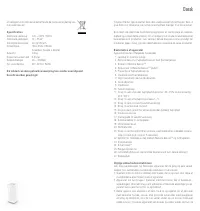
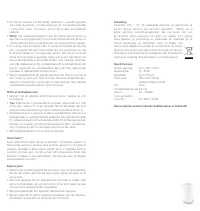
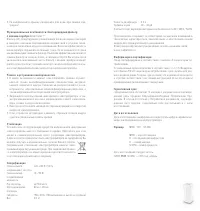
Характеристики

Остались вопросы?Не нашли свой ответ в руководстве или возникли другие проблемы? Задайте свой вопрос в форме ниже с подробным описанием вашей ситуации, чтобы другие люди и специалисты смогли дать на него ответ. Если вы знаете как решить проблему другого человека, пожалуйста, подскажите ему :)


