
Триммеры Ryobi RBC47SEO 5133002542 - инструкция пользователя по применению, эксплуатации и установке на русском языке. Мы надеемся, она поможет вам решить возникшие у вас вопросы при эксплуатации техники.
Если остались вопросы, задайте их в комментариях после инструкции.
"Загружаем инструкцию", означает, что нужно подождать пока файл загрузится и можно будет его читать онлайн. Некоторые инструкции очень большие и время их появления зависит от вашей скорости интернета.


21
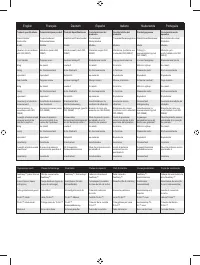
English (Original instructions)
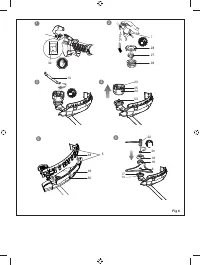
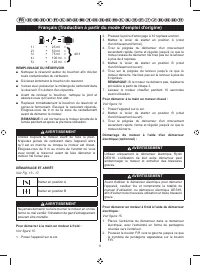
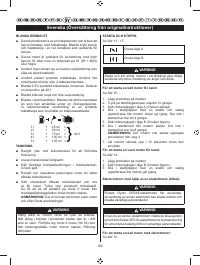
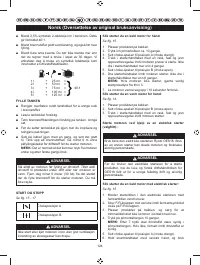
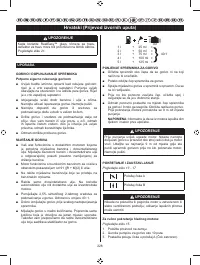
3. Set the choke lever to position A (choke closed).
4. Pull the starter grip with a quick
fi
rm and consistent
upward motion until the engine attempts to start. Do
not pull the starter grip more than 4 times.
5. Set the choke lever to position B (choke open).
6. Pull the starter grip until the engine starts. Do not pull
the starter grip more than 6 times.
NOTE:
If the engine does not start, repeat the
procedure from step 3.
7. Allow engine to warm up for 10 seconds prior to
operation.
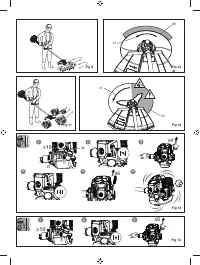
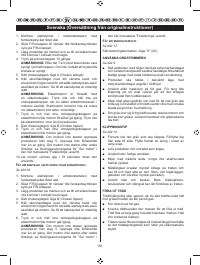
To start a warm engine by hand:
See
fi
gure 14.
1. Lay the product on the ground.
2. Set the choke lever to position B (choke open).
3. Pull the starter grip with a quick,
fi
rm, and consistent
upward motion until the engine starts.
Starting the engine using an electrical starter (optional):
WARNING
Only use the Ryobi OES18 electrical starter. Use of
any other starter may damage the engine and cause
serious personal injury.
WARNING
Before using the electrical starter to start the product,
please read and understand completely the operation
manual of the OES18 electrical starter to avoid
improper operation and serious personal injury.
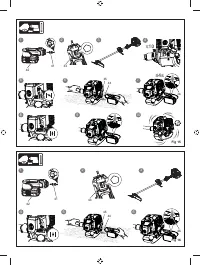
To start a cold engine by electrical starter:
See
fi
gure 15.
1. Install the starter bit into the electrical starter with the
pentagon bit facing outside.
2. Push the F/R button to the left until the pentagon
symbol shows on the F/R button.
3. Lay the product on the ground and make sure that the
cutting means do not come in contact with anything.
4. Press the primer bulb 10 times.
NOTE:
After the 7th press, the fuel should be visible
in the primer bulb. If not, continue pressing until the
fuel is visible.
5. Set the choke lever to position A (choke closed).
6. Hold the insulated shaft with your left hand and use
your right hand to put the starter bit shaft to the shaft
hole on the engine, otherwise the engine will not turn.
Make sure the starter bit is properly engaged.
NOTE:
The electrical starter is equipped with a safety
interlock. Do not press and hold on the switch button
when putting the electrical starter shaft into the shaft
hole on the engine. Also, the starter will not turn if the
electrical starter is not properly engaged.
7. Press and hold the electrical starter switch button until
the engine attempts to start. Do not press the electrical
starter for more than 4 seconds.
8. Set the choke lever to position B (choke open).
9. Press and hold the electrical starter switch button until
the engine starts.
NOTE:
If the engine does not start, repeat the
procedure from step 5. Do not repeat the procedure
more than 1 time. If the engine does not start after
the second attempt, see the solution instruction for the
"Flooded engine" in the "Troubleshooting" section of
this manual.
10. Allow the engine to warm up for 10 seconds prior to
operation.
To start a warm engine by electrical starter:
See
fi
gure 16.
1. Install the starter bit into the electrical starter with the
pentagon bit facing outside.
2. Push the F/R button to the left until the pentagon
symbol shows on the F/R button.
3. Lay the product on the ground and make sure that the
cutting means do not come in contact with anything.
4. Set the choke lever to position B (choke open).
5. Hold the insulated shaft with your left hand and
use your right hand to put the starter bit shaft to the
shaft hole on the engine. Make sure the starter bit is
properly engaged.
6. Press and hold the electrical starter switch button until
the engine starts.
NOTE:
If the engine does not start, repeat the
procedure from step 5. Do not repeat the procedure
more than 1 time. If the engine does not start after
the second attempt, see the solution instruction for the
"Flooded engine" in the "Troubleshooting" section of
this manual.
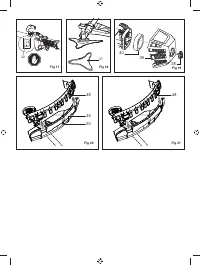
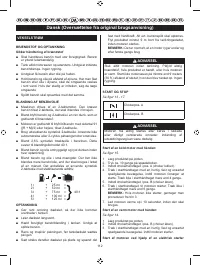
To stop the engine:
See
fi
gure 17.
Place the ignition switch to the “O” (OFF) position.
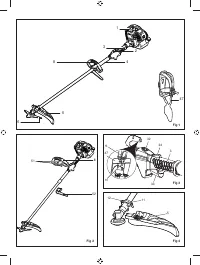
OPERATING THE GRASS TRIMMER
See
fi
gure 9.
■
Hold the product with the right hand on the trigger
handle and the left hand on the left handle. Keep a
firm grip with both hands while in operation.
■
The product should be held at a comfortable position
with the trigger handle about hip height.
■
Always operate the product at full throttle. Prolonged
English (Original Instruction)


