
Триммеры Ryobi RBC47SEO 5133002542 - инструкция пользователя по применению, эксплуатации и установке на русском языке. Мы надеемся, она поможет вам решить возникшие у вас вопросы при эксплуатации техники.
Если остались вопросы, задайте их в комментариях после инструкции.
"Загружаем инструкцию", означает, что нужно подождать пока файл загрузится и можно будет его читать онлайн. Некоторые инструкции очень большие и время их появления зависит от вашей скорости интернета.


18
English (Original instructions)
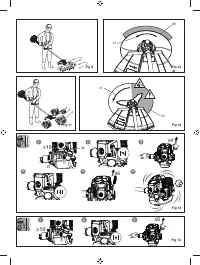
Stop the product
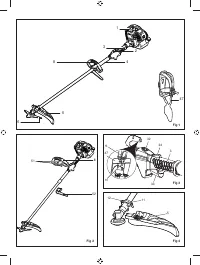
ASSEMBLY
UNPACKING
The product requires assembly.
■
Carefully remove the product and any accessories
from the box. Make sure that all items listed in the
packing list are included.
■
Inspect the tool carefully to make sure no breakage or
damage occurred during shipping.
■
Do not discard the packing material until you have
carefully inspected and satisfactorily operated the tool.
PACKING LIST
■
Grass trimmer/Brushcutter x 1
■
ReelEasy™ grass trimmer head x 1
■
Cutting attachment guard x 1
■
Tri-Arc™ blade x 1
■
Harness x 1
■
Operator’s manual x 1
■
Engine oil x 1
■
Combination wrench x 1
■
Wrench x 1
■
Allen wrench (5 mm) x 1
■
Allen wrench (4 mm) x 1
■
Blade nut x 2
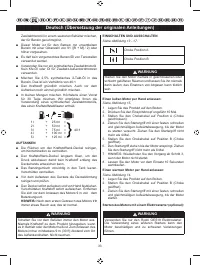
WARNING
If any parts are damaged or missing, do not operate the
product until the parts are replaced. Failure to heed this
warning could result in serious personal injury.
WARNING
Do not attempt to modify the product or create
accessories not recommended for use with the product.
Any alteration or modi
fi
cation is misuse and could result
in a hazardous condition leading to possible serious
personal injury.
WARNING
Never attach or adjust any attachment while power
head is running. Failure to stop the engine may cause
serious personal injury.
WARNING
Make sure all knobs and fasteners are fully tightened
before operating the product; check it periodically for
tightness during use to avoid serious injury.
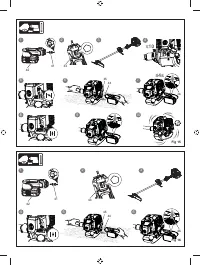
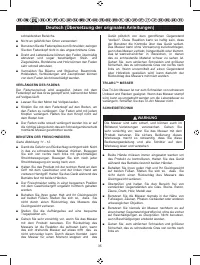
SETTING UP THE FRONT HANDLE
See
fi
gure 2.
1. Remove the four bolts from the front handle.
2. Position the front handle onto the shaft.
NOTE:
The lever protruding from the front handle
should point to the left side of the trimmer.
3. Position the bracket barrier underneath the front
handle and secure it in place by screwing the bolts
through the base of the front handle into to the bracket.
ATTACHING THE HARNESS
See
fi
gure 3.
1. Connect the latch on the harness to the strap hanger.
2. Adjust the strap hanger to a comfortable and balanced
position where the blade or cutter attachment will
suspend between 100 mm and 300 mm above the
ground surface.
NOTE:
Always use the harness with the product.
NOTE
: To quickly release the product from the
harness, sharply pull the quick-release tab.
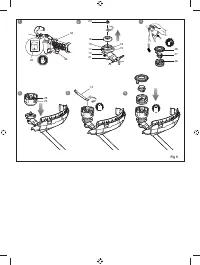
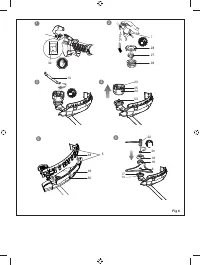
FITTING THE CUTTING ATTACHMENT GUARD
See
fi
gure 4.
1. Attach the cutting attachment guard to the mounting
bracket and align the screw holes on the cutting
attachment guard to the screws on the mounting
bracket.
2. Tighten the screws.
WARNING
When using the ReelEasy™ grass trimmer head, the
grass de
fl
ector must be attached to the blade guard.
See
fi
gure 21
. When using the Tri-Arc™ blade, the
grass de
fl
ector must be removed from the blade guard.
See
fi
gure 20
.
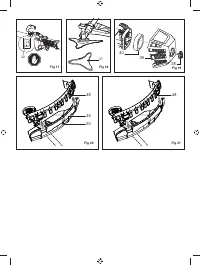
INSTALLING THE REELEASY™ GRASS TRIMMER
HEAD
See
fi
gure 5.
1. Stop the engine.
2. Place the Allen wrench through the hole in the upper
fl
ange washer and the hole in the gear head. Turn the
blade nut clockwise to remove.
3. Remove the blade nut, blade washer, and cupped
English (Original Instruction)


