
Триммеры Makita DUR190LZX3 - инструкция пользователя по применению, эксплуатации и установке на русском языке. Мы надеемся, она поможет вам решить возникшие у вас вопросы при эксплуатации техники.
Если остались вопросы, задайте их в комментариях после инструкции.
"Загружаем инструкцию", означает, что нужно подождать пока файл загрузится и можно будет его читать онлайн. Некоторые инструкции очень большие и время их появления зависит от вашей скорости интернета.


20 ENGLISH
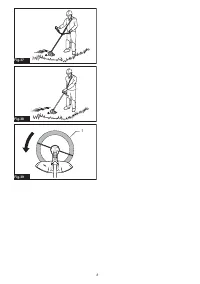
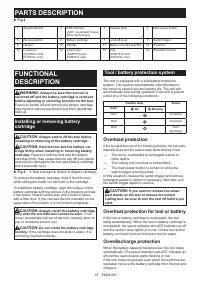
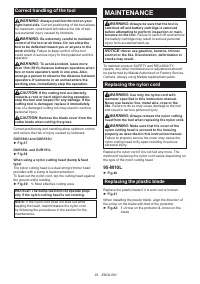
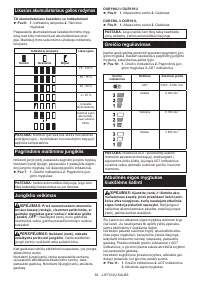
Electric brake
This tool is equipped with an electric brake. If the tool
consistently fails to quickly stop after the switch trigger
is released, have the tool serviced at our service center.
CAUTION:
This brake system is not a substi-
tute for the protector. Never use the tool without
the protector.
An unguarded cutting tool may result
in serious personal injury.
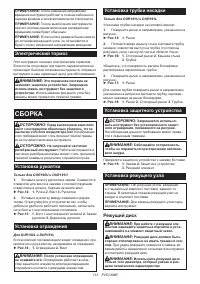
ASSEMBLY
WARNING:
Always be sure that the tool is
switched off and battery cartridge is removed
before carrying out any work on the tool.
Failure to
switch off and remove the battery cartridge may result
in serious personal injury from accidental start-up.
WARNING:
Never start the tool unless it is
completely assembled.
Operation of the tool in a
partially assembled state may result in serious per-
sonal injury from accidental start-up.
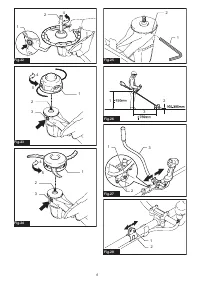
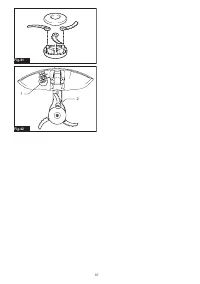
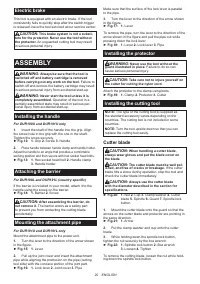
Installing the handle
For DUR190U and DUR191U only
1.
Insert the shaft of the handle into the grip. Align
the screw hole in the grip with the one in the shaft.
Tighten the screw securely.
►
Fig.12:
1.
Grip
2.
Screw
3.
Handle
2.
Place handle between handle clamp and handle holder.
Adjust the handle to an angle that provides a comfortable
working position and then secure with hex socket head bolts.
►
Fig.13:
1.
Hex socket head bolt
2.
Handle clamp
3.
Handle holder
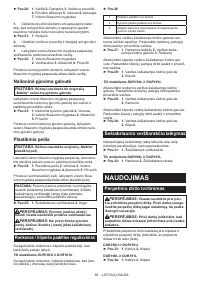
Attaching the barrier
For DUR190L and DUR191L (country specific)
If the barrier is included in your model, attach it to the
handle using the screw on the barrier.
►
Fig.14:
1.
Barrier
2.
Screw
CAUTION:
After assembling the barrier, do
not remove it.
The barrier works as a safety part
to prevent you from contacting the cutting blade
accidentally.
Mounting the attachment pipe
For DUR191U and DUR191L only
Mount the attachment pipe to the power unit.
1.
Turn the lever to the direction of the arrow shown
in the figure.
►
Fig.15:
1.
Lever
2.
Pull up the joint cover and insert the attachment
pipe while aligning the protrusion on the pipe (cutting
tool side) with the concave portion of the joint part.
►
Fig.16:
1.
Lock lever
2.
Joint cover
3.
Pipe
Make sure that the surface of the lock lever is parallel
to the pipe.
3.
Turn the lever to the direction of the arrow shown
in the figure.
►
Fig.17:
1.
Lever
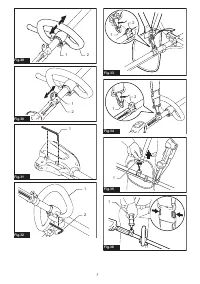
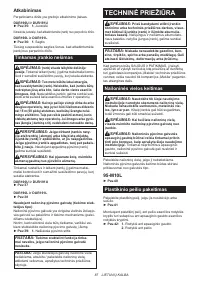
To remove the pipe, turn the lever to the direction of the
arrow shown in the figure and pull the pipe out while
pressing down the lock lever.
►
Fig.18:
1.
Lever
2.
Lock lever
3.
Pipe
Installing the protector
WARNING:
Never use the tool without the
guard illustrated in place.
Failure to do so can
cause serious personal injury.
CAUTION:
Take care not to injure yourself on
the cutter for cutting the nylon cord.
Attach the protector to the clamp using bolts.
►
Fig.19:
1.
Clamp
2.
Protector
3.
Cutter
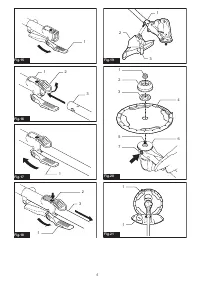
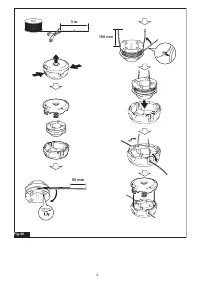
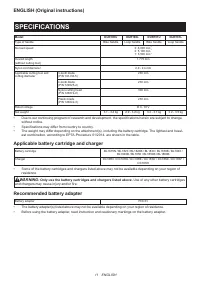
Installing the cutting tool
NOTE:
The type of the cutting tool(s) supplied as
the standard accessory varies depending on the
countries. The cutting tool is not included in some
countries.
NOTE:
Turn the tool upside down so that you can
replace the cutting tool easily.
Cutter blade
CAUTION:
When handling a cutter blade,
always wear gloves and put the blade cover on
the blade.
CAUTION:
The cutter blade must be well pol-
ished, and free of cracks or breakage.
If the cutter
blade hits a stone during operation, stop the tool and
check the cutter blade immediately.
CAUTION:
Always use the cutter blade
with the diameter described in the section for
specifications.
►
Fig.20:
1.
Nut
2.
Cup
3.
Clamp washer
4.
Cutter
blade
5.
Spindle
6.
Guard
7.
Spindle lock
button
1.
Mount the cutter blade onto the guard so that the
arrows on the cutter blade and protector are pointing in
the same direction.
►
Fig.21:
1.
Arrow
2.
Put the clamp washer and cup onto the cutter
blade.
3.
While holding down the spindle lock button,
tighten the nut securely by the box wrench.
►
Fig.22:
1.
Spindle lock button
2.
Box wrench
3.
Loosen
4.
Tighten
To remove the cutting blade, loosen the nut while hold-
ing down the spindle lock button.
Содержание
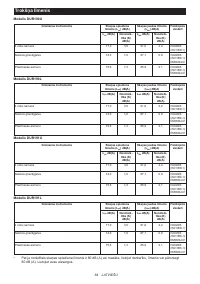
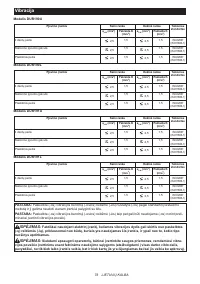
- 103 Шум
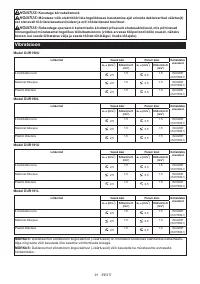
- 104 Вибрация
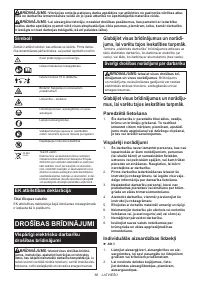
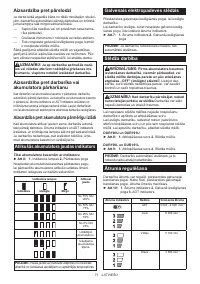
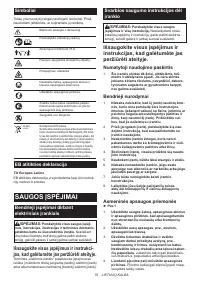
- 105 Символы; Декларация о соответствии ЕС; МЕРЫ БЕЗОПАСНОСТИ; Общие рекомендации по
- 110 ОПИСАНИЕ ДЕТАЛЕЙ
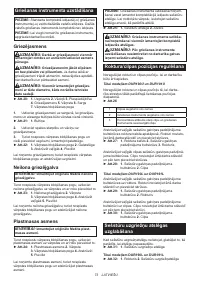
- 111 ОПИСАНИЕ РАБОТЫ; Защита от перегрузки
- 112 Основной переключатель питания; Кнопка реверса для удаления
- 113 СБОРКА; Режущий диск
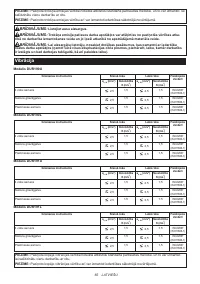
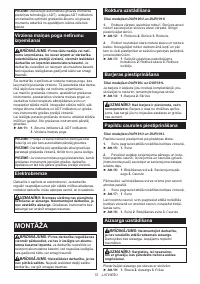
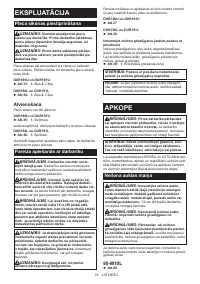
- 114 Хранение шестигранного ключа; ЭКСПЛУАТАЦИЯ; Пристегивание плечевого ремня
- 115 ОБСЛУЖИВАНИЕ; Замена нейлонового шнура
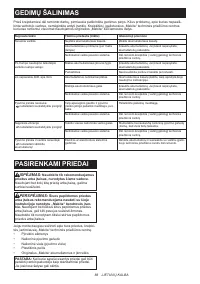
- 116 Замените пластмассовый нож; ПОИСК И УСТРАНЕНИЕ НЕИСПРАВНОСТЕЙ
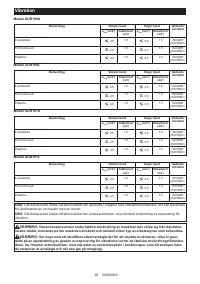
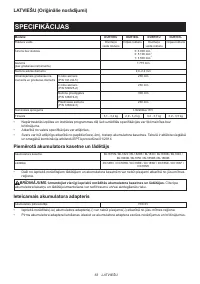
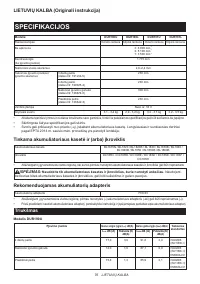
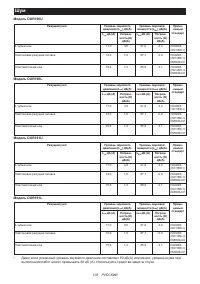
Характеристики

Остались вопросы?Не нашли свой ответ в руководстве или возникли другие проблемы? Задайте свой вопрос в форме ниже с подробным описанием вашей ситуации, чтобы другие люди и специалисты смогли дать на него ответ. Если вы знаете как решить проблему другого человека, пожалуйста, подскажите ему :)


