Стиральная машина ARDESTOBright SWMG-7120W - инструкция пользователя по применению, эксплуатации и установке на русском языке. Мы надеемся, она поможет вам решить возникшие у вас вопросы при эксплуатации техники.
Если остались вопросы, задайте их в комментариях после инструкции.
"Загружаем инструкцию", означает, что нужно подождать пока файл загрузится и можно будет его читать онлайн. Некоторые инструкции очень большие и время их появления зависит от вашей скорости интернета.


EN
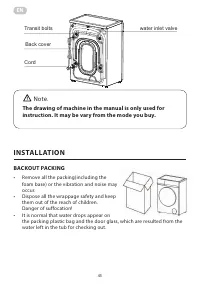
Installation
Use process
Installation
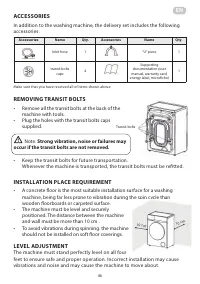
Installation place requirement
A concrete floor is the most suitable installation surface
for a washing machine, being far less prone to vibration
during the spin cycle than wooden floorboards or carpeted
surface.
The machine must be level and securely positioned. The
distance between the machine and wall must be more than
10 cm .
To avoid vibrations during spinning. the machine should not
be installed on soft floor coverings.
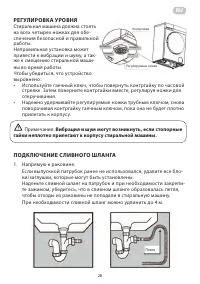
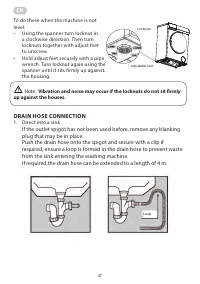
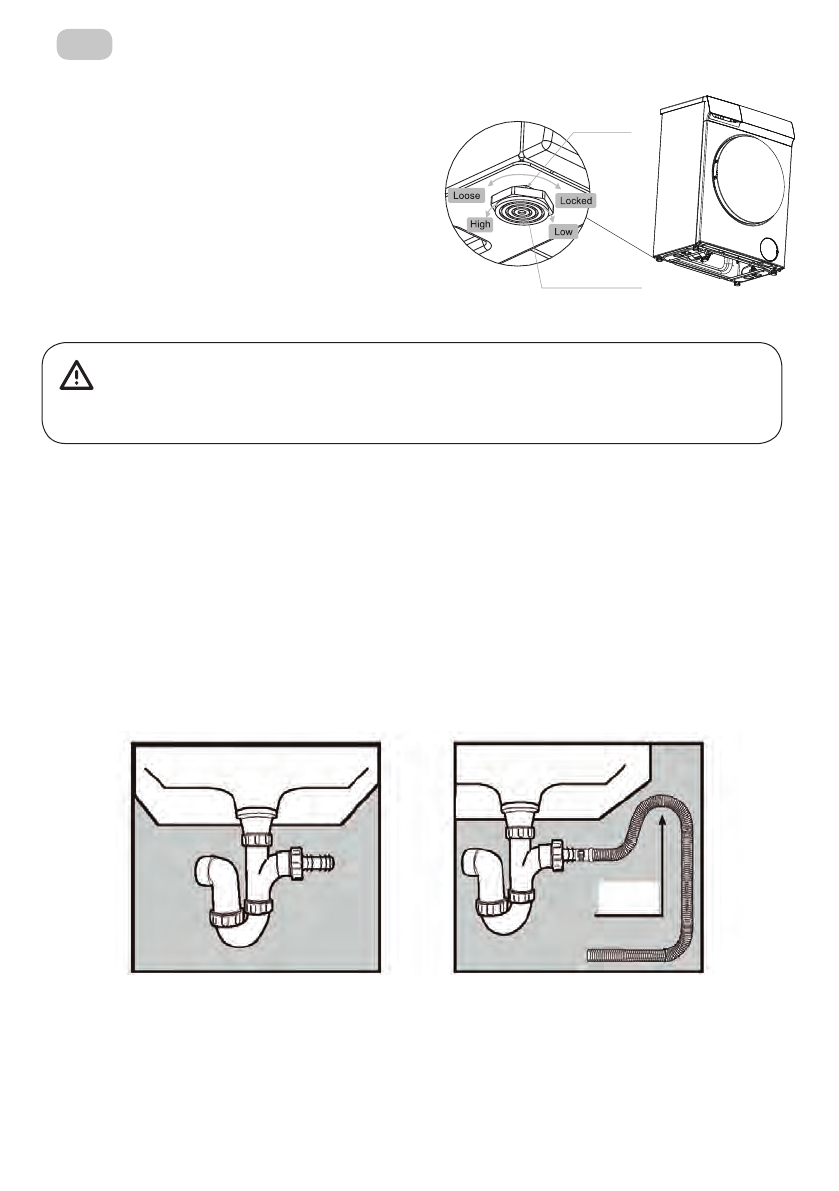
Level adjustment
The machine must stand perfectly level on all
four feet to ensure safe and proper operation.
Incorrect installation may cause vibrations
and noise and may cause the machine to
move about.
To do these when the machine is not level:
Using the spanner turn locknut in a clockwise
direction. Then turn locknuts together with adjust
feet to unscrew.
Hold adjust feet securely with a pipe wrench.
Turn locknut again using the spanner until it sits
firmly up against the housing.
Vibration and noise may occur if the locknuts do
not sit firmly up against the houses.
Drain hose connection
1.Direct into a sink
If the outlet spigot has not been used before, remove any blanking plug
that may be in place.
If required,the drain hose can be extended to a length of 4 m.
Push the drain hose onto the spigot and secure with a clip if required,
ensure a loop is formed in the drain hose to prevent waste from the sink
entering the washing machine.
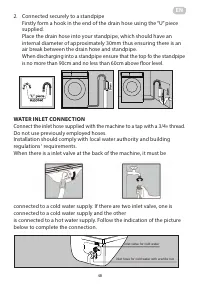
2. Connected securely to a standpipe
Firstly form a hook in the end of the drain hose using the “U” piece supplied.
Place the drain hose into your standpipe, which should have an internal diameter of approximately
30mm thus ensuring there is an air break between the drain hose and standpipe.
When discharging into a standpipe ensure that the top fo the standpipe is no more than 90cm and
no less than 60cm above floor level.
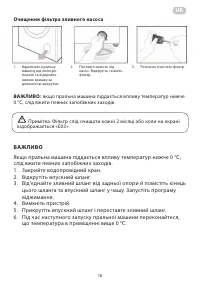
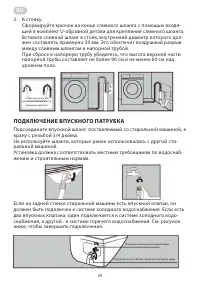
Water inlet connection
Connect the inlet hose supplied with the machine to a tap with a 3/4" thread.
Do not use previously employed hoses.
Installation should comply with local water authority and building regulations ‘ requirements.
When there is a inlet valve at the back of the machine, it must be connected to a cold water
supply. If there are two inlet valve, one is connected to a cold water supply and the other
is connected to a hot water supply. Follow the indication of the picture below to complete the
connection.
inlet valve for cold water
inlet hose for cold water with a white nut
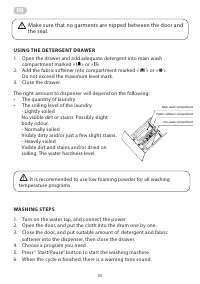
Use process
Locknuts
Adjustable feet
To do these when the machine is not
level:
• Using the spanner turn locknut in
a clockwise direction. Then turn
locknuts together with adjust feet
to unscrew.
• Hold adjust feet securely with a pipe
wrench. Turn locknut again using the
spanner until it sits firmly up against
the housing.
Note.
Vibration and noise may occur if the locknuts do not sit firmly
up against the houses.
DRAIN HOSE CONNECTION
1. Direct into a sink
If the outlet spigot has not been used before, remove any blanking
plug that may be in place.
Push the drain hose onto the spigot and secure with a clip if
required, ensure a loop is formed in the drain hose to prevent waste
from the sink entering the washing machine.
If required,the drain hose can be extended to a length of 4 m.
Loop
47
Содержание
- 21 Эта стиральная машина соответствует действующим требованиям
- 22 МЕРЫ БЕЗОПАСНОСТИ
- 23 ДАННАЯ СТИРАЛЬНАЯ МАШИНА ДОЛЖНА БЫТЬ
- 24 ПРАВИЛЬНАЯ ЭКСПЛУАТАЦИЯ
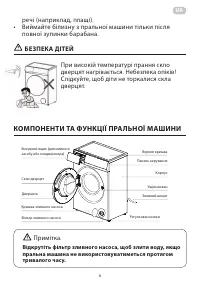
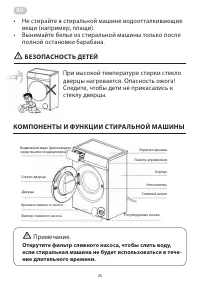
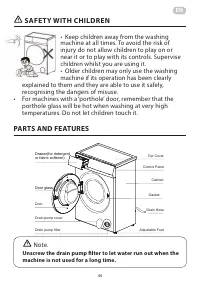
- 25 БЕЗОПАСНОСТЬ ДЕТЕЙ; При высокой температуре стирки стекло; КОМПОНЕНТЫ И ФУНКЦИИ СТИРАЛЬНОЙ МАШИНЫ; Открутите фильтр сливного насоса, чтобы слить воду,
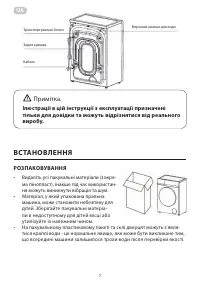
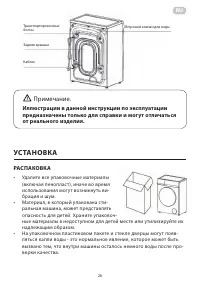
- 26 Иллюстрации в данной инструкции по эксплуатации; УС ТАНОВКА; РАСПАКОВКА
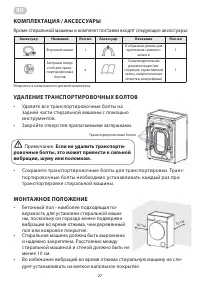
- 27 Если не удалить транспорти-; МОНТАЖНОЕ ПОЛОЖЕНИЕ
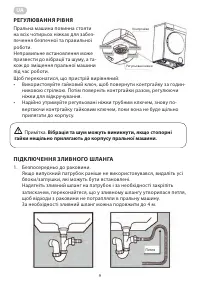
- 28 РЕГУЛИРОВКА УРОВНЯ; Вибрация и шум могут возникнуть, если стопорные; ПОДКЛЮЧЕНИЕ СЛИВНОГО ШЛАНГА
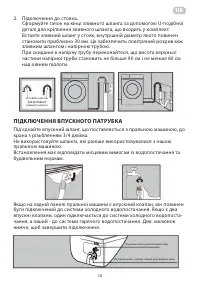
- 29 ПОДКЛЮЧЕНИЕ ВПУСКНОГО ПАТРУБКА
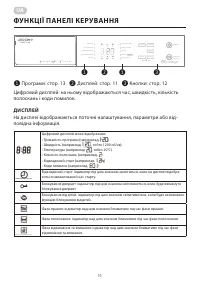
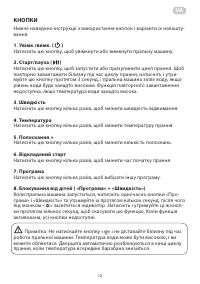
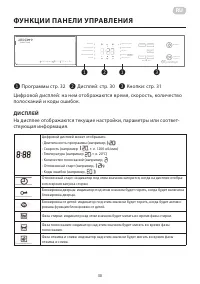
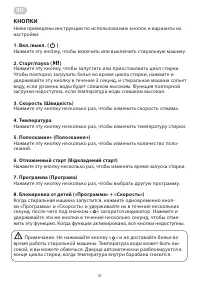
- 30 ФУНКЦИИ ПАНЕЛИ УПРАВЛЕНИЯ; Программы стр. 32
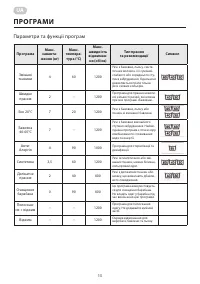
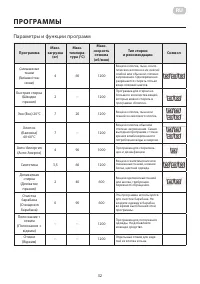
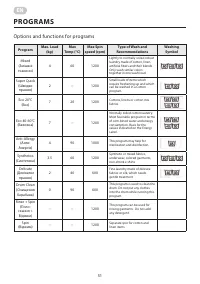
- 32 ПРОГРАММЫ; Параметры и функции программ
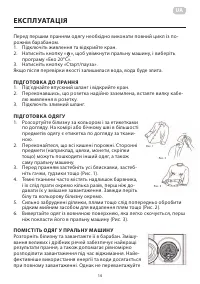
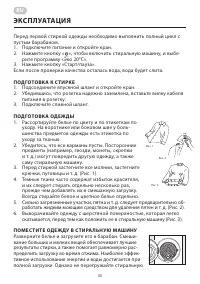
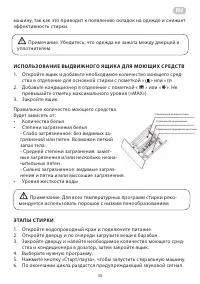
- 33 Programs; How to use washer; Washing preparation; ЭКСПЛУАТАЦИЯ; ПОДГОТОВКА К С ТИРКЕ
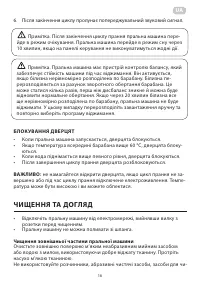
- 35 БЛОКИРОВКА ДВЕРЦЫ; ЧИС ТКА И УХОД; Чистка наружной части стиральной машины
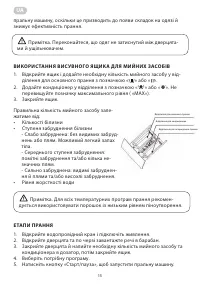
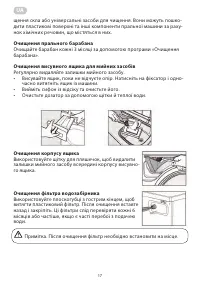
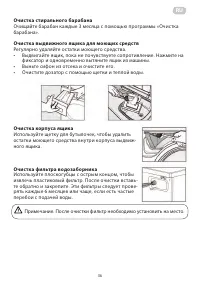
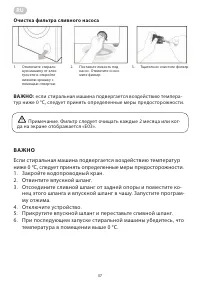
- 37 Очистка фильтра сливного насоса; если стиральная машина подвергается воздействию темпера-; Примечание. Фильтр следует очищать каждые 2 месяца или ког-; ВАЖНО
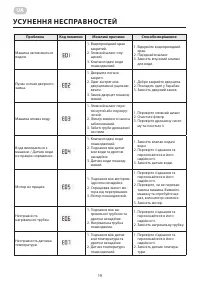
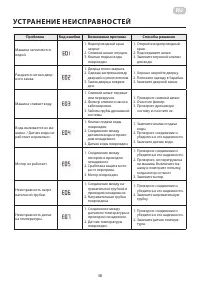
- 38 УС ТРАНЕНИЕ НЕИСПРАВНОС ТЕЙ
- 61 ГАРАНТИЙНЫЙ ТА ЛОН; Уважаемый Покупатель! Поздравляем Вас с приобретением при
- 63 Warranty card/Гарантійний талон/Гарантийный талон
Характеристики

Остались вопросы?Не нашли свой ответ в руководстве или возникли другие проблемы? Задайте свой вопрос в форме ниже с подробным описанием вашей ситуации, чтобы другие люди и специалисты смогли дать на него ответ. Если вы знаете как решить проблему другого человека, пожалуйста, подскажите ему :)
