
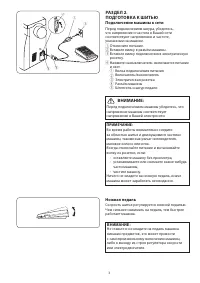
Швейная машина Janome HD1015 - инструкция пользователя по применению, эксплуатации и установке на русском языке. Мы надеемся, она поможет вам решить возникшие у вас вопросы при эксплуатации техники.
Если остались вопросы, задайте их в комментариях после инструкции.
"Загружаем инструкцию", означает, что нужно подождать пока файл загрузится и можно будет его читать онлайн. Некоторые инструкции очень большие и время их появления зависит от вашей скорости интернета.


18
b
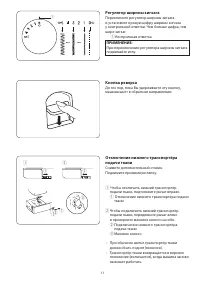
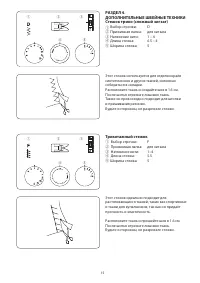
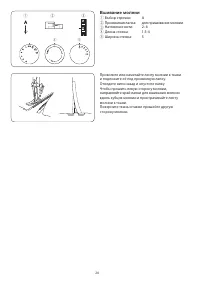
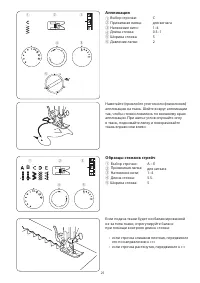
Поднимите иглу вверх. Установите регулятор
выбора строчек на «
25
4-Step Buttonhole
q
Stitch pattern:
w
Stitch width:
4 - 5
e
Stitch length:
0.5 - 1
r
Thread tension:
1 – 5
t
Presser foot:
Sliding buttonhole J
q
w
e
r
t
z
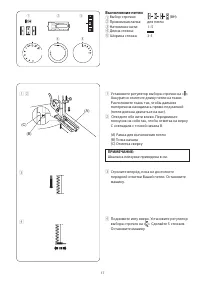
Set the pattern selector dial at “ ”.
Carefully mark buttonhole length on fabric.
Place the fabric under the foot with the
buttonhole marking running toward you.
Draw both of needle and bobbin thread to the left.
Move the slider toward you so that the top
mark on the slider meets the start mark.
q
Start mark
w
Top mark
e
Needle thread
r
Bobbin thread
NOTE:
The scale on the slider is engraved in centimeters.
x
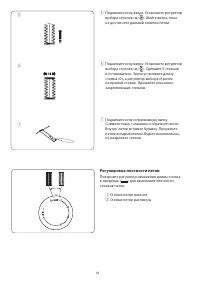
Sew forward until you reach the front marking
of your buttonhole. Stop sewing at a left stitch.
c
Raise the needle to its highest position.
Set the pattern selector dial at “ ”. Sew 5
stitches, then stop sewing at a right stitch.
v
Raise the needle to its highest position.
Set the pattern selector dial at “ ”. Sew until
the needle reach the back marking of the
buttonhole.
b
Raise the needle to its highest position.
Set the pattern selector dial at “ ”. Sew
5 stitches, then stop sewing. Set the stitch
length dial to “0” and the pattern selector dial
at straight sewing.
Sew a few locking stitches.
n
Raise the needle and presser foot. Remove
the fabric from the machine and cut the
sewing thread. Insert a pin inside the bartack.
Then cut the opening with a seam ripper.
Take care not to cut the stitches.
t
Pin
y
Seam ripper
z
x
n
v
c
b
q
w
e
r
t
y
». Шейте вверх, пока
не достигнете дальней отметки петли.
n
Поднимите иглу вверх. Установите регулятор
выбора строчек на «
25
4-Step Buttonhole
q
Stitch pattern:
w
Stitch width:
4 - 5
e
Stitch length:
0.5 - 1
r
Thread tension:
1 – 5
t
Presser foot:
Sliding buttonhole J
q
w
e
r
t
z
Set the pattern selector dial at “ ”.
Carefully mark buttonhole length on fabric.
Place the fabric under the foot with the
buttonhole marking running toward you.
Draw both of needle and bobbin thread to the left.
Move the slider toward you so that the top
mark on the slider meets the start mark.
q
Start mark
w
Top mark
e
Needle thread
r
Bobbin thread
NOTE:
The scale on the slider is engraved in centimeters.
x
Sew forward until you reach the front marking
of your buttonhole. Stop sewing at a left stitch.
c
Raise the needle to its highest position.
Set the pattern selector dial at “ ”. Sew 5
stitches, then stop sewing at a right stitch.
v
Raise the needle to its highest position.
Set the pattern selector dial at “ ”. Sew until
the needle reach the back marking of the
buttonhole.
b
Raise the needle to its highest position.
Set the pattern selector dial at “ ”. Sew
5 stitches, then stop sewing. Set the stitch
length dial to “0” and the pattern selector dial
at straight sewing.
Sew a few locking stitches.
n
Raise the needle and presser foot. Remove
the fabric from the machine and cut the
sewing thread. Insert a pin inside the bartack.
Then cut the opening with a seam ripper.
Take care not to cut the stitches.
t
Pin
y
Seam ripper
z
x
n
v
c
b
q
w
e
r
t
y
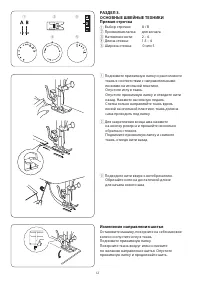
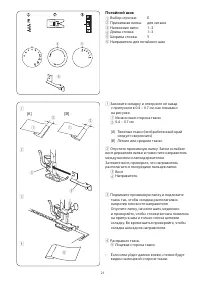
». Сделайте 5 стежков
и остановитесь. Затем установите длину
стежка «0», а регулятор выбора строчек
на прямой стежок. Прошейте несколько
закрепляющих стежков.
m
Поднимите иглу и прижимную лапку.
Снимите ткань с машины и обрежьте нитки.
Внутрь петли вставьте булавку. Прорежьте
петлю вспарывателем. Будьте внимательны,
не разрежьте стежки.
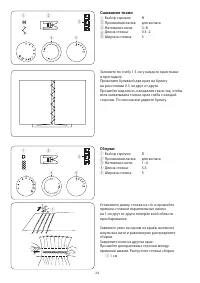
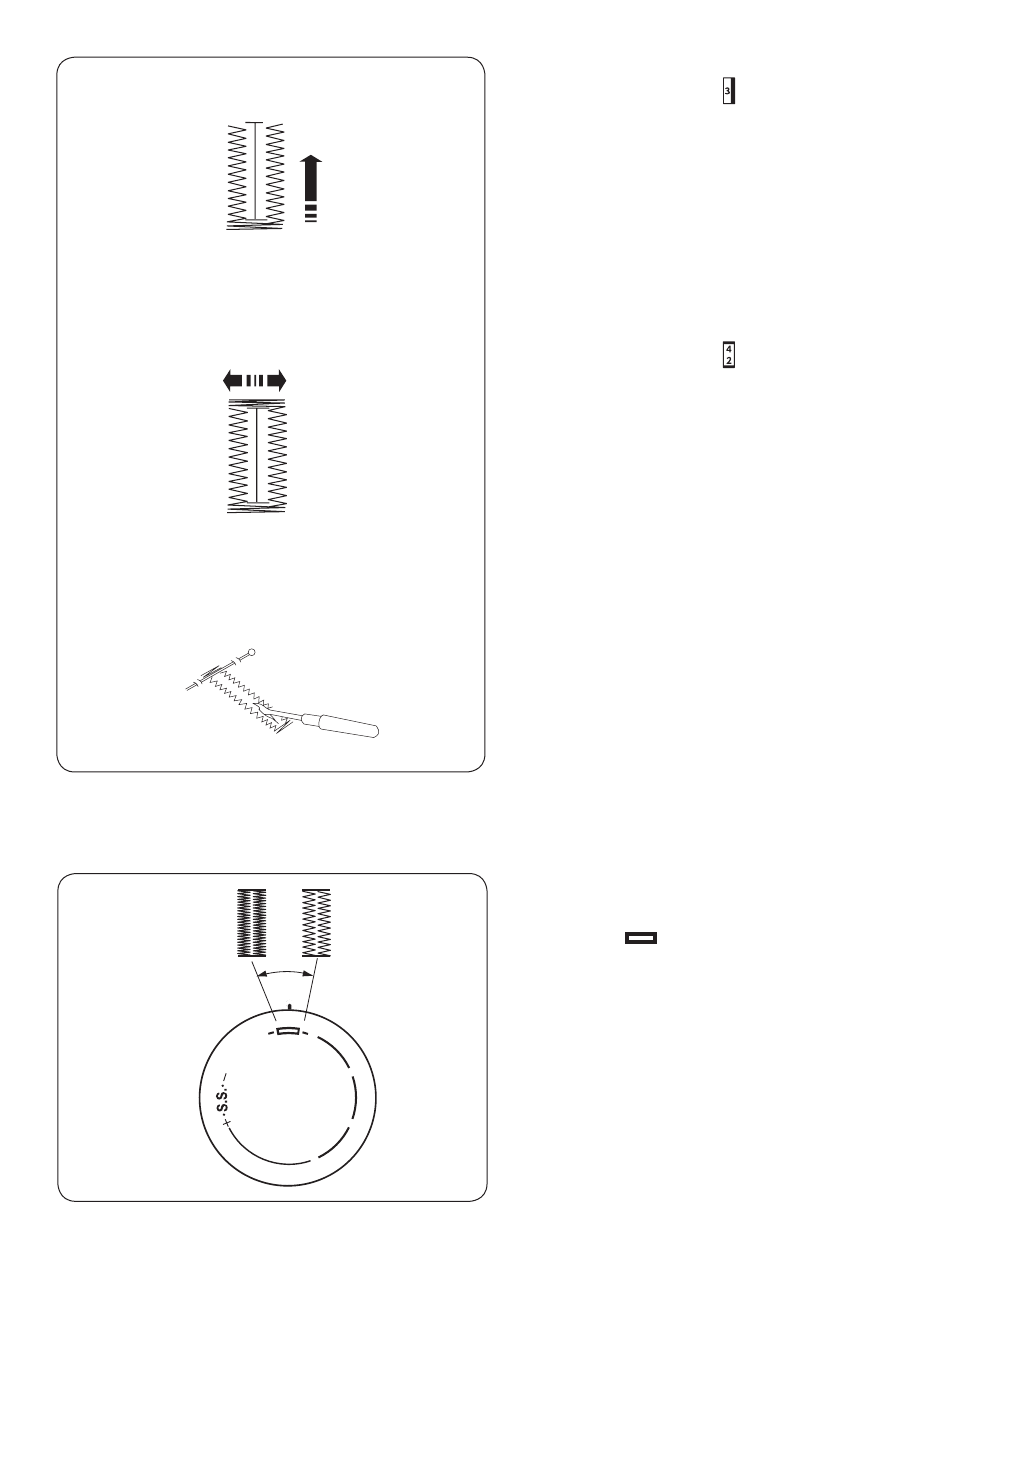
Регулировка плотности петли
Поверните регулятор изменения длины стежка
в пределах «
» для изменения плотности
стежков петли.
q
Стежки петли плотнее
w
Стежки петли растянуты
20
b
Set the pattern selector dial at “ “.
Sew until you reach the back marking of the
buttonhole.
Stop sewing at a right stitch.
n
Set the pattern selector dial at “ “.
Sew a few bartacks and raise the needle
from the fabric.
Set the stitch length dial to “ 0 “ and the
pattern selector dial at straight stitch sewing.
Sew a few locking stitches.
m
Remove the fabric from the machine and cut
the sewing threads.
Insert a pin inside the bartack.
Then cut the opening with a seam ripper.
Take care not to cut the stitches.
Adjusting buttonhole stitch density
Turn the stitch length dial to the left for a coarser
density.
Turn the stitch length dial to the right for a tighter
density.
b
n
m
1
2
3
4
0
Содержание
- 3 СОДЕРЖАНИЕ
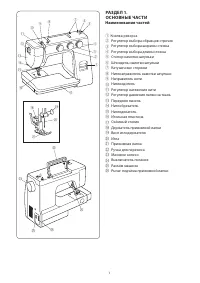
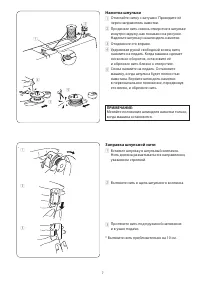
- 4 ОСНОВНЫЕ ЧАСТИ; Наименования частей; SECTION 1. ESSENTIAL PARTS; Names of Parts
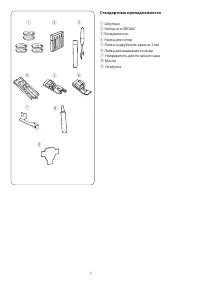
- 5 Стандартные принадлежности; Направитель для потайного шва; Standard Accessories
- 6 ПОДГОТОВКА К ШИТЬЮ; Подключение машины к сети; SECTION 2. GETTING READY TO SEW
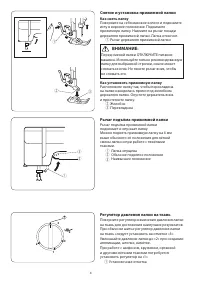
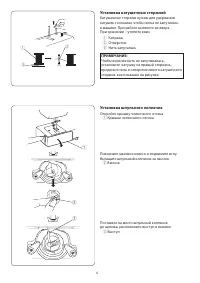
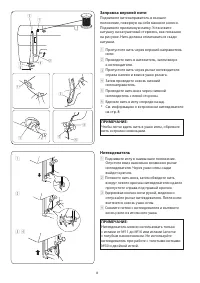
- 7 Снятие и установка прижимной лапки; Как снять лапку; Рычаг подъёма прижимной лапки; To attach; To Attach and Remove the Presser Foot; To remove; Presser Foot Lifter
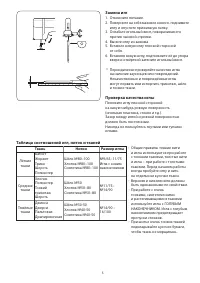
- 8 Ткань; Changing Needle; To check the needle; Fabric, Thread and Needle Chart; Fabric; Fine
- 11 Needle Threader; Needle Threader
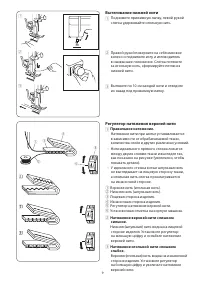
- 12 Регулятор натяжения верхней нити; Правильное натяжение.; • Нити идеального прямого стежка ложатся; Натяжение верхней нити слишком; Вытягивание нижней нити
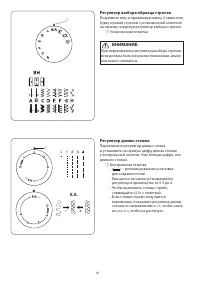
- 13 • При шитье зигзагом устанавливайте; Stitch Selector Dial; Stitch Length Dial; Stitch Length Dial
- 14 • При обычном шитье транспортёр ткани; Регулятор ширины зигзага
- 15 SECTION 3. BASIC SEWING
- 16 Различные положения иглы
- 17 Зигзаг; для зигзага; Zigzag foot; Zigzag foot
- 18 SECTION 4. UTILITY STITCHING
- 20 Buttonhole; Buttonhole; z x; Buttonhole; z x
- 21 Регулировка плотности петли; Adjusting buttonhole stitch density
- 23 Zipper Application; Zipper foot
- 24 Потайной шов; • Если игла уйдет далеко влево, стежки будут; Blind Hem Stitch
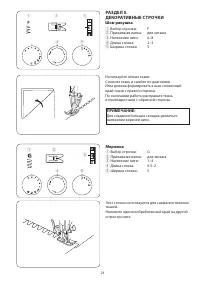
- 26 ДЕКОРАТИВНЫЕ СТРОЧКИ; Мережка; SECTION 5. DECORATIVE STITCHING
- 28 • если строчка слишком плотная, передвиньте; Applique
- 29 УХОД ЗА МАШИНОЙ; Сборка челночного механизма; Как разобрать челночный механизм; • Щёточкой и мягкой салфеткой очистите; Как собрать челночный механизм; Чистка нижнего транспортёра ткани; Щёточкой удалите пыль и остатки ткани
- 30 Устранение неисправностей; Неисправность Вероятная причина
Характеристики

Остались вопросы?Не нашли свой ответ в руководстве или возникли другие проблемы? Задайте свой вопрос в форме ниже с подробным описанием вашей ситуации, чтобы другие люди и специалисты смогли дать на него ответ. Если вы знаете как решить проблему другого человека, пожалуйста, подскажите ему :)


