
Шлифмашины Bosch GWS 9-125 - инструкция пользователя по применению, эксплуатации и установке на русском языке. Мы надеемся, она поможет вам решить возникшие у вас вопросы при эксплуатации техники.
Если остались вопросы, задайте их в комментариях после инструкции.
"Загружаем инструкцию", означает, что нужно подождать пока файл загрузится и можно будет его читать онлайн. Некоторые инструкции очень большие и время их появления зависит от вашей скорости интернета.


18
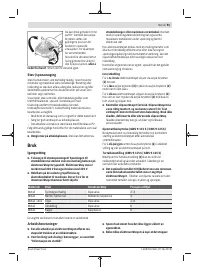
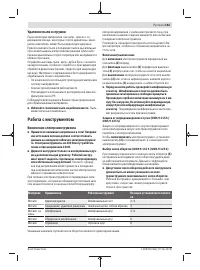
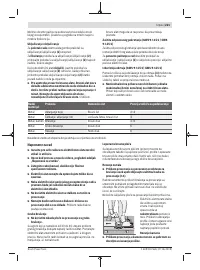
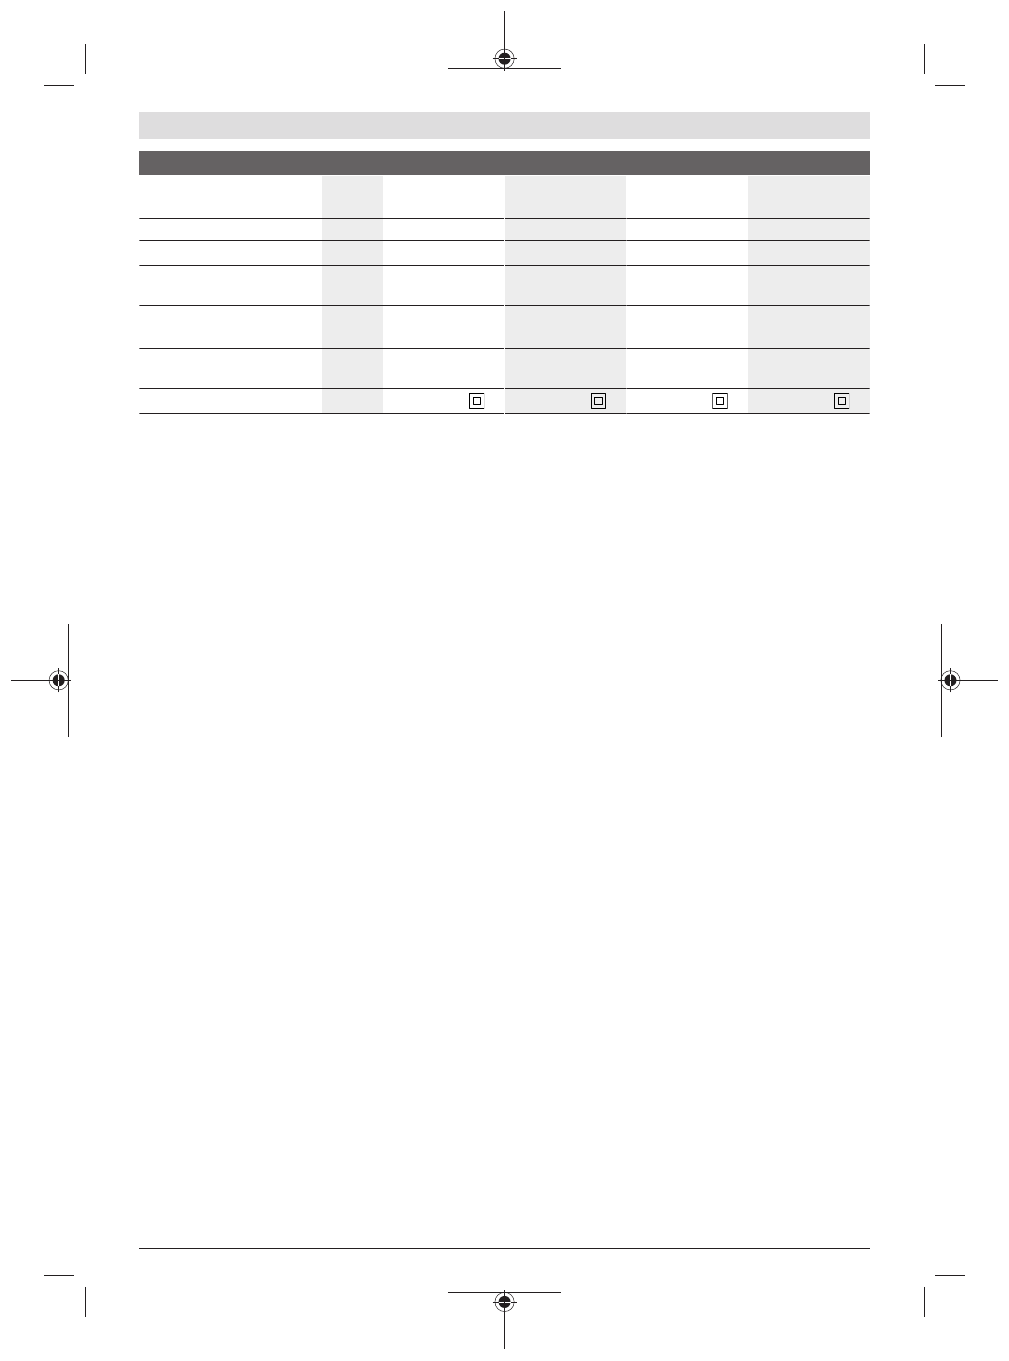
| English
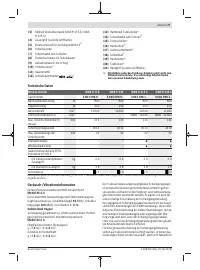
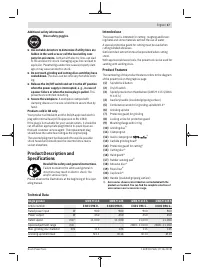
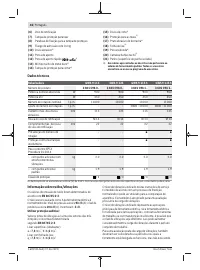
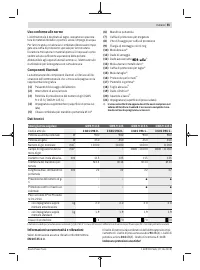
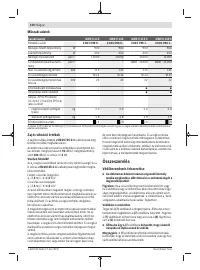
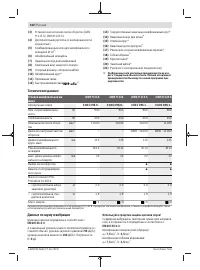
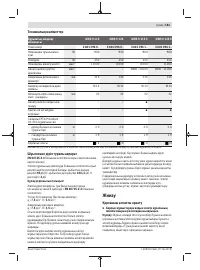
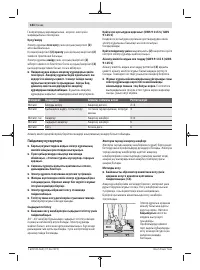
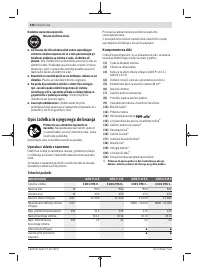
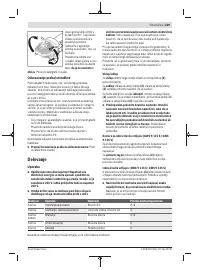
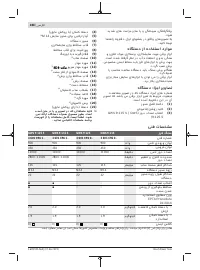
Angle grinder
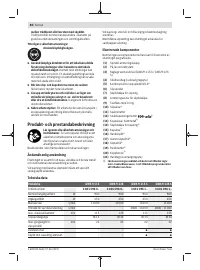
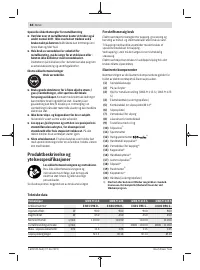
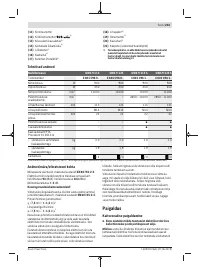
GWS 9-115
GWS 9-125
GWS 9-115 S
GWS 9-125 S
Max. thread length of grinding
spindle
mm
22
22
22
22
Speed preselection
–
–
●
●
Restart protection
–
–
●
●
Weight according to EPTA-
Procedure 01:2014
– with additional low-vibra-
tion auxiliary handle
kg
2.0
2.0
2.0
2.0
– with standard auxiliary
handle
kg
1.9
1.9
1.9
1.9
Protection class
/ II
/ II
/ II
/ II
The specifications apply to a rated voltage [U] of 230 V. These specifications may vary at different voltages and in country-specific models.
Noise/Vibration Information
Noise emission values determined according to
EN 60745-2-3
.
Typically, the A-weighted noise level of the power tool is:
Sound pressure level
93
dB(A); sound power level
104
dB(A). Uncertainty K=
3
dB.
Wear hearing protection.
Vibration total values a
h
(triax vector sum) and uncertainty K
determined according to
EN 60745-2-3
:
Surface grinding (roughing):
a
h
=
7,5
m/s
2
, K=
1,5
m/s
2
,
Grinding with abrasive disc:
a
h
=
7,5
m/s
2
, K=
1,5
m/s
2
.
The vibration level given in these instructions has been
measured in accordance with a standardised measuring pro-
cedure and may be used to compare power tools. It can also
be used for a preliminary estimation of exposure to vibra-
tion.
The stated vibration level applies to the main applications of
the power tool. However, if the power tool is used for differ-
ent applications, with different application tools or poorly
maintained, the vibration level may differ. This can signific-
antly increase the exposure to vibration over the total work-
ing period.
To estimate the exposure to vibration accurately, the times
when the tool is switched off or when it is running but not ac-
tually being used should also be taken into account. This can
significantly reduce the exposure to vibration over the total
working period.
Implement additional safety measures to protect the oper-
ator from the effects of vibration, such as servicing the
power tool and application tools, keeping the hands warm,
and organising workflows correctly.
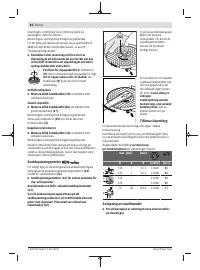
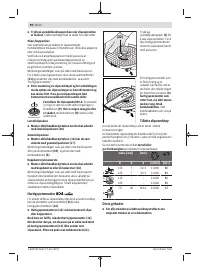
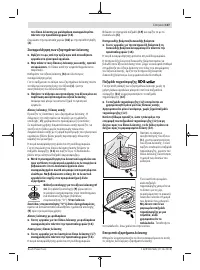
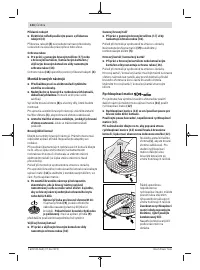
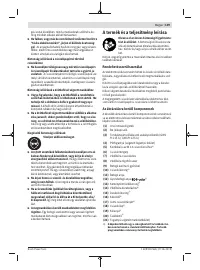
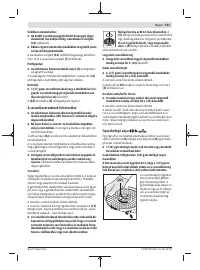
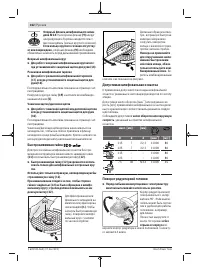
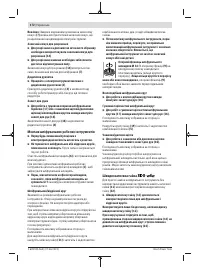
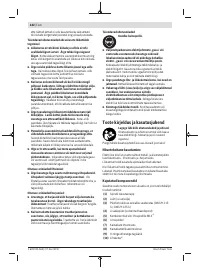
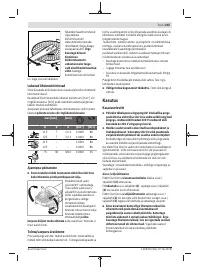
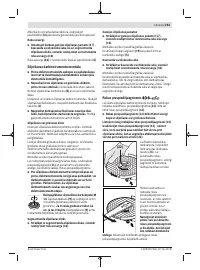
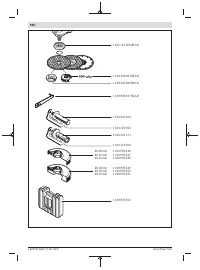
Fitting
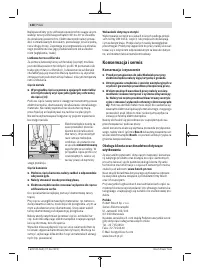
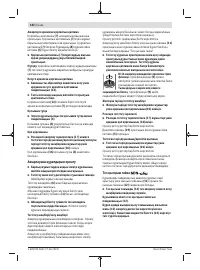
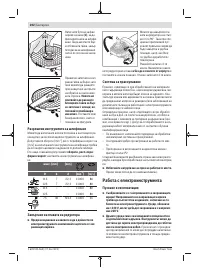
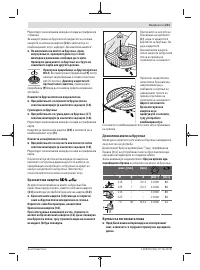
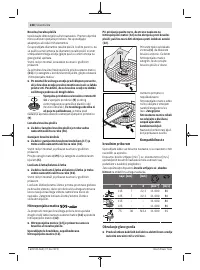
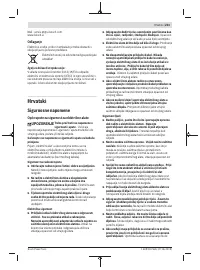
Fitting Protective Equipment
u
Pull the plug out of the socket before carrying out any
work on the power tool.
Note:
If the grinding disc breaks during operation or the
holding fixtures on the protective guard/power tool become
damaged, the power tool must be sent to the after-sales ser-
vice immediately; see the "After-Sales Service and Applica-
tion Service" section for addresses.
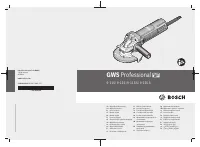
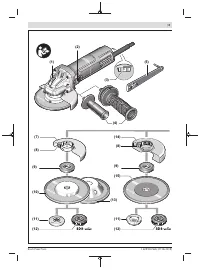
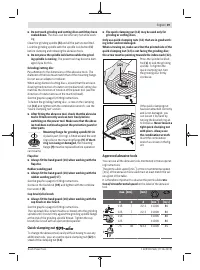
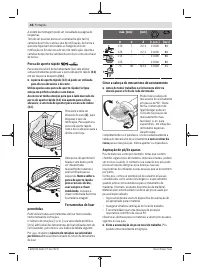
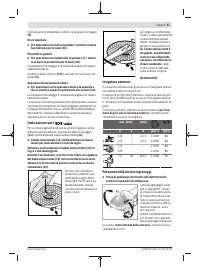
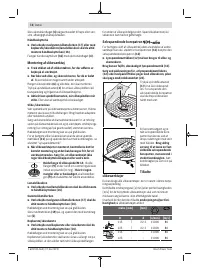
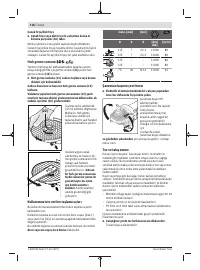
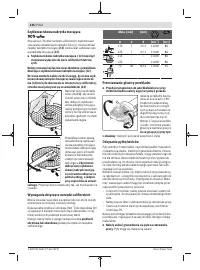
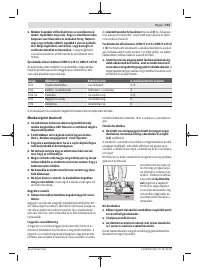
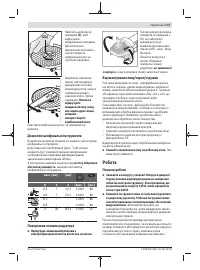
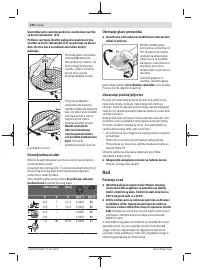
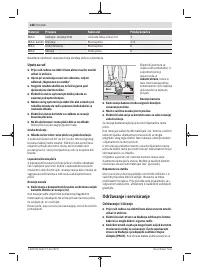
Protective guard for grinding
Place the protective guard
(7)
on the spindle collar. Adjust
the position of the protective guard
(7)
to meet the require-
ments of the operation. Lock the protective guard
(7)
by
tightening the locking screw
(8)
using the combination
wrench
(5)
.
u
Adjust the protective guard
(7)
such that sparking in
the direction of the operator is prevented.
Note:
The coding cams on the protective guard
(7)
ensure
that only a protective guard that is suitable for the power
tool can be fitted.
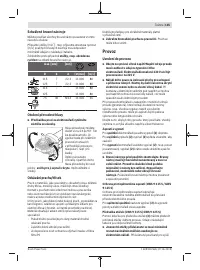
Protective guard for cutting
u
Always use the protective guard for cutting (14) when
cutting bonded abrasives.
u
Provide sufficient dust extraction when cutting stone.
The protective guard for cutting
(14)
is fitted in the same
way as the protective guard for grinding
(7)
.
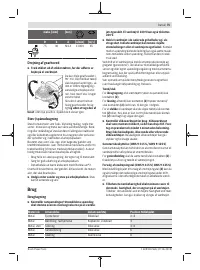
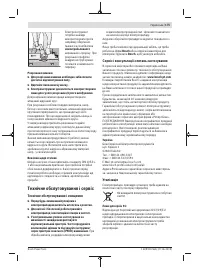
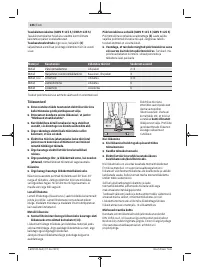
Side handle
u
Do not operate your power tool without the side
handle
(4)
.
Screw the side handle
(4)
on the left or right of the machine
head depending on how your are working.
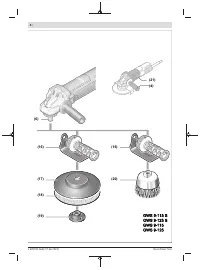
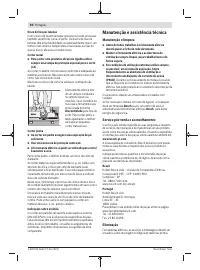
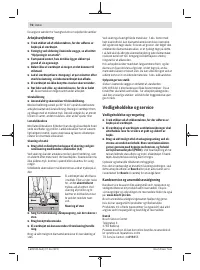
Hand guard
u
Always fit the hand guard (16)
when working with the
rubber sanding pad
(17)
or with the cup brush/disc
brush/flap disc.
Attach the hand guard
(16)
to the side handle
(4)
.
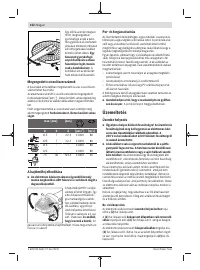
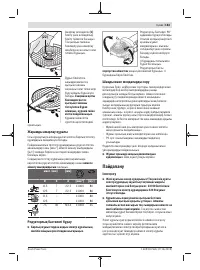
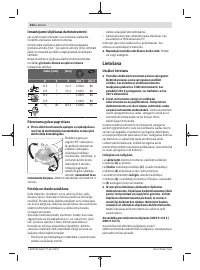
Fitting the abrasive tools
u
Pull the plug out of the socket before carrying out any
work on the power tool.
1 609 92A 56A | (27.06.2019)
Bosch Power Tools
Характеристики

Остались вопросы?Не нашли свой ответ в руководстве или возникли другие проблемы? Задайте свой вопрос в форме ниже с подробным описанием вашей ситуации, чтобы другие люди и специалисты смогли дать на него ответ. Если вы знаете как решить проблему другого человека, пожалуйста, подскажите ему :)


