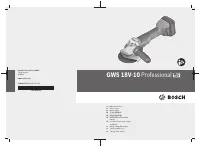
Шлифмашины Bosch 18V-10, (06019J4004) - инструкция пользователя по применению, эксплуатации и установке на русском языке. Мы надеемся, она поможет вам решить возникшие у вас вопросы при эксплуатации техники.
Если остались вопросы, задайте их в комментариях после инструкции.
"Загружаем инструкцию", означает, что нужно подождать пока файл загрузится и можно будет его читать онлайн. Некоторые инструкции очень большие и время их появления зависит от вашей скорости интернета.


English |
11
u
Do not continue to press the On/Off switch after the
power tool has automatically switched off.
The battery
can be damaged.
Follow the instructions on correct disposal.
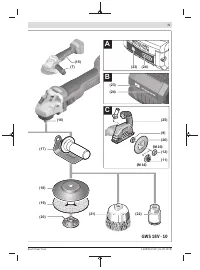
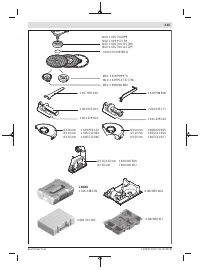
Removing the Battery
The battery
(5)
is equipped with two locking levels to pre-
vent the battery from falling out if the battery release button
(6)
is pressed unintentionally. As long as the battery is inser-
ted in the power tool, it is held in position by means of a
spring.
To remove the battery
(5)
, press the release button
(6)
and
pull the battery out of the power tool.
Do not use force to
do this.
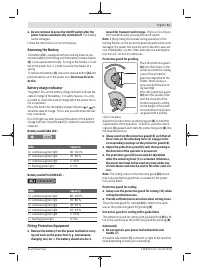
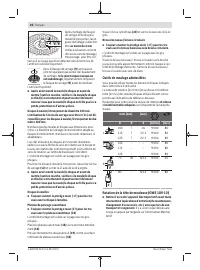
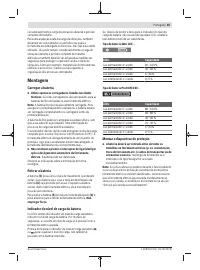
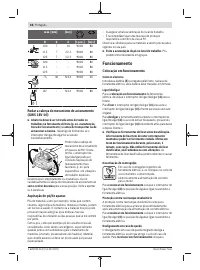
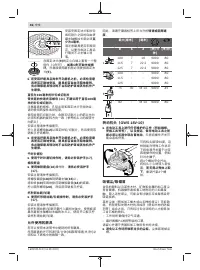
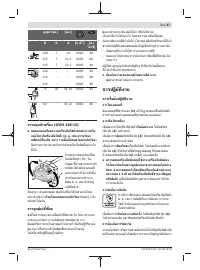
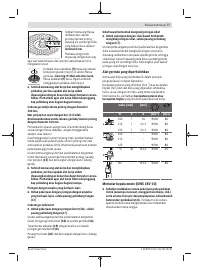
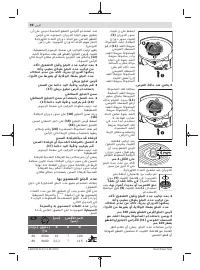
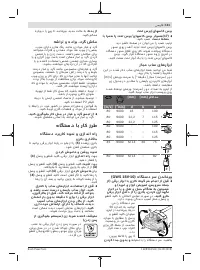
Battery charge indicator
The green LEDs on the battery charge indicator indicate the
state of charge of the battery. For safety reasons, it is only
possible to check the state of charge when the power tool is
not in operation.
Press the button for the battery charge indicator or
to
show the state of charge. This is also possible when the bat-
tery is removed.
If no LED lights up after pressing the button for the battery
charge indicator, then the battery is defective and must be
replaced.
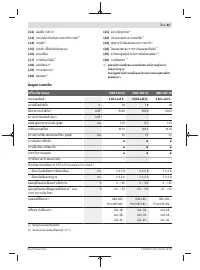
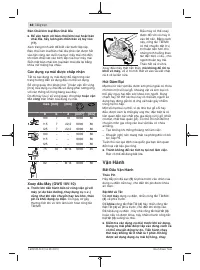
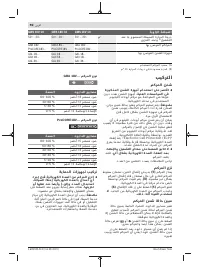
Battery model GBA 18V...
LEDs
Capacity
3× continuous green light
60−100 %
2× continuous green light
30−60 %
1× continuous green light
5−30 %
1× flashing green light
0−5 %
Battery model ProCORE18V...
LEDs
Capacity
5× continuous green light
80−100 %
4× continuous green light
60−80 %
3× continuous green light
40−60 %
2× continuous green light
20−40 %
1× continuous green light
5−20 %
1× flashing green light
0−5 %
Fitting Protective Equipment
u
Remove the battery from the power tool before carry-
ing out work on the power tool (e.g. maintenance,
changing tool, etc.). The battery should also be re-
moved for transport and storage.
There is risk of injury
from unintentionally pressing the on/off switch.
Note:
If the grinding disc breaks during operation or the
holding fixtures on the protective guard/power tool become
damaged, the power tool must be sent to the after-sales ser-
vice immediately; see the "After-Sales Service and Applica-
tion Service" section for addresses.
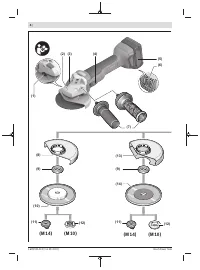
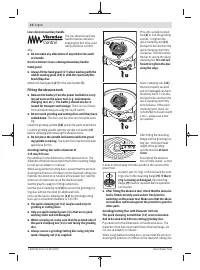
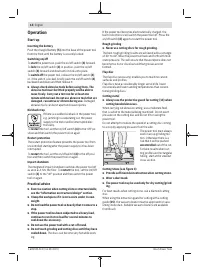
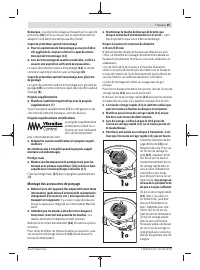
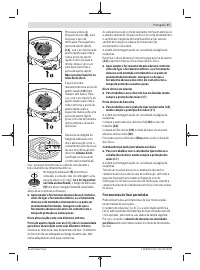
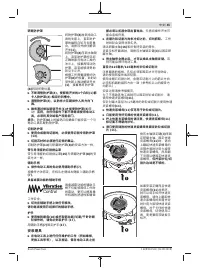
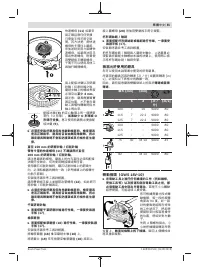
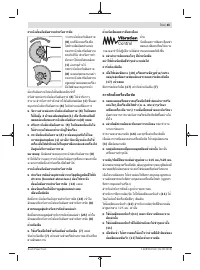
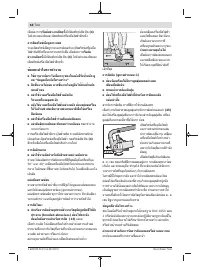
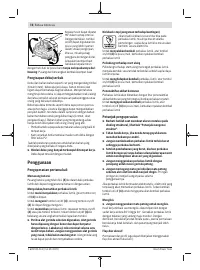
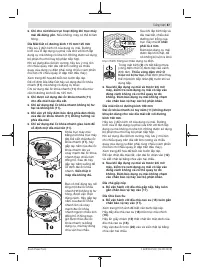
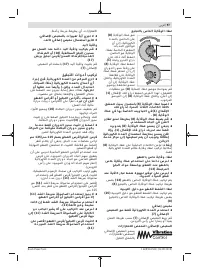
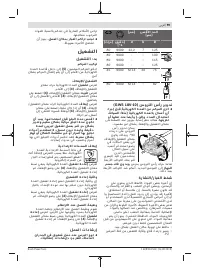
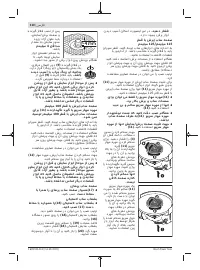
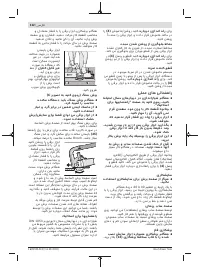
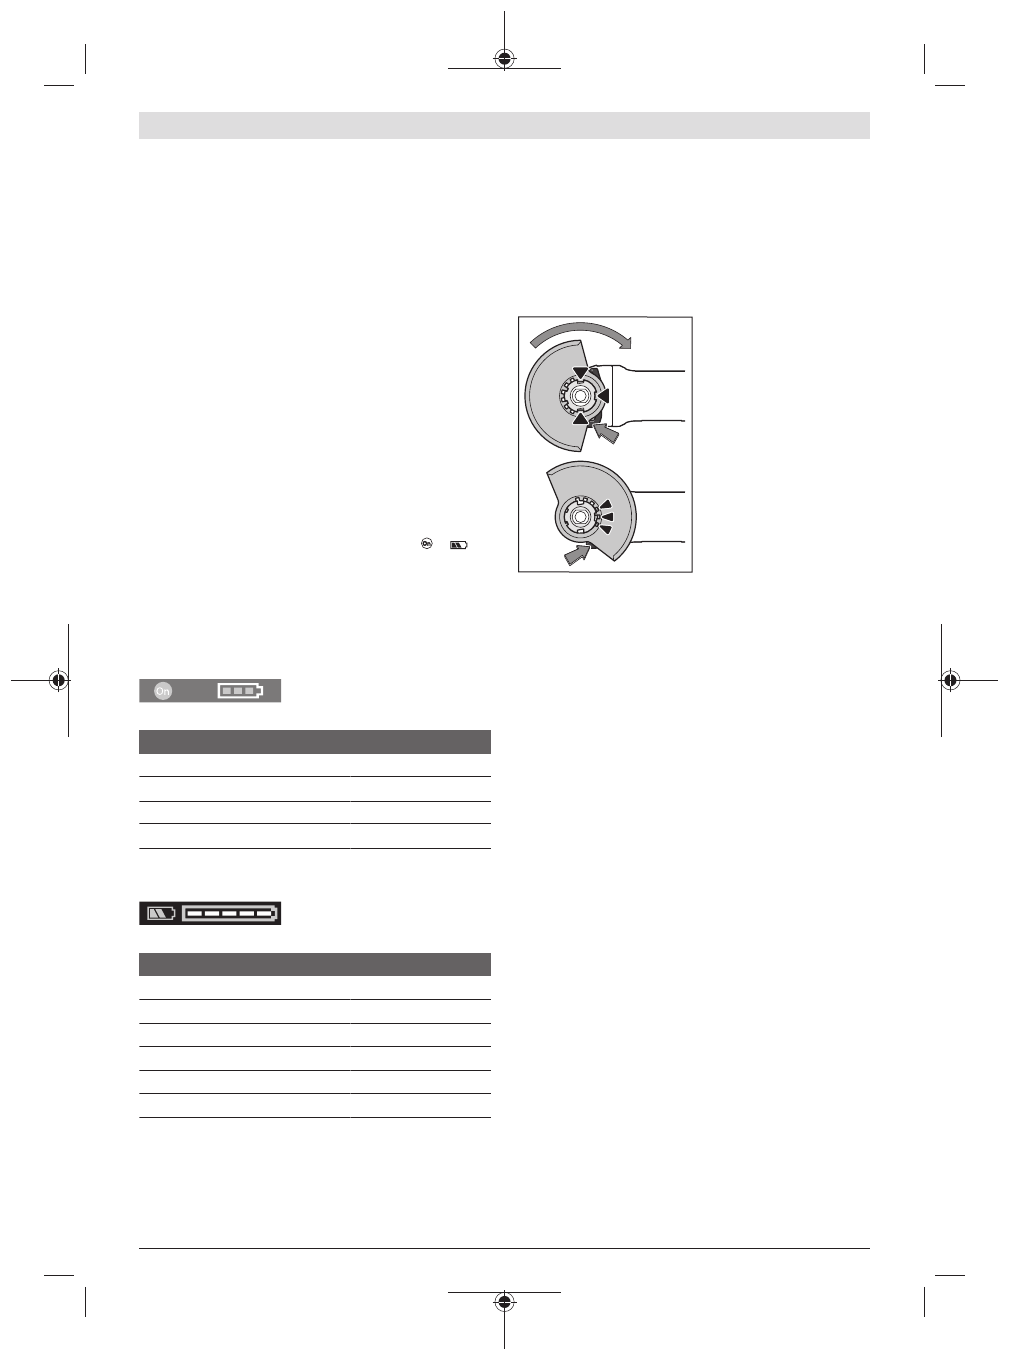
Protective guard for grinding
Place the protective guard
(8)
onto the holder on the
power tool until the coding
cams of the protective
guard are aligned with the
holder. When doing so,
press and hold the unlock-
ing lever
(1)
.
Press the protective guard
(8)
onto the spindle collar
until the shoulder of the
protective guard is sitting
on the flange of the power
tool and rotate the protect-
ive guard until it audibly
clicks into place.
Adjust the position of the protective guard
(8)
to meet the
requirements of the operation. To do this, push the unlock-
ing lever
(1)
upward and rotate the protective guard
(8)
into
the required position.
u
Always position the protective guard
(8)
such that all
three cams on the unlocking lever (1)
engage in the
corresponding openings on the protective guard (8).
u
Adjust the protective guard
(8)
such that sparking in
the direction of the operator is prevented.
u
The protective guard
(8)
must only be adjustable
while the unlocking lever (1)
is actuated. Otherwise,
the power tool must not be used any more under any
circumstances and must be sent to the after-sales ser-
vice.
Note:
The coding cams on the protective guard
(8)
ensure
that only a protective guard that is suitable for the power
tool can be fitted.
Protective guard for cutting
u
Always use the protective guard for cutting (13) when
cutting bonded abrasives.
u
Provide sufficient dust extraction when cutting stone.
The protective guard for cutting
(13)
is fitted in the same
way as the protective guard for grinding
(8)
.
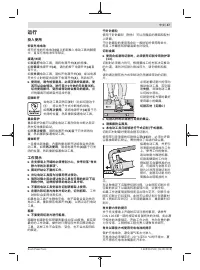
Extraction guard for cutting with a guide block
The extraction guard for cutting with a guide block
(25)
is fit-
ted in the same way as the protective guard for grinding
(8)
.
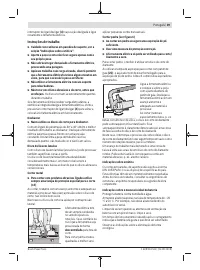
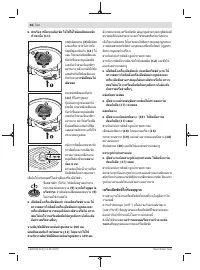
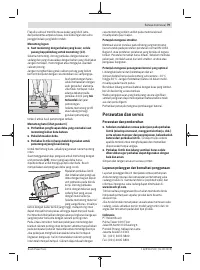
Side handle
u
Do not operate your power tool without the side
handle
(7)
.
Screw the side handle
(7)
on the left or right of the machine
head depending on how your are working.
Bosch Power Tools
1 609 92A 51Z | (13.09.2019)
Характеристики

Остались вопросы?Не нашли свой ответ в руководстве или возникли другие проблемы? Задайте свой вопрос в форме ниже с подробным описанием вашей ситуации, чтобы другие люди и специалисты смогли дать на него ответ. Если вы знаете как решить проблему другого человека, пожалуйста, подскажите ему :)


