
Пылесос Bosch BGL252101 MoveOn Mini - инструкция пользователя по применению, эксплуатации и установке на русском языке. Мы надеемся, она поможет вам решить возникшие у вас вопросы при эксплуатации техники.
Если остались вопросы, задайте их в комментариях после инструкции.
"Загружаем инструкцию", означает, что нужно подождать пока файл загрузится и можно будет его читать онлайн. Некоторые инструкции очень большие и время их появления зависит от вашей скорости интернета.


4
1
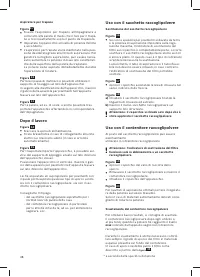
Figure
18
a
)
C
los
e
th
e
dust bag by pulling on th
e
locking tab and
th
e
n r
em
ov
e
it.
b)
Ins
e
r t a n
e
w dust bag by pushing it fully into th
e
hold
e
r.
!
Ple
as
e note: The lid will only clo
s
e if
a
du
s
t b
a
g
h
as
been in
s
erted.
U
s
ing the du
s
t cont
a
iner
If n
e
c
e
ssar y
,
a dust contain
e
r can b
e
us
e
d in plac
e
of
a dust bag.
!
Ple
as
e note: The du
s
t b
a
g ch
a
nge indic
a
tor only
work
s
in conjunction with
a
du
s
t b
a
g.
Figure
19
Op
e
n th
e
dust bag co
m
par t
me
nt lid.
Rem
ov
e
th
e
dust bag and ins
e
r t th
e
dust contain
e
r.
C
los
e
th
e
applianc
e
lid.
Figure
20
Se
t th
e
pow
e
r s
e
tting to
m
a xi
m
u
m
for b
e
st r
e
sults
wh
e
n vacuu
m
ing.
W
e
r
e
co
mme
nd that you r
e
duc
e
th
e
s
e
tting only wh
e
n
vacuu
m
ing v
e
r y d
e
licat
e
m
at
e
rials.
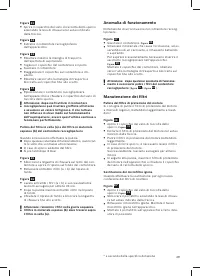
E
m
ptying the du
s
t cont
a
iner
In ord
e
r to achi
e
v
e
th
e
b
e
st possibl
e
vacuu
m
ing
r
e
sults
,
th
e
dust contain
e
r should b
e
em
pti
e
d aft
e
r
e
v
e
r y us
e
or
,
at th
e
lat
e
st
,
wh
e
n dust at on
e
point in
th
e
contain
e
r has r
e
ach
e
d th
e
ma
x
m
arking.
Wh
e
n
em
ptying th
e
dust contain
e
r
,
always ch
e
ck th
e
soiling l
e
v
e
l of th
e
foa
m
filt
e
r in th
e
botto
m
of th
e
contain
e
r.
Wh
e
n it is visibly soil
e
d
,
cl
e
an th
e
filt
e
r as d
e
scrib
e
d
fro
m
figure
25
onwards.
Figure
21
Op
e
n th
e
dust bag co
m
par t
me
nt lid by
m
oving th
e
locking l
e
v
e
r in th
e
dir
e
ction of th
e
arrow.
Figure
22
Rem
ov
e
th
e
dust contain
e
r fro
m
th
e
applianc
e
.
Figure
23
Fold th
e
carr ying handl
e
backwards
,
away fro
m
th
e
air intak
e
op
e
ning.
Rem
ov
e
th
e
cov
e
r fro
m
th
e
contain
e
r and put it to
on
e
sid
e
.
E
m
pty th
e
contain
e
r.
Hook th
e
cov
e
r into th
e
contain
e
r and th
e
clos
e
it.
Fold up th
e
carr ying handl
e
and lock it in plac
e
on
th
e
cov
e
r.
Figure
24
Re
ins
e
r t th
e
dust contain
e
r into th
e
applianc
e
and
clos
e
th
e
dust bag co
m
par t
me
nt lid.
!
Ple
as
e note: The in
s
ide of the du
s
t cont
a
iner
ma
y beco
m
e
s
cr
a
tched with u
s
e
a
nd
s
t
a
rt to look
op
a
que. Thi
s
doe
s
not
,
however
,
a
ffect the perfor
-
ma
nce of the v
a
cuu
m
cle
a
ner in
a
ny w
a
y
,
i.e. it will
continue to function
as
nor
ma
l.
Th
e
drill dust nozzl
e
is h
e
ld in th
e
r
e
quir
e
d position
by suction. D
e
p
e
nding on th
e
condition of th
e
wall to
b
e
drill
e
d
,
you
m
ay n
ee
d to adjust to a high
e
r pow
e
r
s
e
tting to
e
nsur
e
that th
e
drill dust nozzl
e
r
em
ains
in plac
e
.
During drilling
,
th
e
fin
e
dust is auto
m
atically vacu-
u
me
d up.
Figure
12
You can us
e
th
e
parking aid on th
e
sid
e
of th
e
appli-
anc
e
if you wish to stop vacuu
m
ing for a shor t ti
me
.
Aft
e
r switching off th
e
applianc
e,
slid
e
th
e
hook
on th
e
floor tool into th
e
r
e
c
e
ss on th
e
sid
e
of th
e
applianc
e
.
Figure
13
Wh
e
n vacuu
m
ing on stairs for
e
xa
m
pl
e,
th
e
applianc
e
can also b
e
carri
e
d by th
e
handl
e
.
After u
s
ing the
a
ppli
a
nce
Figure
14
P
ull out th
e
m
ains plug.
Bri
e
fly pull on th
e
pow
e
r cord and th
e
n r
e
l
e
as
e
it
(th
e
pow
e
r cord r
e
tracts auto
m
atically).
Figure
15
To stor
e
/transpor t th
e
applianc
e,
you can us
e
th
e
storag
e
aid on th
e
und
e
rsid
e
of th
e
applianc
e
.
S
tand th
e
applianc
e
up on its
e
nd.
S
lid
e
th
e
hook on
th
e
floor tool into th
e
r
e
c
e
ss on th
e
und
e
rsid
e
of th
e
applianc
e
.
You hav
e
purchas
e
d a floor vacuu
m
cl
e
an
e
r which can
vacuu
m
up any typ
e
of dr y dir t using th
e
dust contai-
n
e
r or dust bag.
W
e
r
e
co
mme
nd that you us
e
:
− Th
e
dust bag principally for
e
v
e
ryday hous
e
hold
cl
e
aning.
− Th
e
dust contain
e
r for DIY-r
e
lat
e
d cl
e
aning in parti-
cular
,
e
.g. to vacuu
m
up wood shavings
,
e
tc.
U
s
ing du
s
t b
a
g
s
R
epl
a
cing the du
s
t b
a
g
Figure
16
If th
e
dust bag chang
e
indicator in th
e
lid is fill
e
d
co
m
pl
e
t
e
ly wh
e
n th
e
floor tool is lift
e
d fro
m
th
e
floor with th
e
high
e
st suction l
e
v
e
l s
e
l
e
ct
e
d
,
th
e
dust bag
m
ust b
e
chang
e
d
,
e
v
e
n though it
m
ay not
y
e
t b
e
full. Ev
e
n if th
e
dust bag is not full
,
it
m
ay
still n
ee
d changing
,
du
e
to th
e
typ
e
of dust which
has b
ee
n vacuu
me
d.
First ch
e
ck that th
e
nozzl
e,
suction pip
e
and fl
e
xib -
l
e
hos
e
ar
e
not block
e
d
,
as this would also l
e
ad to
th
e
dust bag chang
e
indicator b
e
ing trigg
e
r
e
d.
Figure
17
Unlock th
e
lid by r
e
l
e
asing th
e
locking l
e
v
e
r in th
e
dir
e
ction of th
e
arrow.
* D
e
p
e
nding on
m
od
e
l


