Пылесос Bosch BGC 4U330 - инструкция пользователя по применению, эксплуатации и установке на русском языке. Мы надеемся, она поможет вам решить возникшие у вас вопросы при эксплуатации техники.
Если остались вопросы, задайте их в комментариях после инструкции.
"Загружаем инструкцию", означает, что нужно подождать пока файл загрузится и можно будет его читать онлайн. Некоторые инструкции очень большие и время их появления зависит от вашей скорости интернета.


4
6
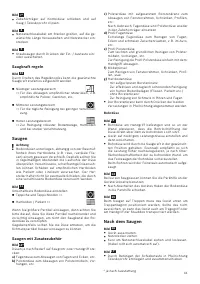
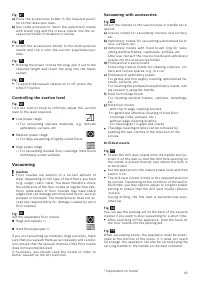
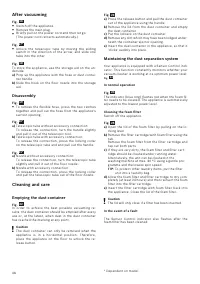
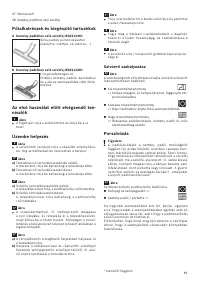
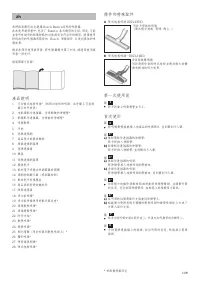
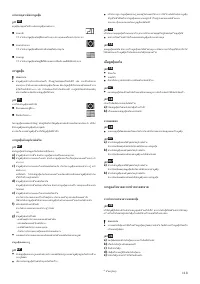
After vacuu
m
ing
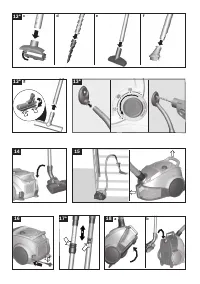
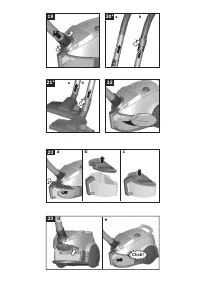
Fig.
16
S
witch off the appliance.
R
emove the main plug.
Briefly pull on the power cord and then let go.
(The power cord retracts automatically.)
Fig.
17*
Unlock the telescopic tube by moving the sliding
switch in the direction of the arrow
,
and slide one
tube into the other.
Fig.
18
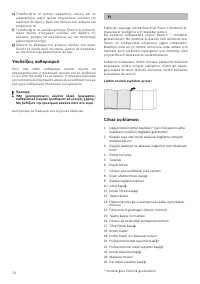
To store the appliance
,
use the storage aid on the un-
derside.
a)
P
rop up the appliance with the hose or dust contai-
ner handle.
b)
S
lide the hook on the floor nozzle into the storage
aid.
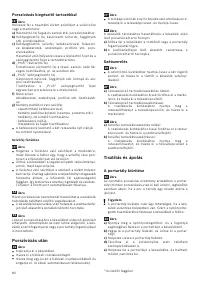
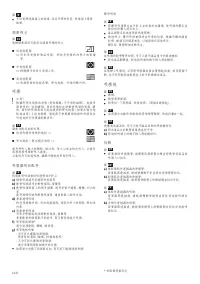
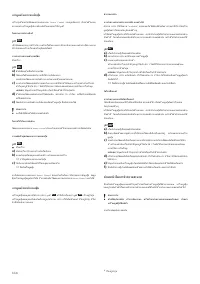
Disasse
m
bly
Fig.
1
9
To remove the flexible hose
,
press the two catches
together and pull out the hose from the appliance's
suction opening.
Fig.
2
0*
a)
Telescopic tube without accessor y connection:
To release the connection
,
turn the handle slightly
and pull it out of the telescopic tool.
b)
Telescopic tube with accessor y connection:
To release the connection
,
press the locking collar
on the telescopic tube and and pull out the handle.
Fig.
2
1*
a)
Nozzle without accessor y connection:
To release the connection
,
turn the telescopic tube
slightly and pull it out of the floor nozzle.
b)
Nozzle with accessor y connection:
To release the connection
,
press the locking collar
and pull the telescopic tube out of the floor nozzle.
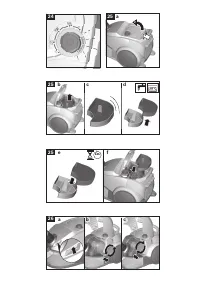
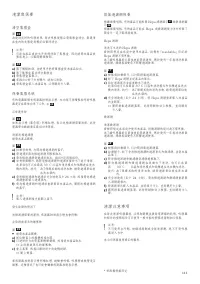
Cleaning and care
E
m
ptying the dust container
Fig.
22
In order to achieve the best possible vacuuming re -
sults
,
the dust container should be emptied after ever y
use or
,
at the latest
,
when dust in the dust container
has reached the marking at any point.
!
Caution
The dust container can only be removed when the
appliance is in a horizontal position. Therefore
,
place the appliance on the floor to unlock the re -
lease button.
* Dependent on model
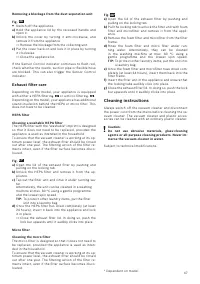
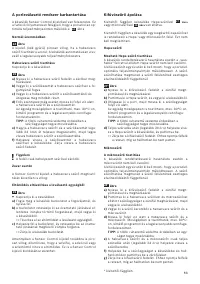
Fig.
2
3
a)
P
ress the release button and pull the dust container
out of the appliance using the handle.
b)
R
emove the lid from the dust container and empty
the dust container.
c)
P
ut the lid back on the dust container.
d)
R
emove any dir t which may have been lodged under-
neath the container ejector opening.
e)
Inser t the dust container in the appliance
,
so that it
'clicks' audibly into place.
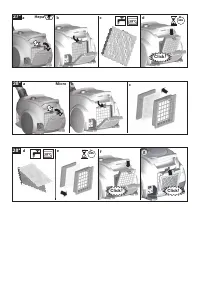
Maintaining the dust separation syste
m
Your appliance is equipped with a
S
ensor
C
ontrol indi-
cator. This function constantly monitors whether your
vacuum cleaner is working at its optimum power level.
Fig.
2
4
In nor
m
al operation
Fig.
2
4
The indicator (blue ring) flashes red when the foam fil-
ter needs to be cleaned. The appliance is automatically
adjusted to the lowest power level.
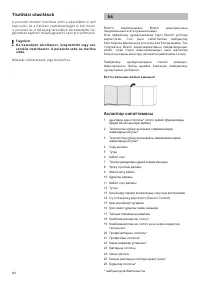
Cleaning the foa
m
filter
S
witch off the appliance.
Fig.
2
5
a)
Open the lid of the foam filter by pulling on the lo -
cking lever.
b)
R
emove the filter car tridge with foam filter using the
tab.
R
emove the foam filter from the filter car tridge and
tap out both par ts.
c)
If they are ver y dir ty
,
the foam filter and filter car t-
ridge should be cleaned under running water.
Alternatively
,
the unit can be cleaned in the
washing machine at ma x. 3 0 °
C
using a gentle pro -
gramme and the lowest spin speed.
TIP:
To protect other laundr y items
,
put the filter
unit into a laundr y bag.
d)
Allow the foam filter and filter car tridge to dr y com-
pletely (at least 24 hours) and then reinser t the foam
filter into the filter car tridge.
e)
Inser t the filter car tridge with foam filter back into
the appliance.
C
lose the lid of the foam filter.
!
Caution
The lid will only close if a filter has been inser ted.
In the event of a fault
The
S
ensor
C
ontrol indicator also flashes after the
foam filter has been cleaned:


