Мясорубки Zelmer 986.50 (53) (56) (57) (58) - инструкция пользователя по применению, эксплуатации и установке на русском языке. Мы надеемся, она поможет вам решить возникшие у вас вопросы при эксплуатации техники.
Если остались вопросы, задайте их в комментариях после инструкции.
"Загружаем инструкцию", означает, что нужно подождать пока файл загрузится и можно будет его читать онлайн. Некоторые инструкции очень большие и время их появления зависит от вашей скорости интернета.


74
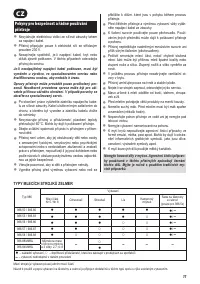
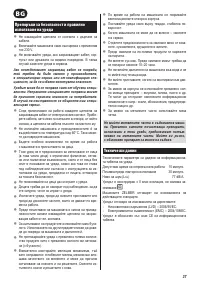
Technical parameters
The technical parameters are indicated on the rating label.
Permissible duration of uninterrupted operation 15 minutes.
Break before the next use
30 minutes.
Noise level (L
WA
)
77 dB/A.
The appliance features double electrical insulation (Class II)
and does not require grounding
.
ZELMER mincers fulill the requirements of the existing
norms.
The appliance is in conformity with the requirements of the
directives:
Low voltage appliance (LVD) – 2006/95/EC.
–
Electromagnetic compatibility (EMC) – 2004/108/EC.
–
The appliance was marked by the CE sign on the rating
label.
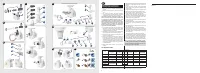
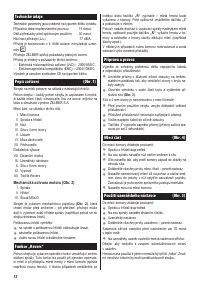
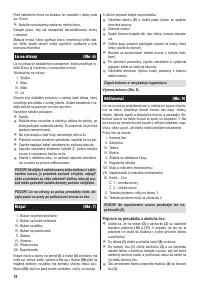
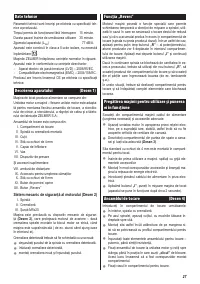
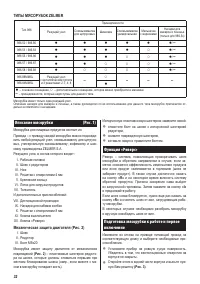
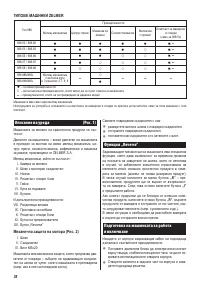
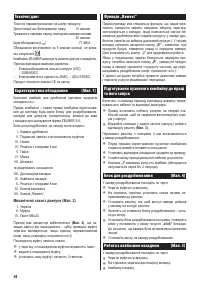
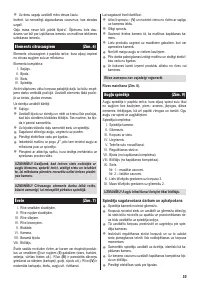
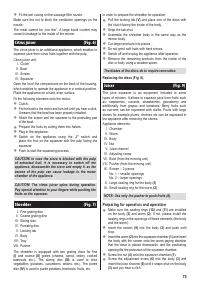
Description
(Fig. 1)
The food mincer consists of:
Mincer motor – each motor is adapted to install each
ZELMER mincing unit, citrus juicer, juicer, coffee grinder and
shredder.
The mincer unit consists of:
I. Mincer body
II. Scroll with clutch
III. Cutter
IV. Mincer screen with 4mm openings
V. Ring nut
VI. Tray
VII. Pusher
And additional accessories:
VIII. Base plate
IX. Sausage iller nozzle
X. Mincer screen with 8mm openings
XI. On/Off button.
XII. „Reverse” switch
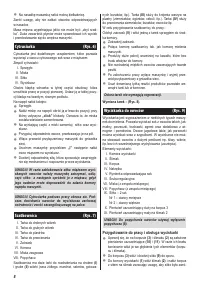
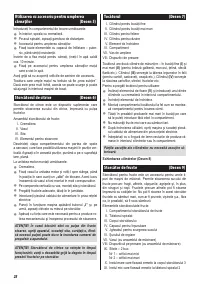
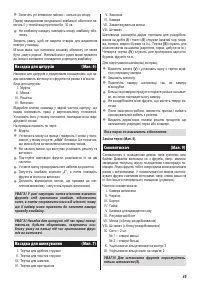
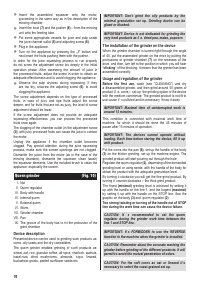
Mechanical safety device for the motor (Fig. 2)
I. Scroll
II. Clutch
III. Screw M5x20
The mincer is equipped with a mechanical safeguard, which
protects the motor against damage – the teeth in the clutch
break when the mincer is overloaded (e.g. when bones get
inside).
Replace the damaged clutch:
twist off the screw from the scroll with the damaged
●
clutch,
remove the damaged clutch,
●
attach the new clutch and tighten it with the screw.
●
„Reverse” function
The motor has a special function allowing to temporarily
change the direction of the scroll. It is used if mincing is
limited and/or if there is too much product in the mincer body
(the scroll does not take the product). Press the
„
R”
switch
for a short period of time, the product will be removed from
the inside of the mincer body. Press the
„I”
button once
again to continue operation.
If the scroll is still blocked by the excess of product, use the
„R”
switch once again, remove the product from the mincer
body and next remove product parts which make it dificult to
mince (e.g. sinews, etc.).
In some cases it is necessary to dismantle the mincer body
and remove the above-mentioned obstacles.
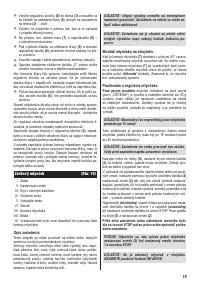
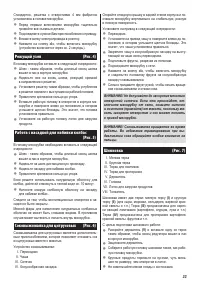
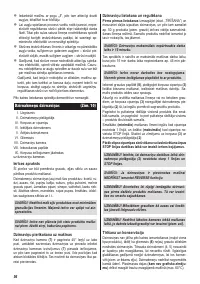
Preparing the appliance for operation and
switching on the appliance
Take out a suficient length of the supply cord and the
appropriate accessories from the compartment.
Place the motor near the socket, on a hard, stable
●
surface. Do not cover the ventilation openings of the
housing.
Open the compartment on the back of the housing and
●
take out an appropriate screen.
A screen with 4mm openings is installed in the mincer body
as a standard.
Wash all accessories thoroughly before the initial use.
●
Assemble the appropriate accessories and install them
●
on the motor.
Plug in the appliance.
●
Switch on the appliance using the
●
„I”
switch (the
appliance starts to operate after about 2 seconds).
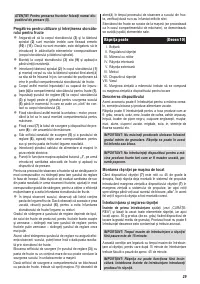
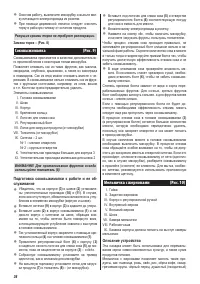
Mincing unit
(Fig. 4)
Fit the following elements in the mincer body:
The scroll with the clutch facing to the inside of the body.
●
The cutter to the bolt with the blades facing the screen.
●
The screen so that the protrusion of the body its the
●
groove in the circumference of the screen.
Tightly it all the elements of the mincer body.
●
Place the assembled mincer body on the motor and turn
●
left until you hear a click. It means that the body has
been properly installed.
Fit the tray to the mincer body.
●
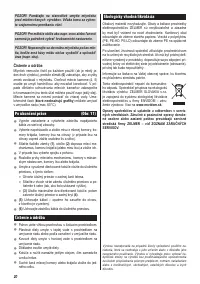
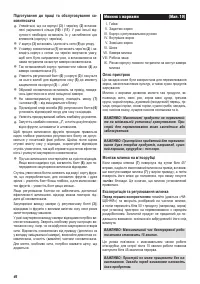
Operation with the sausage iller nozzle (Fig. 5)
Place the following elements in the mincer body:
The scroll with the clutch facing to the inside of the body.
●
The base plate to the bolt.
●
The sausage iller nozzle.
●
Tightly it all the elements with the ring nut.
●
Soak the casing for about 10 minutes before itting.


