Материнские платы GIGABYTE GA 73PVM S2H rev 1 0 - инструкция пользователя по применению, эксплуатации и установке на русском языке. Мы надеемся, она поможет вам решить возникшие у вас вопросы при эксплуатации техники.
Если остались вопросы, задайте их в комментариях после инструкции.
"Загружаем инструкцию", означает, что нужно подождать пока файл загрузится и можно будет его читать онлайн. Некоторые инструкции очень большие и время их появления зависит от вашей скорости интернета.


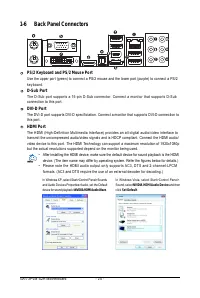
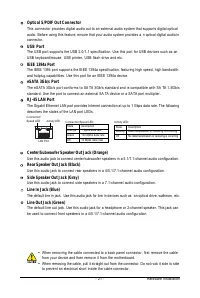
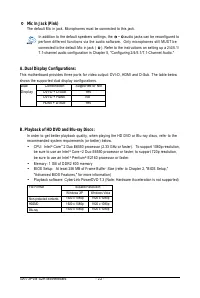
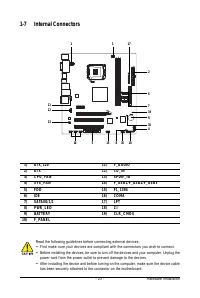


GA-73PVM-S2H Motherboard
- 3 6 -
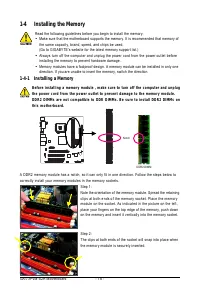
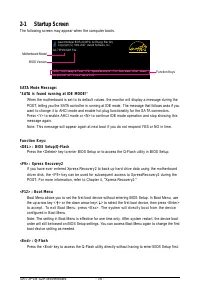
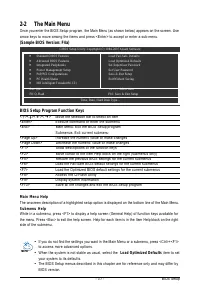
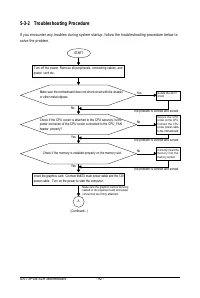
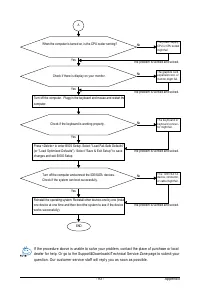
2-1
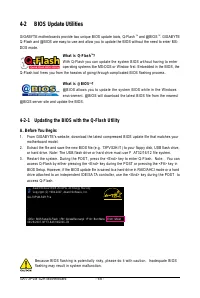
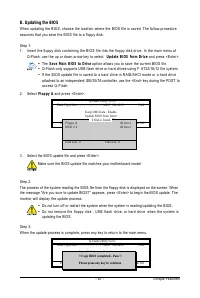
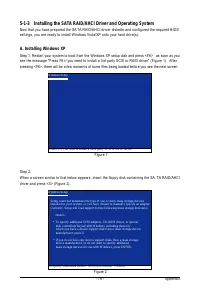
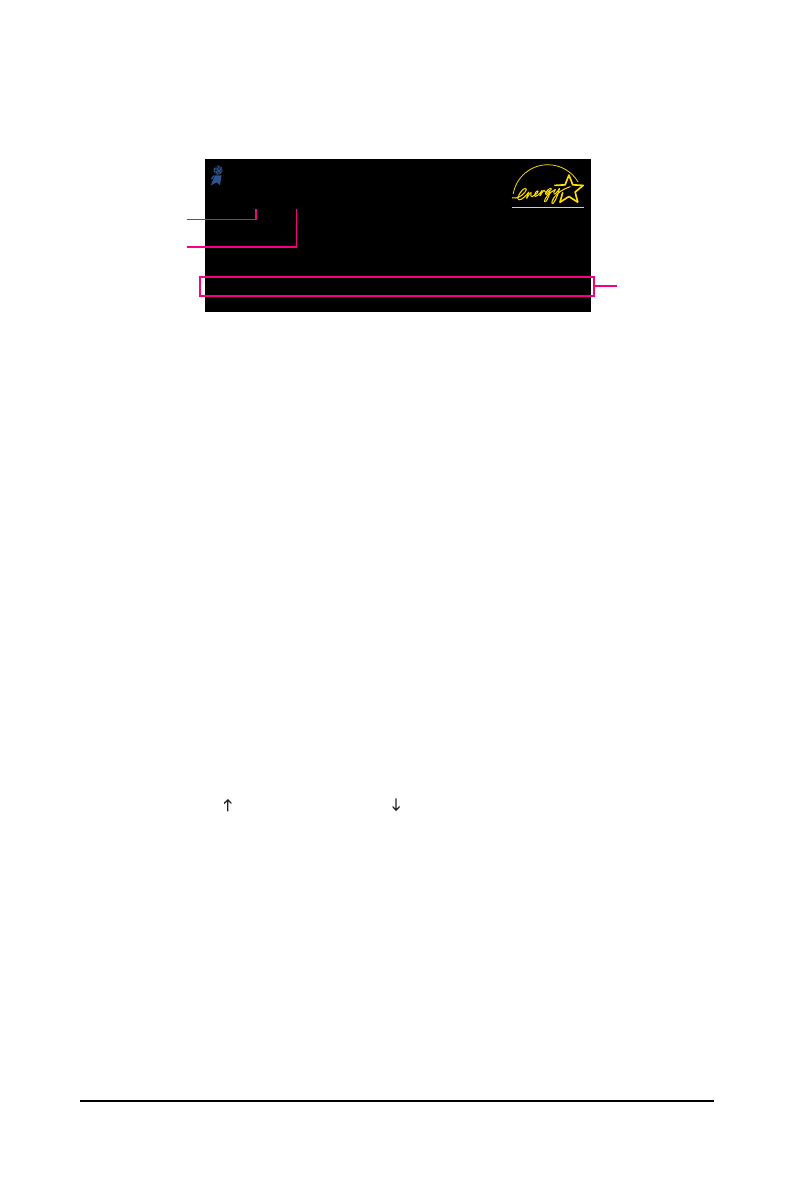
Startup Screen
The following screen may appear when the computer boots.
Function Keys:
<DEL> : BIOS Setup/Q-Flash
Press the <Delete> key to enter BIOS Setup or to access the Q-Flash utility in BIOS Setup.
<F9> : Xpress Recovery2
If you have ever entered Xpress Recovery2 to back up hard drive data using the motherboard
driver disk, the <F9> key can be used for subsequent access to XpressRecovery2 during the
POST. For more information, refer to Chapter 4, "Xpress Recovery2."
<F12> : Boot Menu
Boot Menu allows you to set the first boot device without entering BIOS Setup. In Boot Menu, use
the up arrow key < > or the down arrow key< > to select the first boot device, then press <Enter>
to accept. To exit Boot Menu, press <Esc>. The system will directly boot from the device
configured in Boot Menu.
Note: The setting in Boot Menu is effective for one time only. After system restart, the device boot
order will still be based on BIOS Setup settings. You can access Boot Menu again to change the first
boot device setting as needed.
<End> : Q-Flash
Press the <End> key to access the Q-Flash utility directly without having to enter BIOS Setup first.
Motherboard Model
BIOS Version
Function Keys
Award Modular BIOS v6.00PG, An Energy Star Ally
Copyright (C) 1984-2007, Award Software, Inc.
GA-73PVM-S2H F4a
.
.
.
.
<DEL>: BIOS Setup /Q-Flash <F9>: XpressRecovery2 <F12>: Boot Menu <End>: Qflash
0 9 / 2 8 / 2 0 0 7 - N F 7 3 - 6 A 6 1 N G 0 2 C - 0 0
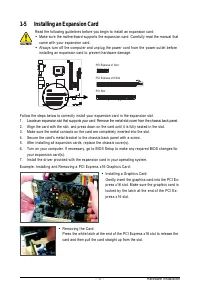
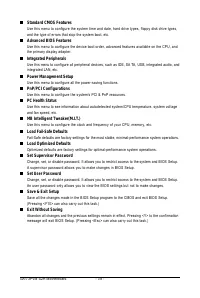
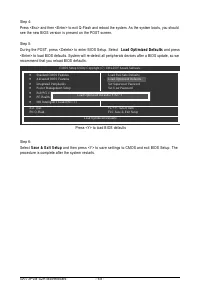
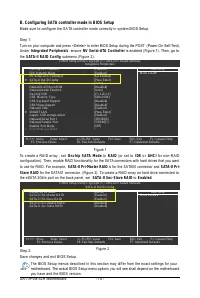
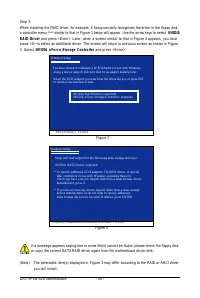
SATA Mode Message:
"SATA is found running at IDE MODE!"
When the motherboard is set to its default values, the monitor will display a message during the
POST, telling you the SATA controller is running at IDE mode. The message that follows asks if you
want to change it to AHCI mode and enable hot plug functionality for the SA TA connectors.
Press <Y> to enable AHCI mode or <N> to continue IDE mode operation and stop showing this
message again.
Note: This message will appear again at next boot if you do not respond YES or NO in time.


