Магнитолы Pioneer AVH-X1500DVD - инструкция пользователя по применению, эксплуатации и установке на русском языке. Мы надеемся, она поможет вам решить возникшие у вас вопросы при эксплуатации техники.
Если остались вопросы, задайте их в комментариях после инструкции.
"Загружаем инструкцию", означает, что нужно подождать пока файл загрузится и можно будет его читать онлайн. Некоторые инструкции очень большие и время их появления зависит от вашей скорости интернета.
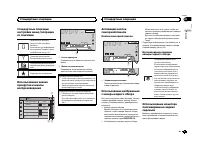


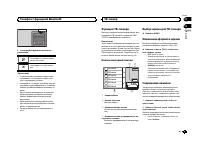

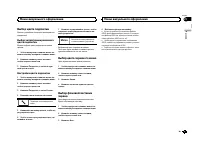
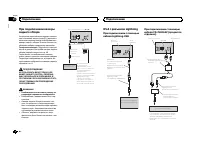
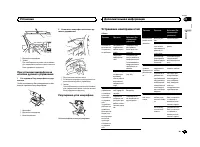
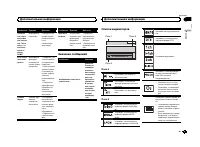
Настройка видеосигнала
Вы можете выбрать подходящую настройку
видеосигнала
.
1
Нажмите клавишу меню
,
чтобы от
-
крыть меню
.
2
Нажмите
Color System
,
чтобы открыть
список возможных настроек
.
3
Выберите подходящую настройку из
списка
,
чтобы установить нужный тип ви
-
деосигнала
.
PAL 1
/
PAL 2
,
SECAM
,
NTSC
!
Нажимайте
PAL 1
/
PAL 2
для переключения
между
PAL 1
и
PAL 2
.
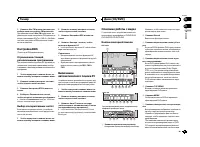
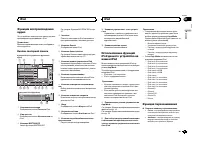
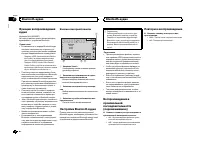
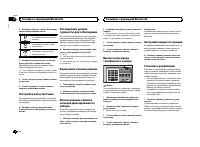
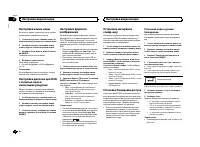
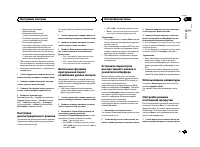
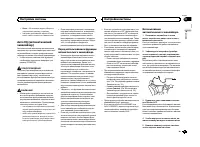
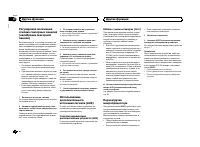
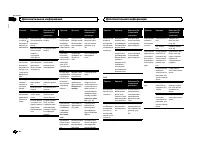
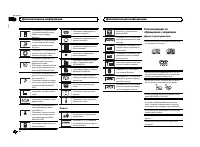
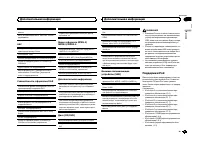
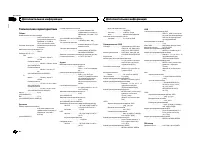
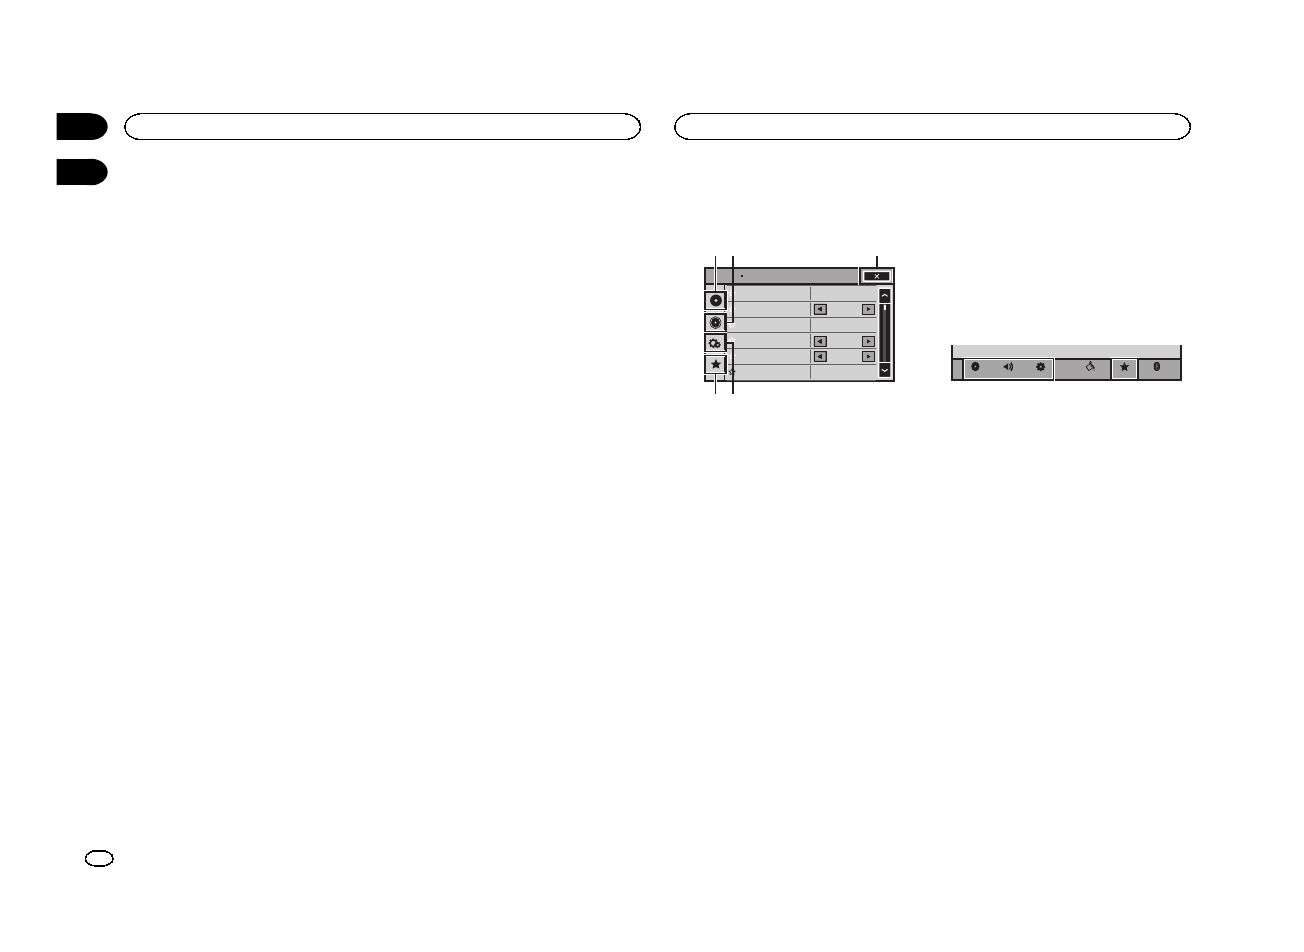
Элементы меню
Кнопки сенсорной панели
Sonic Center Control
Loudness
Subwoofer
Bass Booster
High Pass Filter
Source Level Adjuster
L/R 0
Low
0
125Hz
0
On
Audio
1
5 4
2
3
1
Клавиша настройки видео
См
.
раздел
2
Клавиша регулировки параметров
звука
См
.
раздел
3
Кнопка закрытия
Возврат к дисплею текущего источника
сигнала
.
4
Клавиша настроек системы
См
.
раздел
5
Клавиша
“
Избранное
”
Можно выбрать меню внутри каждого
меню
(
меню аудиофункций и т
.
д
.)
и со
-
хранить его в меню
“
Избранное
”
.
См
.
раздел
Примечания
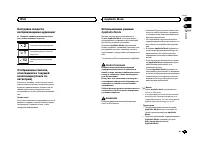
!
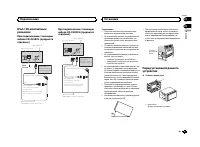
Если в качестве источника сигнала вы
-
брано
Disc
или
USB
,
можно открыть меню
Установки ВИДЕО
.
!
При открытии меню
Установки ВИДЕО
воспроизведение останавливается
.
!
Нельзя открыть меню аудиофункций
,
если включена функция приглушения
звука или просматриваются файлы
JPEG.
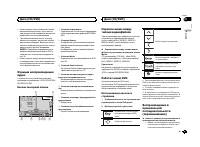
1
Чтобы вернуться в главное меню
,
на
-
жмите клавишу возврата в главное меню
.
2
Чтобы выбрать меню для настройки
,
нажмите любую изследующих кнопок
сенсорной панели
.
Bluetooth
Favorite
Theme
System
Settings
Audio
Video
ТВ
-
тюнер
32
Раздел
Настройки
Ru
14
15
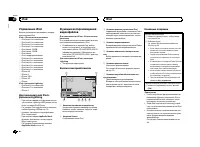
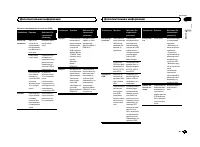
Содержание
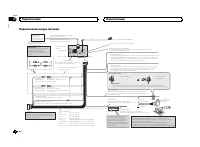
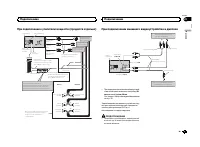
- 3 c d e; Do not use unauthorized products.; After installation of this unit, turn the
- 4 Tuner; Basic operations; Note; Using preset tuning buttons; When you find a station that you want; Switching the RDS display; Press; Using PTY functions; Operating this unit
- 5 Function settings; and press to select FUNCTION.; Displaying text information; English
- 6 Audio adjustments; Important
- 7 Using an AUX source; Sound muting; This unit; Installation
- 8 Power cord; Insert the mounting sleeve into the dash-
- 9 Removing the unit; Removing the front panel to; Troubleshooting; Error messages; Additional information
- 10 Handling guidelines; Discs and player
- 11 Sequence of audio files
- 12 Put those files into a folder.; Russian character chart; iTunes; Specifications
- 14 Nous vous remercions; APPAREIL À LASER DE CLASSE 1; PRÉCAUTION; DEMO
- 15 Après avoir installé l
- 16 Remarque; Opérations de base
- 17 Utilisation des touches de présélection; Changement de l; Utilisation des fonctions PTY; Réglages des fonctions; Français; Utilisation de l
- 18 Utilisation avancée à l; Réglages sonores
- 22 Montage avant/arrière DIN; Montage frontal DIN; Retrait de la face
- 23 Dépannage; Messages d; entretien agréé par Pioneer le plus; Informations complémentaires
- 24 Conseils sur la manipulation; Disques et lecteur
- 25 Séquence des fichiers audio; utilisateur ne peut pas affecter; La séquence de sélection des dossiers ou d
- 26 ne comporte pas de licence ni n; WMA; autres
- 28 PRODOTTO LASER DI CLASSE 1; ATTENZIONE
- 29 Italiano
- 30 Funzionamento di base; Nota
- 31 Uso dei tasti di preselezione sintonia; Quando viene individuata una stazione; Scorrimento del display RDS; Premere; Uso delle funzioni PTY; Impostazioni delle funzioni; opzione di; Funzionamento dell
- 32 elenco dei nomi
- 35 Importante; Installazione; Installazione
- 36 Montaggio DIN anteriore/posteriore; Montaggio DIN anteriore; Rimozione del fronta-
- 37 Informazioni supplementari
- 38 Linee guida per l; Dischi e lettori
- 39 utente non può assegnare i
- 40 Inserire tali file in una cartella.; Tabella dei caratteri cirillici; Dati tecnici
- 42 Gracias; PRODUCTO LASER CLASE 1; PRECAUCIÓN; Evite la exposición a la humedad.
- 43 Unidad principal; No utilice productos no autorizados.; Indicaciones del display; Menú de configuración; Una vez instalada la unidad, gire la llave; Utilización de esta unidad
- 44 Sintonizador; Funcionamiento básico
- 45 Cambio de la visualización RDS; Pulse; Uso de las funciones PTY; Ajustes de funciones; menú y pulse para seleccionar FUNCTION.
- 46 Ajustes de audio; menú y pulse para seleccionar AUDIO.
- 47 Ajustes iniciales; Uso de una fuente AUX; Silenciamiento del sonido; El sonido se silencia automáticamente cuando:
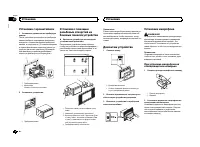
- 48 Conexiones; Esta unidad; Instalación
- 49 Montaje delantero/posterior de DIN; Montaje delantero DIN; Inserte el manguito de montaje en el sal-
- 50 Montaje trasero DIN; Determine la posición correcta, de modo; Extracción de la unidad; Retire el anillo de guarnición.; Inserte en ambos lados de la unidad las; Retirada y colocación del panel delantero; Colocación del panel delantero; Solución de problemas; Mensajes de error; Información adicional
- 51 Español
- 52 Pautas para el manejo; Discos y reproductor; DualDisc; WAV
- 53 Secuencia de archivos de audio; Disco; Coloque esos archivos en una carpeta.; Tabla de caracteres rusos
- 54 Especificaciones
- 56 Zu diesem Gerät; LASER KLASSE 1; VORSICHT; Zu dieser Anleitung; Im Störungsfall; Bevor Sie beginnen
- 57 Hauptgerät; Drehen Sie nach der Installation des Ge-; Bedienung des Geräts
- 58 Wichtig; Hinweis; Hinweis
- 59 Verwendung der Stationstasten; Zum Speichern eines abgestimmten Sen-; Umschalten der RDS-Anzeige; Drücken Sie; Funktionseinstellungen; Deutsch
- 60 Anzeigen von Textinformationen
- 61 Grundeinstellungen
- 62 Abschalten des Tons; Der Ton wird abgeschaltet, im Display erscheint; Anschlüsse
- 64 Entfernen des Geräts; Entfernen der Frontplatte zum Schutz vor
- 65 Zusätzliche Informationen
- 66 Handhabungsrichtlinien; Discs und Player
- 68 Disc; mand; Allgemein
- 69 USB


