Кронштейны для мониторов Chief (K1C120BXRH) - инструкция пользователя по применению, эксплуатации и установке на русском языке. Мы надеемся, она поможет вам решить возникшие у вас вопросы при эксплуатации техники.
Если остались вопросы, задайте их в комментариях после инструкции.
"Загружаем инструкцию", означает, что нужно подождать пока файл загрузится и можно будет его читать онлайн. Некоторые инструкции очень большие и время их появления зависит от вашей скорости интернета.
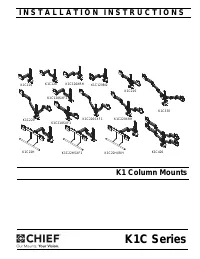
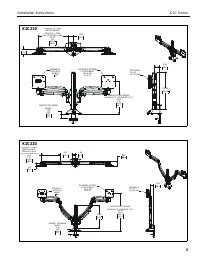

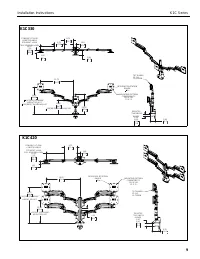

Installation Instructions
K1C Series
13
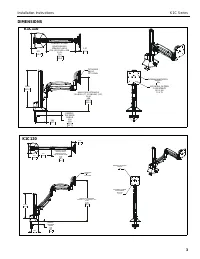
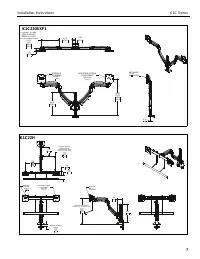
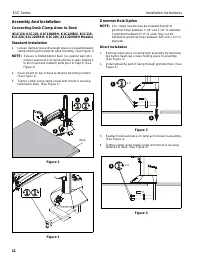
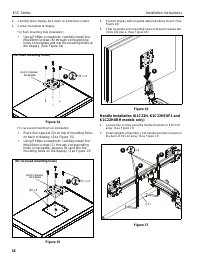
Using Grommet Hardware
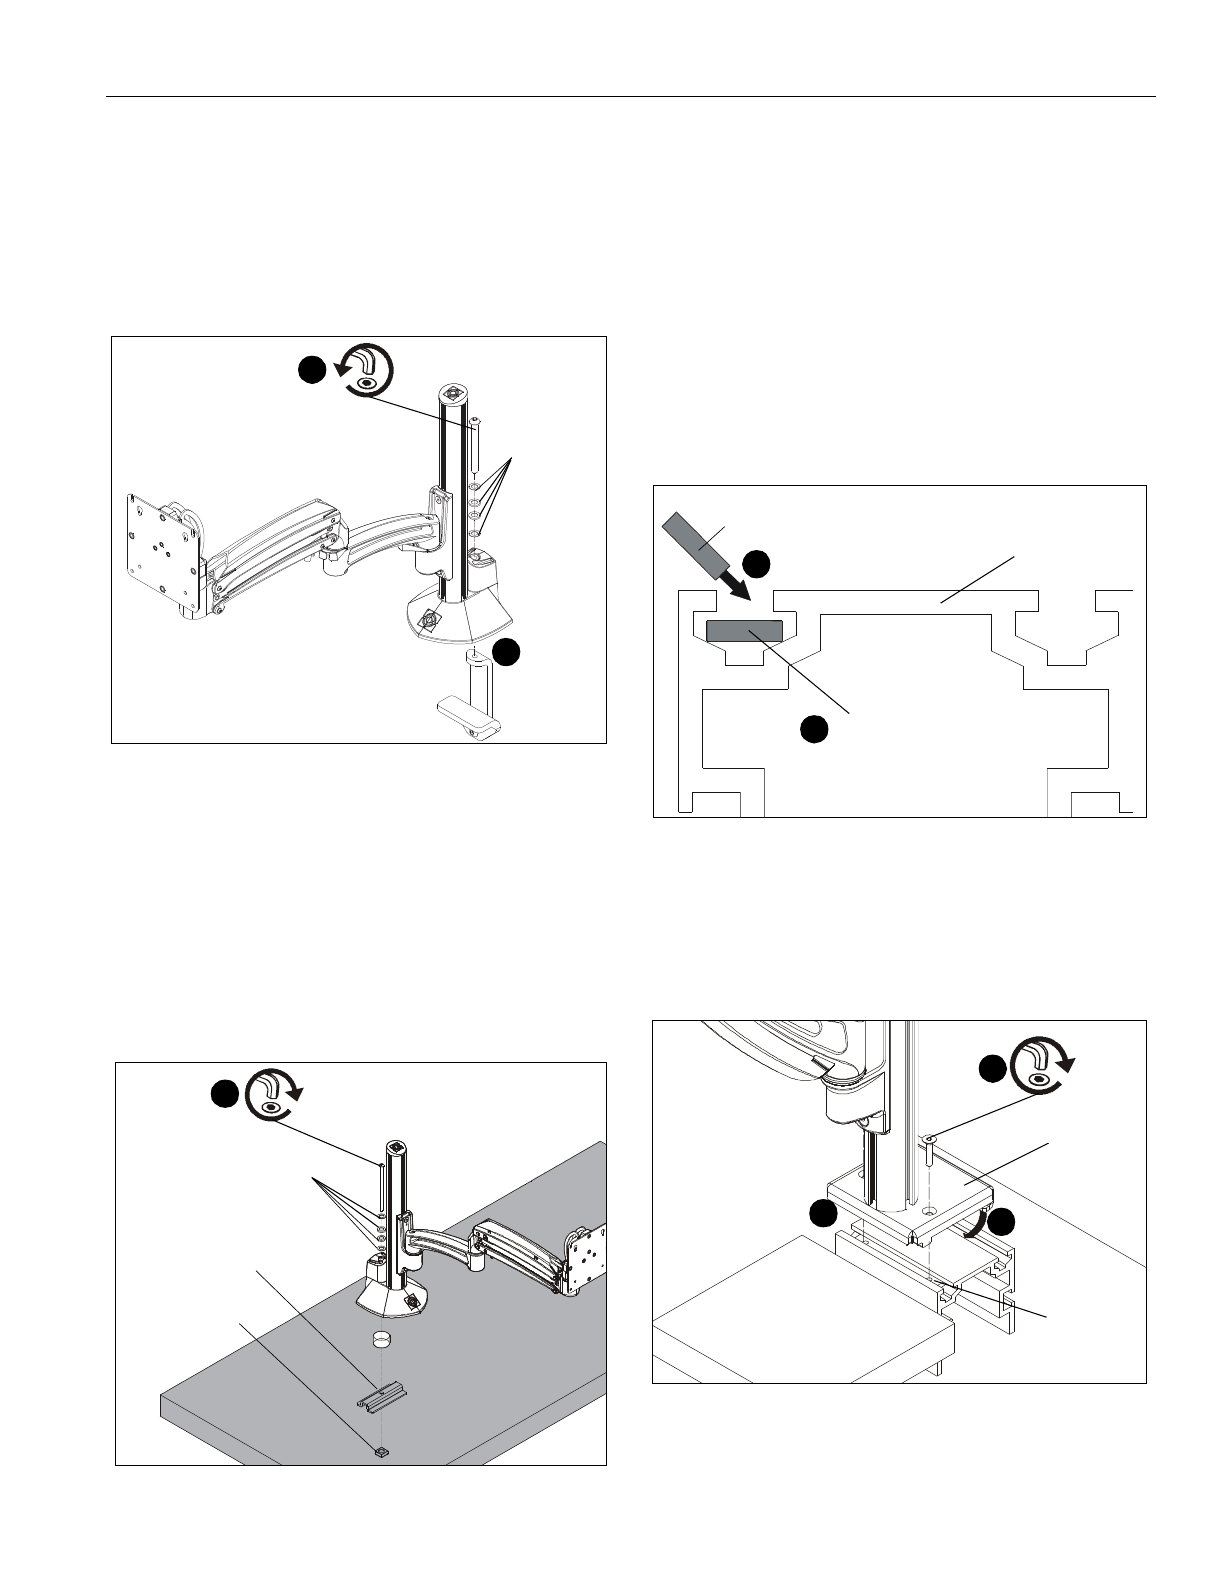
1.
Remove desk clamp from mount by loosening button head
cap screw until clamp is completely disengaged from the
bolt. (See Figure 5)
2.
Maneuver clamp so that it is totally removed from desk
mount. (See Figure 5)
NOTE:
Set removed washers aside for re-use.
Figure 5
3.
Locate a flat surface (thickness of 3/4” minimum to 3 1/2”
maximum) on which to mount the column plate.
4.
If mounting hole does not already exist on desk, drill 3/8”
mounting hole in desk at desired mounting location.
IMPORTANT ! :
Mounting hole must be between 3/8”
and 2 1/2” in diameter!
5.
Place mount on desk over grommet hole. (See Figure 6)
6.
Use 5/16-18 x 6” button head cap screw (H), removed
washers, clamp bracket (F) and 5/16-18” square nut (G) to
secure mount to desk. (See Figure 6)
Figure 6
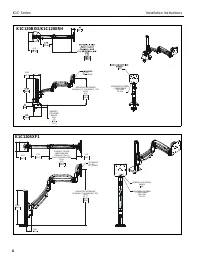
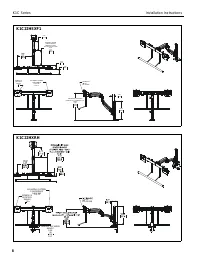
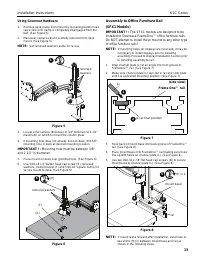
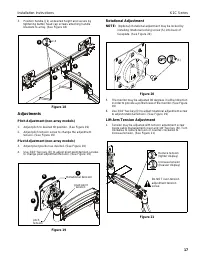
Assembly to Office Furniture Rail
(SFX1 Models)
IMPORTANT ! :
The SFX1 models are designed to be
installed to Steelcase FrameOne™ office furniture rails.
Do NOT attempt to install these mounts to any other type
of office furniture rails!
NOTE:
If mounting holes on displays are recessed, it may be
necessary to install displays prior to installing
assembly. Proceed to Display Installation Section prior
to installing assembly to rail.
1.
Drop channel plate (L) at an angle into front groove of
FrameOne™ rail. (See Figure 7)
2.
Make sure channel plate (L) lays flat in rail and slide plate
until it is at desired mounting position. (See Figure 7)
Figure 7
3.
Hook back of mount base into back groove of FrameOne™
rail. (See Figure 8)
4.
Place mount base onto FrameOne™ rail making sure holes
line up with holes on channel plate (L). (See Figure 8)
5.
Use two #10-32 x 7/8” flat head cap screws (N) to secure
mount base to channel plate (L). (See Figure 8)
Figure 8
NOTE:
If mount leans forward after installation, install one or
two shims (M) in between mount base and rail as
shown in the following steps.
2
1
removed
washers
(F)
(G)
(H)
6
removed washers
(side view)
Frame One™ rail
(L)
(L) at final position
1
2
5
3
4
(E) x 2
(mount base)
(L)
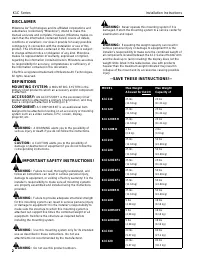
Характеристики

Остались вопросы?Не нашли свой ответ в руководстве или возникли другие проблемы? Задайте свой вопрос в форме ниже с подробным описанием вашей ситуации, чтобы другие люди и специалисты смогли дать на него ответ. Если вы знаете как решить проблему другого человека, пожалуйста, подскажите ему :)


