
Кондиционеры Tesla TT68X71 - инструкция пользователя по применению, эксплуатации и установке на русском языке. Мы надеемся, она поможет вам решить возникшие у вас вопросы при эксплуатации техники.
Если остались вопросы, задайте их в комментариях после инструкции.
"Загружаем инструкцию", означает, что нужно подождать пока файл загрузится и можно будет его читать онлайн. Некоторые инструкции очень большие и время их появления зависит от вашей скорости интернета.


51
ENG
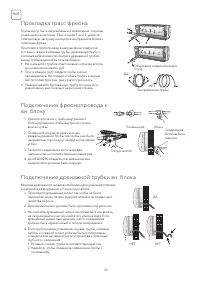
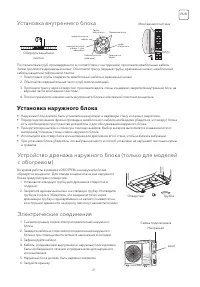
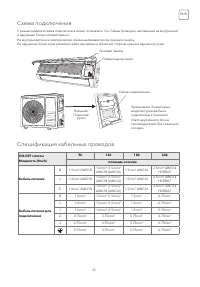
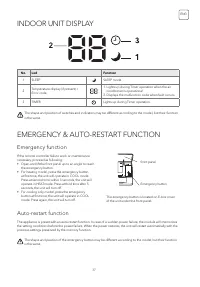
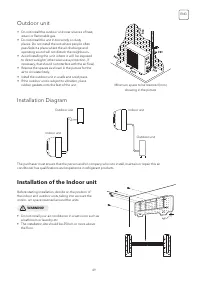
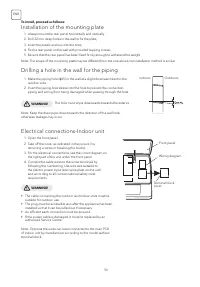
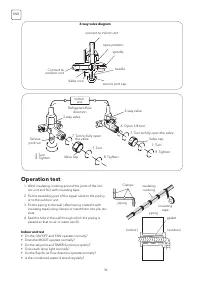
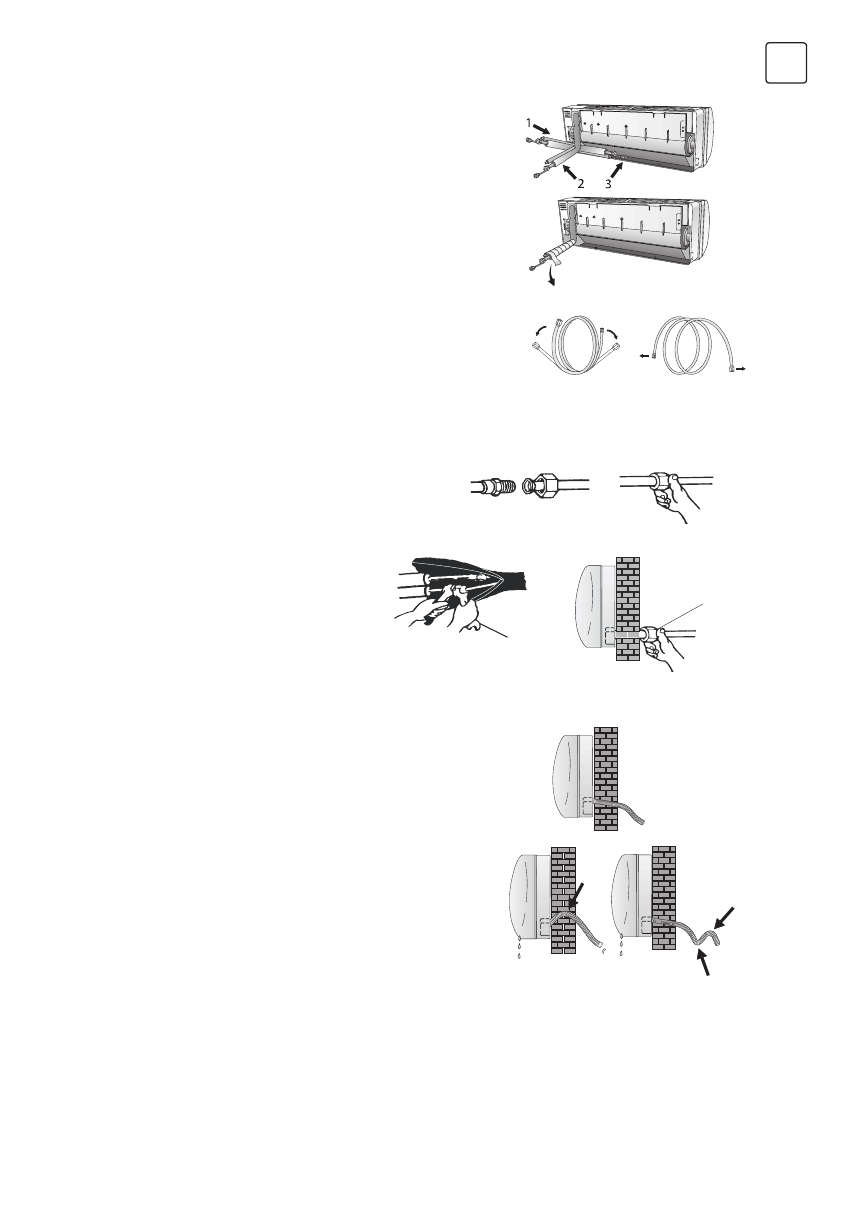
The piping can be run in the 3 directions indicated by
numbers in the picture . When the piping is run in direction
1or 3, cut a notch along the groove on the side
of the indoor unit with a cutter.
Run the piping in the direction of the wall hole and bind
the copper pipes , the drain pipe and the power cables
together with the tape with the drain pipe at the bottom, so
that water can flow freely.
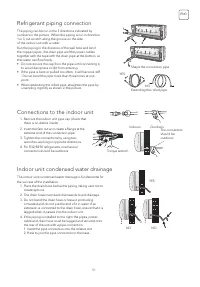
• Do not remove the cap from the pipe until connecting it,
to avoid dampness or dirt from entering.
• If the pipe is bent or pulled too often , it will become stiff
. Do not bend the pipe more than three times at one
point.
• When extending the rolled pipe, straighten the pipe by
unwinding it gently as shown in the picture.
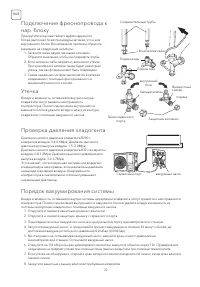
1. Remove the indoor unit pipe cap (check that
there is no debris inside).
2. Insert the fare nut and create a flange at the
extreme end of the connection pipe.
3. Tighten the connections by using two
wrenches working in opposite directions.
4. For R32/R290 refrigerants, mechanical
connectors should be outdoors.
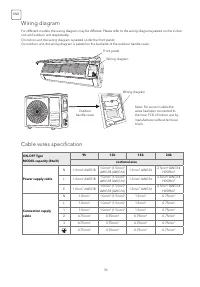
The indoor unit condensed water drainage is fundamental for
the success of the installation.
1. Place the drain hose below the piping, taking care not to
create siphons.
2. The drain hose must slant downwards to aid drainage.
3. Do not bend the drain hose or leave it protruding
or twisted and do not put the end of it in water. If an
extension is connected to the drain hose, ensure that it is
lagged when it passes into the indoor unit.
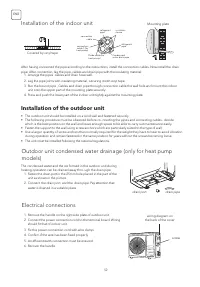
4. If the piping is installed to the right, the pipes, power
cable and drain hose must be lagged and secured onto
the rear of the unit with a pipe connection.
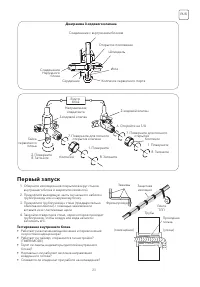
1. Insert the pipe connection into the relative slot.
2. Press to join the pipe connection to the base.
Refrigerant piping connection
Connections to the indoor unit
Indoor unit condensed water drainage
Shape the connection pipe
Extending the rolled pipe
YES
NO
YES
NO
NO
Torque wrench
The connectors
should be
outdoors
Indoors
Outdoors
Содержание
- 2 RUS
- 4 ПРАВИЛА БЕЗОПАСНОСТИ
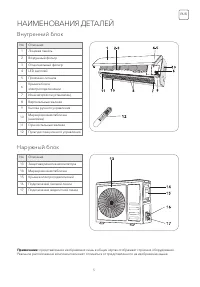
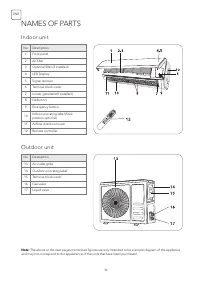
- 5 НАИМЕНОВАНИЯ ДЕТАЛЕЙ; Внутренний блок
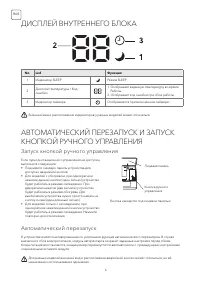
- 6 ДИСПЛЕЙ ВНУТРЕННЕГО БЛОКА; Запуск кнопкой ручного управления
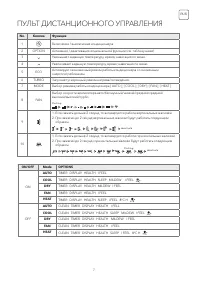
- 7 ПУЛЬТ ДИСТАНЦИОННОГО УПРАВЛЕНИЯ
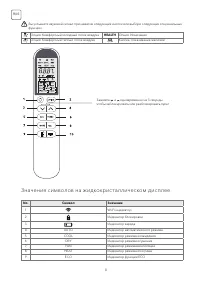
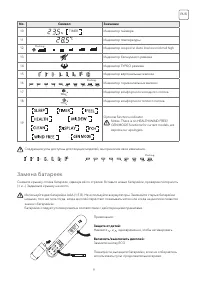
- 8 Значения символов на жидкокристаллическом дисплее
- 9 Замена батареек
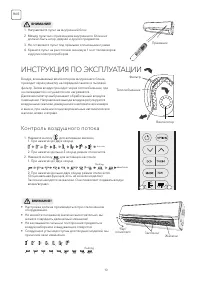
- 10 ИНСТРУКЦИЯ ПО ЭКСПЛУАТАЦИИ; Контроль воздушного потока
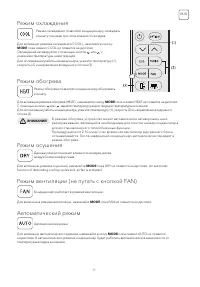
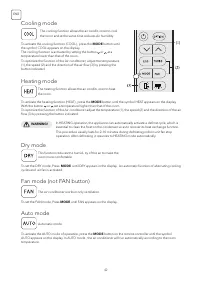
- 11 Режим охлаждения
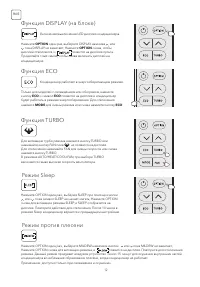
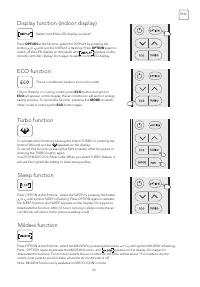
- 12 Функция ECO
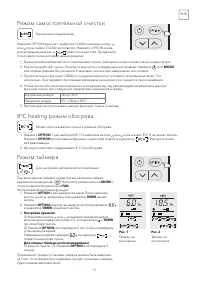
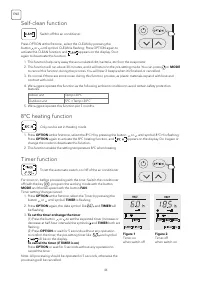
- 13 Режим самостоятельной очистки
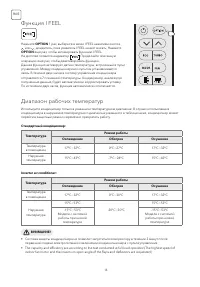
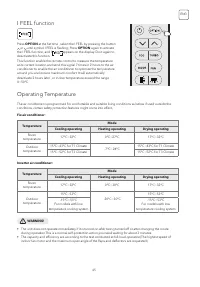
- 14 Функция I FEEL
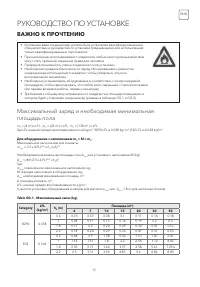
- 15 РУКОВОДСТВО ПО УСТАНОВКЕ; ВАЖНО К ПРОЧТЕНИЮ
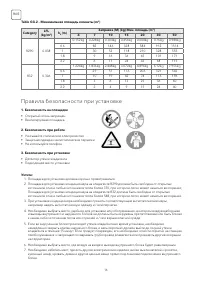
- 16 Правила безопасности при установке
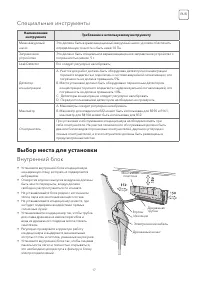
- 17 Специальные инструменты; Выбор места для установки
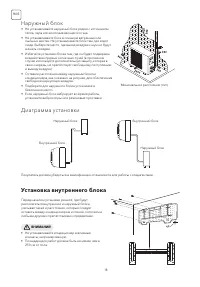
- 18 Наружный блок; Установка внутреннего блока
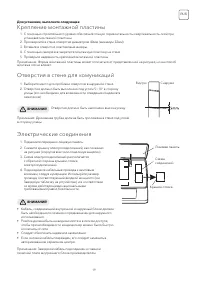
- 19 Крепление монтажной пластины
- 20 Прокладка трасс фреона
- 21 Электрические соединения; Установка наружного блока
- 22 Утечка
- 23 Первый запуск
- 24 ИНФОРМАЦИЯ ДЛЯ МОНТАЖНИКА
- 25 Схема подключения
- 27 ТЕХНИЧЕСКОЕ ОБСЛУЖИВАНИЕ
- 28 УСТРАНЕНИЕ НЕПОЛАДОК
- 29 ИНСТРУКЦИЯ ПО ОБСЛУЖИВАНИЮ
Характеристики

Остались вопросы?Не нашли свой ответ в руководстве или возникли другие проблемы? Задайте свой вопрос в форме ниже с подробным описанием вашей ситуации, чтобы другие люди и специалисты смогли дать на него ответ. Если вы знаете как решить проблему другого человека, пожалуйста, подскажите ему :)


