
Кондиционеры Tesla TT68X71 - инструкция пользователя по применению, эксплуатации и установке на русском языке. Мы надеемся, она поможет вам решить возникшие у вас вопросы при эксплуатации техники.
Если остались вопросы, задайте их в комментариях после инструкции.
"Загружаем инструкцию", означает, что нужно подождать пока файл загрузится и можно будет его читать онлайн. Некоторые инструкции очень большие и время их появления зависит от вашей скорости интернета.


37
ENG
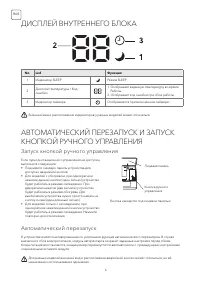
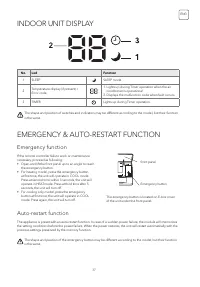
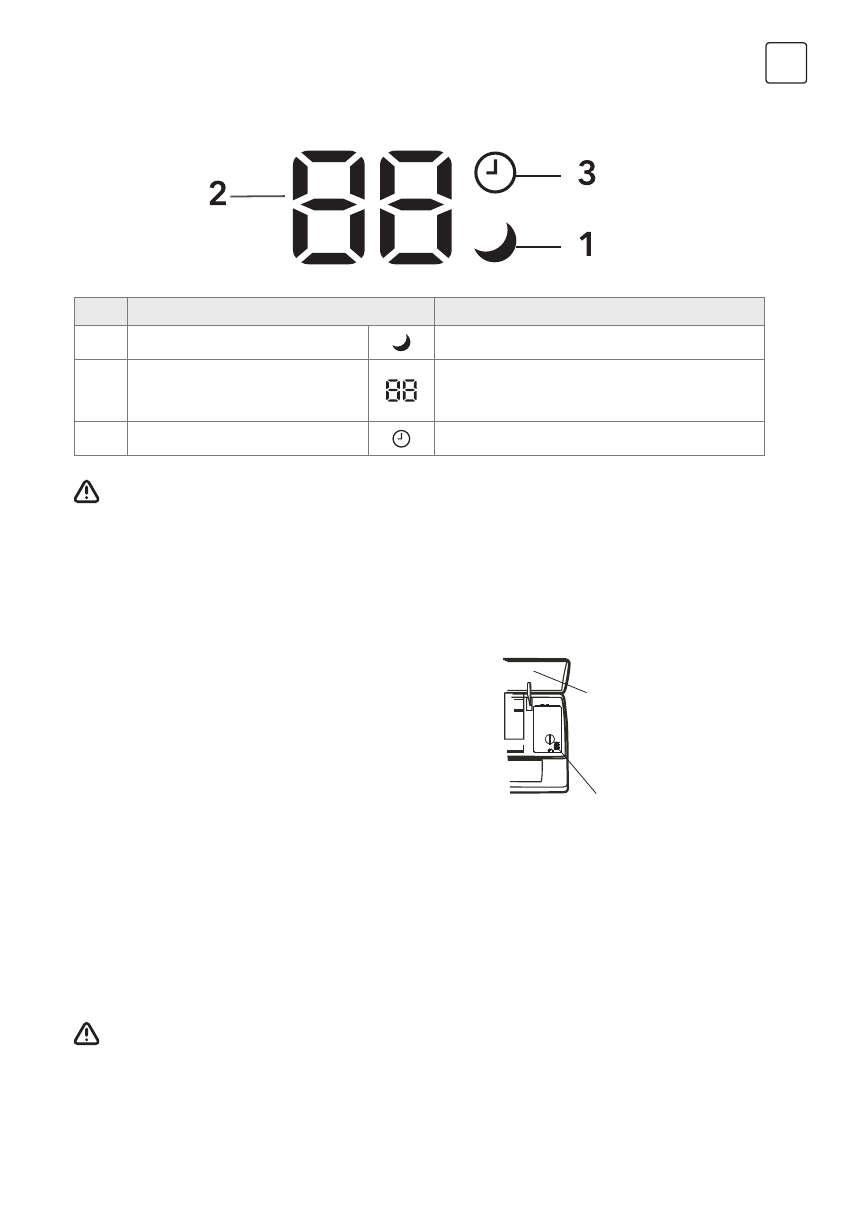
INDOOR UNIT DISPLAY
EMERGENCY & AUTO-RESTART FUNCTION
Emergency function
Auto-restart function
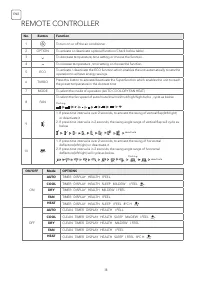
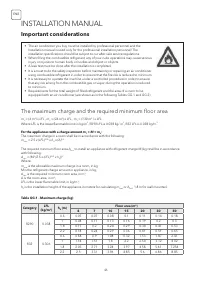
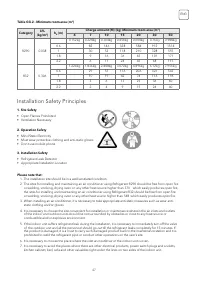
No.
Led
Function
1
SLEEP
SLEEP mode
2
Temperature display (if present) /
Error code
1. Lights up during Timer operation when the air
conditioner is operational
2. Displays the malfunction code when fault occurs.
3
TIMER
Lights up during Timer operation.
The shape and position of switches and indicators may be different according to the model, but their function
is the same.
The shape and position of the emergency button may be different according to the model, but their function
is the same.
If the remote controller fails to work or maintenance
necessary, proceed as following:
• Open and lift the front panel up to an angle to reach
the emergency button.
• For heating model, press the emergency button
at first time, the unit will operate in COOL mode.
Press at second time within 3 seconds, the unit will
operate in HEATmode. Press at third time after 5
seconds, the unit will turn off.
• For cooling only model, press the emergency
button at first time, the unit will operate in COOL
mode. Press again, the unit will turn off.
The appliance is preset with an auto-restart function. In case of a sudden power failure, the module will memorizes
the setting conditions before the power failure. When the power restores, the unit will restart automatically with the
previous settings preserved by the memory function.
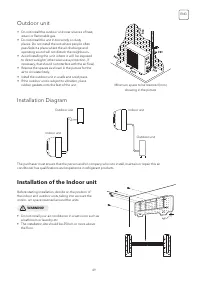
front panel
Emergency button
The emergency button is located on E-box cover
of the unit under the front panel.
Содержание
- 2 RUS
- 4 ПРАВИЛА БЕЗОПАСНОСТИ
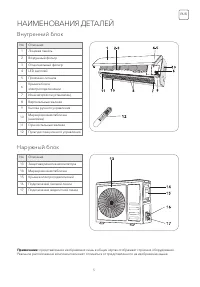
- 5 НАИМЕНОВАНИЯ ДЕТАЛЕЙ; Внутренний блок
- 6 ДИСПЛЕЙ ВНУТРЕННЕГО БЛОКА; Запуск кнопкой ручного управления
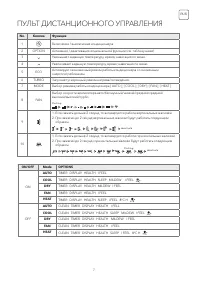
- 7 ПУЛЬТ ДИСТАНЦИОННОГО УПРАВЛЕНИЯ
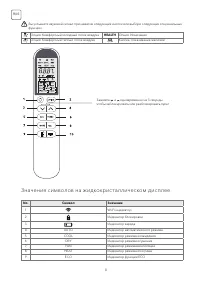
- 8 Значения символов на жидкокристаллическом дисплее
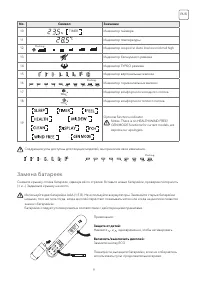
- 9 Замена батареек
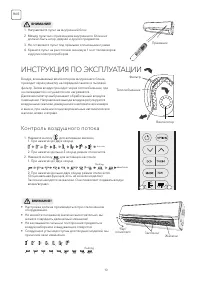
- 10 ИНСТРУКЦИЯ ПО ЭКСПЛУАТАЦИИ; Контроль воздушного потока
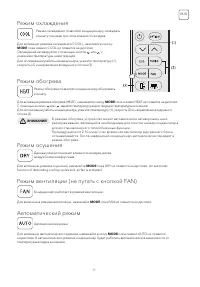
- 11 Режим охлаждения
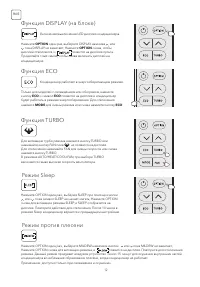
- 12 Функция ECO
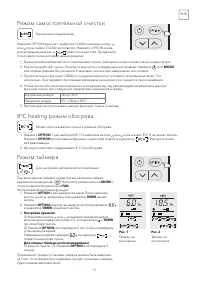
- 13 Режим самостоятельной очистки
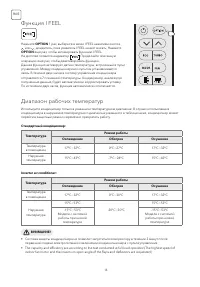
- 14 Функция I FEEL
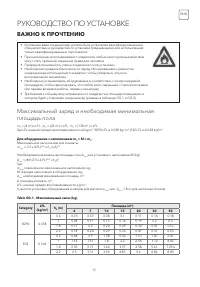
- 15 РУКОВОДСТВО ПО УСТАНОВКЕ; ВАЖНО К ПРОЧТЕНИЮ
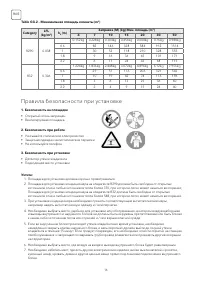
- 16 Правила безопасности при установке
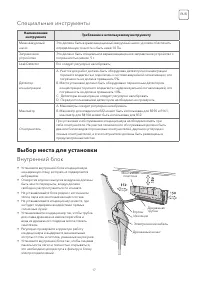
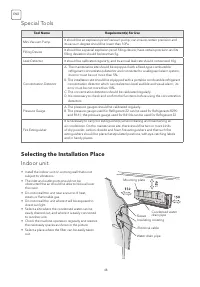
- 17 Специальные инструменты; Выбор места для установки
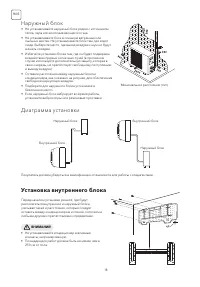
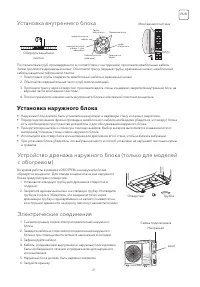
- 18 Наружный блок; Установка внутреннего блока
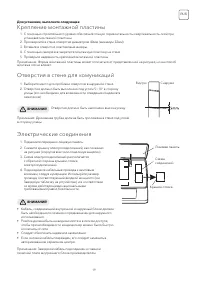
- 19 Крепление монтажной пластины
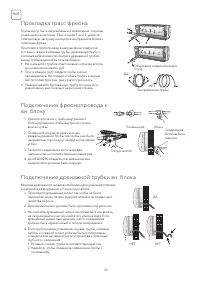
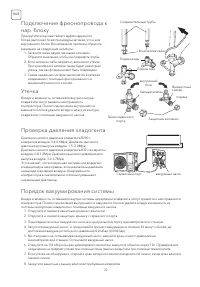
- 20 Прокладка трасс фреона
- 21 Электрические соединения; Установка наружного блока
- 22 Утечка
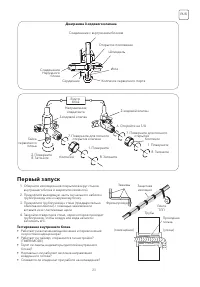
- 23 Первый запуск
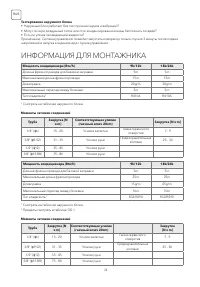
- 24 ИНФОРМАЦИЯ ДЛЯ МОНТАЖНИКА
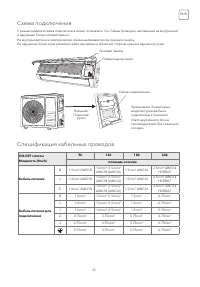
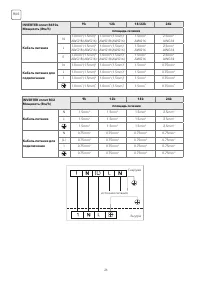
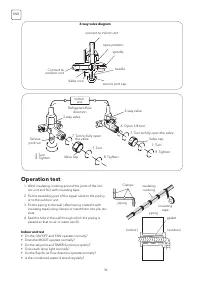
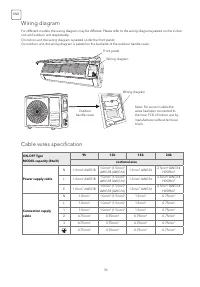
- 25 Схема подключения
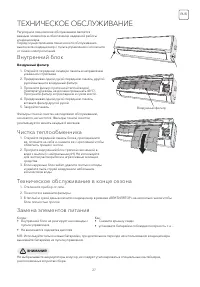
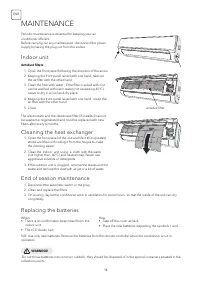
- 27 ТЕХНИЧЕСКОЕ ОБСЛУЖИВАНИЕ
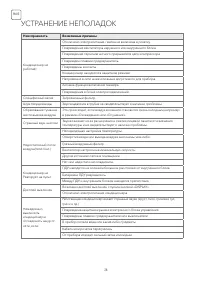
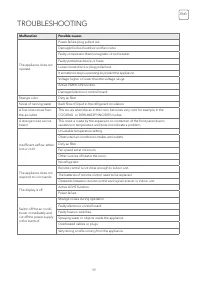
- 28 УСТРАНЕНИЕ НЕПОЛАДОК
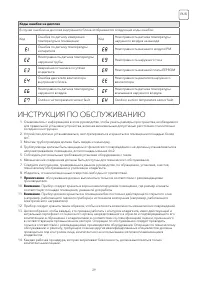
- 29 ИНСТРУКЦИЯ ПО ОБСЛУЖИВАНИЮ
Характеристики

Остались вопросы?Не нашли свой ответ в руководстве или возникли другие проблемы? Задайте свой вопрос в форме ниже с подробным описанием вашей ситуации, чтобы другие люди и специалисты смогли дать на него ответ. Если вы знаете как решить проблему другого человека, пожалуйста, подскажите ему :)


