
Кондиционеры Tesla TT68X71 - инструкция пользователя по применению, эксплуатации и установке на русском языке. Мы надеемся, она поможет вам решить возникшие у вас вопросы при эксплуатации техники.
Если остались вопросы, задайте их в комментариях после инструкции.
"Загружаем инструкцию", означает, что нужно подождать пока файл загрузится и можно будет его читать онлайн. Некоторые инструкции очень большие и время их появления зависит от вашей скорости интернета.


50
ENG
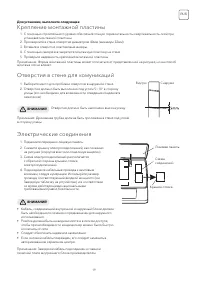
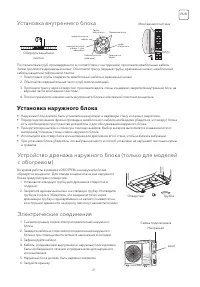
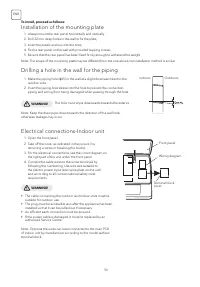
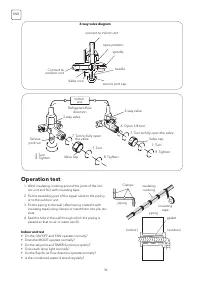
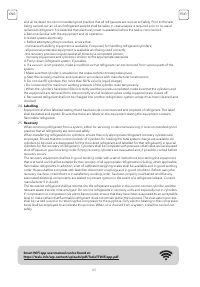
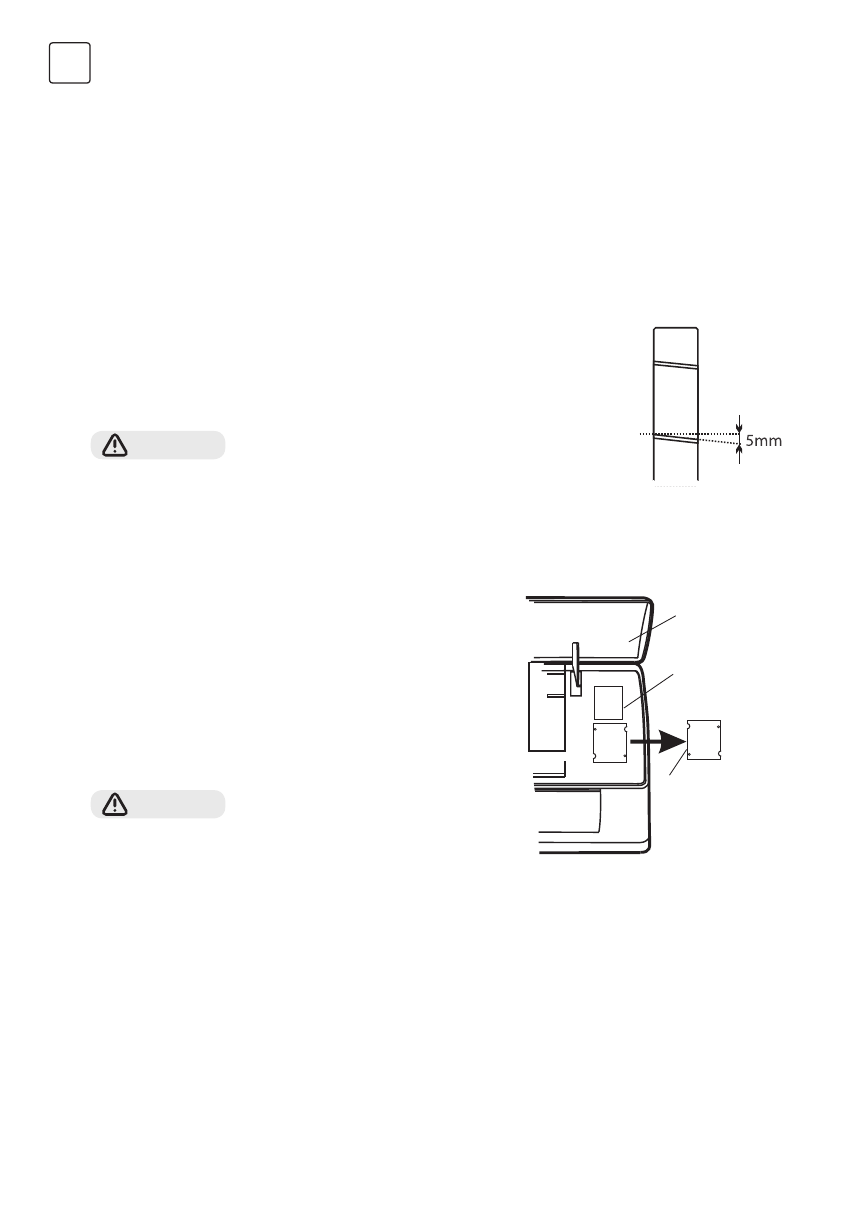
1. Make the piping hole (
ɸ
65) in the wall at a slight downward slant to the
outdoor side.
2. Insert the piping-hole sleeve into the hole to prevent the connection
piping and wiring from being damaged when passing through the hole.
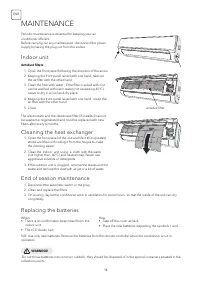
1. Open the front panel.
2. Take off the cover as indicated in the piciure ( by
removing a screw or breaking the hooks).
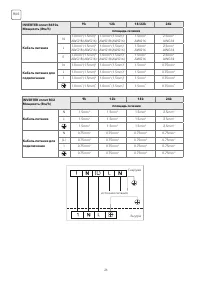
3. For the electrical connections, see the circuit diagram on
the right part of the unit under the front panel.
4. Connect the cable wires to the screw terminals by
following the numbering ,Use wire size suitable to
the electric power input (see name plate on the unit)
and according to all current national safety code
requirements.
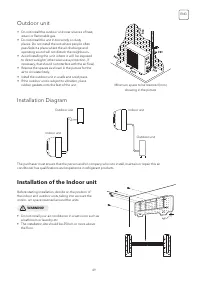
To install, proceed as follows:
Installation of the mounting plate
Drilling a hole in the wall for the piping
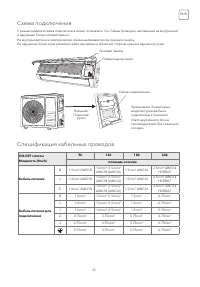
Electrical connections-Indoor unit
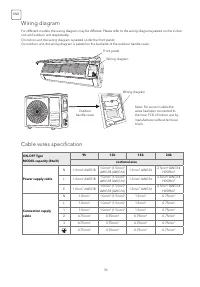
• The cable connecting the outdoor and indoor units must be
suitable for outdoor use.
• The plug must be accessible also after the appliance has been
installed so that it can be pulled out if necessary.
• An efficient earth connection must be ensured.
• If the power cable is damaged, it must be replaced by an
authorised Service Centre.
Note: Optional the wires can been connected to the main PCB
of indoor unit by manufacturer according to the model without
terminal block.
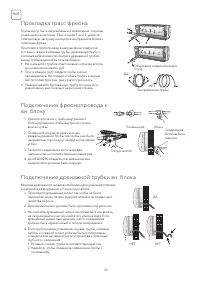
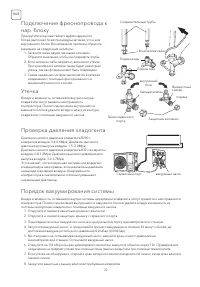
The hole must slope downwards towards the exterior
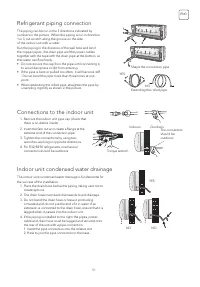
Note: Keep the drain pipe down towards the direction of the wall hole,
otherwise leakage may occur
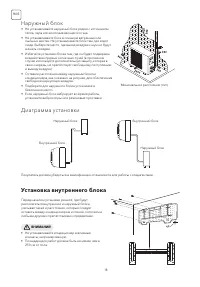
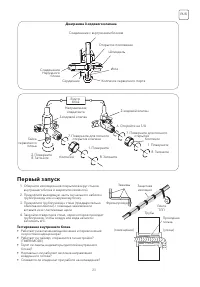
1. Always mount the rear panel horizontally and vertically
2. Drill 32 mm deep holes in the wall to fix the plate;
3. Insert the plastic anchors into the hole;
4. Fix the rear panel on the wall with provided tapping screws
5. Be sure that the rear panel has been fixed firmly enough to withstand the weight
Note: The shape of the mounting plate may be different from the one above, but installation method is similar .
WARNING!
WARNING!
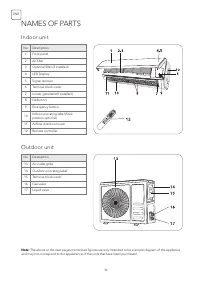
Front panel
Wiring diagram
Terminal block
cover
Indoors
Outdoors
Содержание
- 2 RUS
- 4 ПРАВИЛА БЕЗОПАСНОСТИ
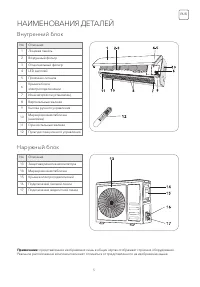
- 5 НАИМЕНОВАНИЯ ДЕТАЛЕЙ; Внутренний блок
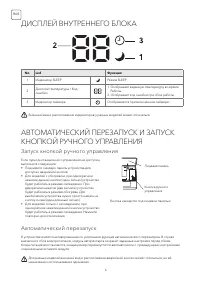
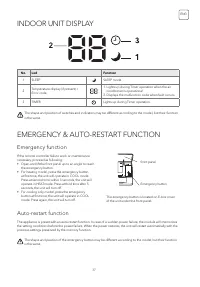
- 6 ДИСПЛЕЙ ВНУТРЕННЕГО БЛОКА; Запуск кнопкой ручного управления
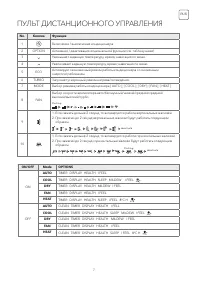
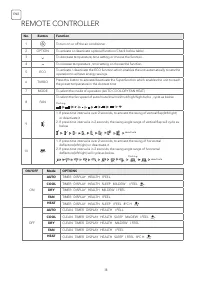
- 7 ПУЛЬТ ДИСТАНЦИОННОГО УПРАВЛЕНИЯ
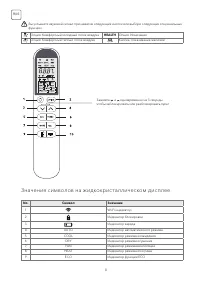
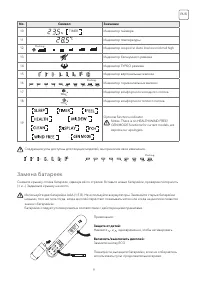
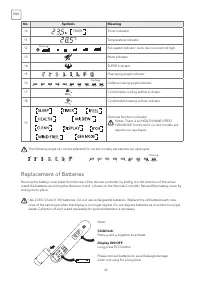
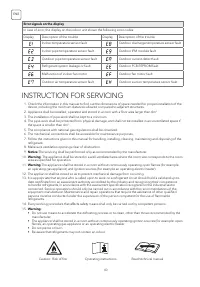
- 8 Значения символов на жидкокристаллическом дисплее
- 9 Замена батареек
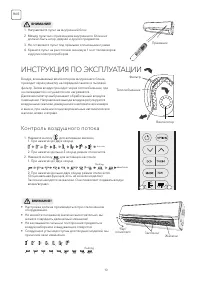
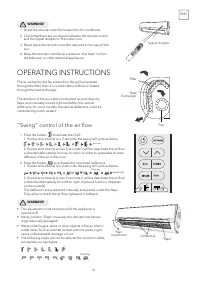
- 10 ИНСТРУКЦИЯ ПО ЭКСПЛУАТАЦИИ; Контроль воздушного потока
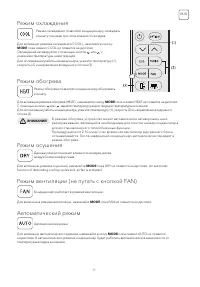
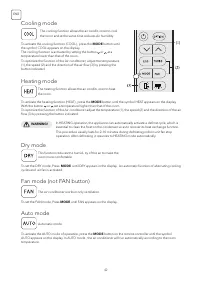
- 11 Режим охлаждения
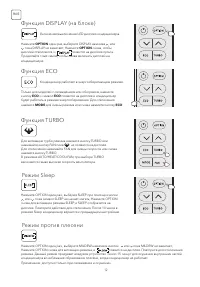
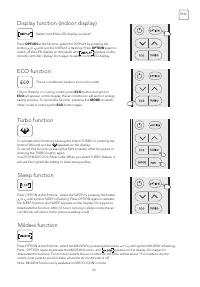
- 12 Функция ECO
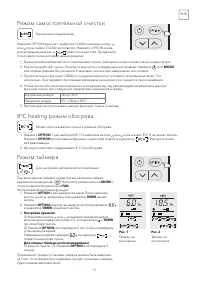
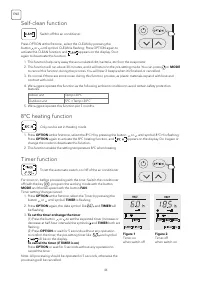
- 13 Режим самостоятельной очистки
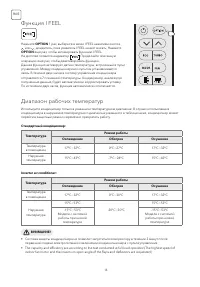
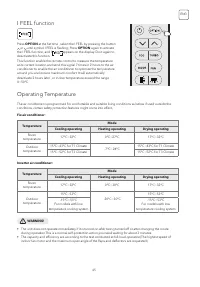
- 14 Функция I FEEL
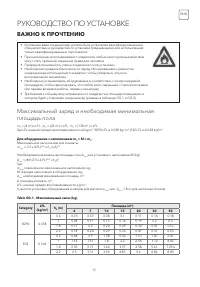
- 15 РУКОВОДСТВО ПО УСТАНОВКЕ; ВАЖНО К ПРОЧТЕНИЮ
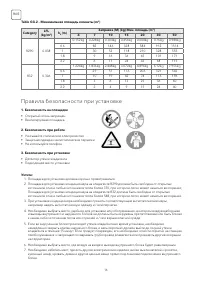
- 16 Правила безопасности при установке
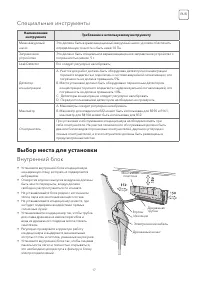
- 17 Специальные инструменты; Выбор места для установки
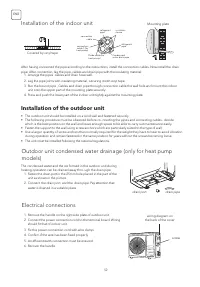
- 18 Наружный блок; Установка внутреннего блока
- 19 Крепление монтажной пластины
- 20 Прокладка трасс фреона
- 21 Электрические соединения; Установка наружного блока
- 22 Утечка
- 23 Первый запуск
- 24 ИНФОРМАЦИЯ ДЛЯ МОНТАЖНИКА
- 25 Схема подключения
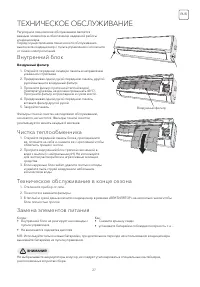
- 27 ТЕХНИЧЕСКОЕ ОБСЛУЖИВАНИЕ
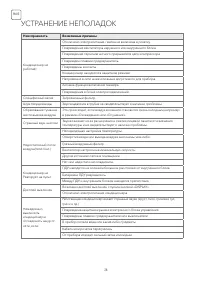
- 28 УСТРАНЕНИЕ НЕПОЛАДОК
- 29 ИНСТРУКЦИЯ ПО ОБСЛУЖИВАНИЮ
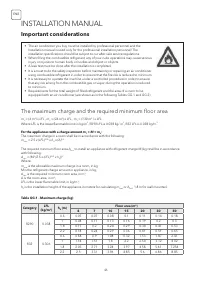
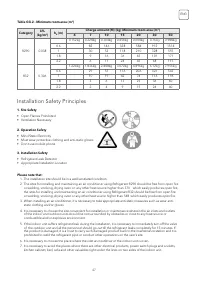
Характеристики

Остались вопросы?Не нашли свой ответ в руководстве или возникли другие проблемы? Задайте свой вопрос в форме ниже с подробным описанием вашей ситуации, чтобы другие люди и специалисты смогли дать на него ответ. Если вы знаете как решить проблему другого человека, пожалуйста, подскажите ему :)


