
Кофеварка BRAYER BR1108 - инструкция пользователя по применению, эксплуатации и установке на русском языке. Мы надеемся, она поможет вам решить возникшие у вас вопросы при эксплуатации техники.
Если остались вопросы, задайте их в комментариях после инструкции.
"Загружаем инструкцию", означает, что нужно подождать пока файл загрузится и можно будет его читать онлайн. Некоторые инструкции очень большие и время их появления зависит от вашей скорости интернета.


16
EN
•
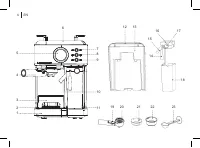
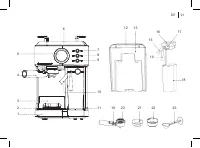
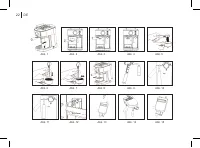
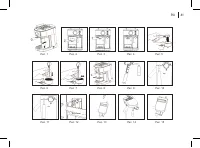
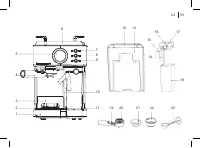
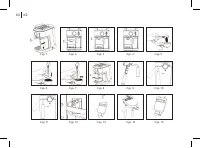
After you finish using the coffee maker, switch the
coffee maker off by setting the switch (11) «0/I» to the
position «0».
•
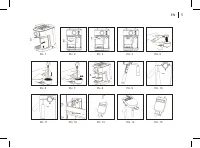
Wait until the coffee maker cools down, take the
container (18), pull it towards yourself and remove it
(pic. 1), remove the cappuccinator lid (14) from the
container (18).
• Pour the remaining water out of the container (18), wipe
the container with a dry cloth and dry the cappuccinator
lid (16).
• Before assembling make sure that the cappuccinator lid
and the container are dry. Install the cappuccinator lid
(16) on the container (18) and install the cappuccinator
on the coffee maker.
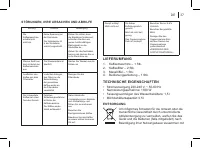
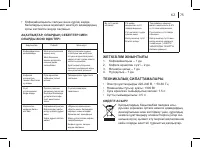
DESCALING
•
Scale inside the boiler affects the taste of ready coffee,
slows down the coffee making and reduces the service
life of the coffee maker.
•
Note that the thicker the scale, the more difficult it is to
remove, that’s why we recommen regularly removing
scale for effective operation of the coffee maker (see
the table).
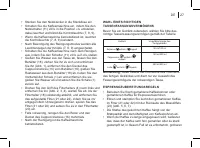
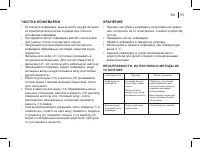
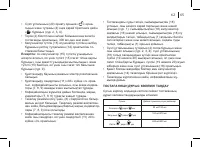
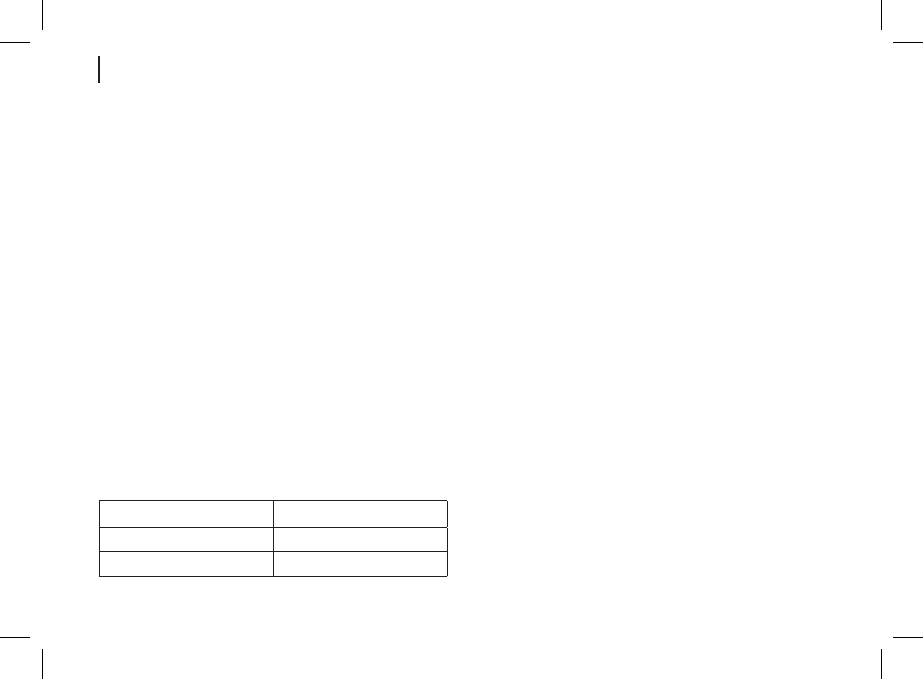
Water type
Cleaning frequency
Soft (filtered) water
Every 80 coffee making cycles
Hard (tap) water
Every 40 coffee making cycles
•
The buttons (7, 6, 9) light indicators flashing by rotation
will remind you about descaling.
•
You can use special descaling agents for espresso coffee
makers or coffee machines to remove scale. You can also
use table vinegar or citric acid solution (2 teaspoons of
citric acid per 1 liter of water).
• Follow the instructions on the usage of the descaling
agent, pour it into the water tank (13).
•
Install one of the coffee filters (21 or 22) into the filter
holder (20) matching the ledge on the filter (21 or 22) with
the hole on the holder (20) and turn the filter (21 or 22)
counter/clockwise.
• Place a cup of suitable height and capacity on the grid (2).
• Direct the cappuccinator pipe (15) into the cup using
the cappuccinator pipe angle adjustment bar (14), if
necessary, change the length of the cappuccinator pipe
(15) (fig. 9).
• Insert the power plug into the mains socket.
•
Switch the coffee maker on by setting the «0/I» power
switch (11) to the «I» position.
• To switch the cleaning mode on, press simultaneously the
button (9) «Latte» and the button (7) «Espresso».
•
In the descaling mode the light indicators slowly flash
by rotation, after 30 minutes the light indicators will start
flashing faster. Remove the container (13), drain the
remaining descaling solution and fill the container (13) with
clean water. Install the container (13) back to its place.
• Pour the descaling solution out from the cup, place the
cup on the grid (2).
Содержание
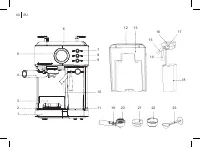
- 39 РОЖКОВАЯ КОФЕВАРКА; Кофеварка предназначена для варки кофе «эс-; ОПИСАНИЕ
- 42 Перед использованием кофеварки внимательно
- 44 ПОДГОТОВКА КОФЕВАРКИ К РАБОТЕ
- 48 ПРОГРАММИРОВАНИЕ ПОРЦИЙ КОФЕ ЭСПРЕССО
- 50 опасайтесь ожогов выходящим горячим паром.
- 51 ПРИГОТОВЛЕНИЕ МОЛОЧНОЙ ПЕНКИ
- 52 ЧИСТКА КАПУЧИНАТОРА
- 53 УДАЛЕНИЕ НАКИПИ
- 55 НЕИСПРАВНОСТИ, ИХ ПРИЧНИЫ И МЕТОДЫ ИХ
- 56 Номинальная потребляемая мощность: 1300 Вт
Характеристики

Остались вопросы?Не нашли свой ответ в руководстве или возникли другие проблемы? Задайте свой вопрос в форме ниже с подробным описанием вашей ситуации, чтобы другие люди и специалисты смогли дать на него ответ. Если вы знаете как решить проблему другого человека, пожалуйста, подскажите ему :)


Изначально все работало отлично, потом при приготовлении латте наливает шрам 10 молока и всё, чистки делала, до заводских настроек скидывала — ничего не помогает