Холодильник Liebherr CNes 4066 Premium NoFrost - инструкция пользователя по применению, эксплуатации и установке на русском языке. Мы надеемся, она поможет вам решить возникшие у вас вопросы при эксплуатации техники.
Если остались вопросы, задайте их в комментариях после инструкции.
"Загружаем инструкцию", означает, что нужно подождать пока файл загрузится и можно будет его читать онлайн. Некоторые инструкции очень большие и время их появления зависит от вашей скорости интернета.

NOTICE
Incorrect cleaning damages the appliance!
u
Do not use cleaning agents in concentrated form.
u
Do not use any scouring or abrasive sponges or steel wool.
u
Do not use any cleaning agents containing sand, chloride,
chemicals or acid.
u
Do not use chemical solvents.
u
Do not damage or remove the type plate on the inside of the
appliance. It is important for the customer service.
u
Do not pull off, bend or damage cables or other components.
u
Do not allow any cleaning water to enter the drain channel,
ventilation grille or electrical parts.
u
Empty the appliance.
u
Pull out the plug.
- Use soft cleaning cloths and a multi-purpose
cleaning agent with neutral pH value.
- Only use food compatible cleaning and care agents
on the inside of the appliance.
u
Regularly clean ventilation grilles.
w
Dust deposits increase energy consumption.
Outside surfaces and interior:
u
Clean the plastic surfaces, outside and inside, by hand using
lukewarm water and a little washing-up liquid.
NOTICE
The stainless steel doors are provided with a high-quality surface
coating and must not be treated using the accompanying care
product.
Otherwise the surface coating will be affected.
u
Wipe the coated door surfaces using a soft, clean cloth only.
In case of stubborn dirt, use a little water or a neutral cleaning
agent. A microfibre cloth can be optionally used.
u
If the stainless steel side walls are dirty, clean them using
a commercially available stainless steel cleaning agent. Then
evenly apply the accompanying stainless steel care product,
making strokes in the direction of the grain.
u
Wipe side walls with a paint finish using a soft, clean cloth
only. In case of stubborn dirt, use a little water or a neutral
cleaning agent. A microfibre cloth can be optionally used.
Do not apply stainless steel cleaning agent to glass or plastic
surfaces to prevent them from being scratched. Darker areas at
the beginning and quite an intensive colour of the stainless steel
surface are normal.
u
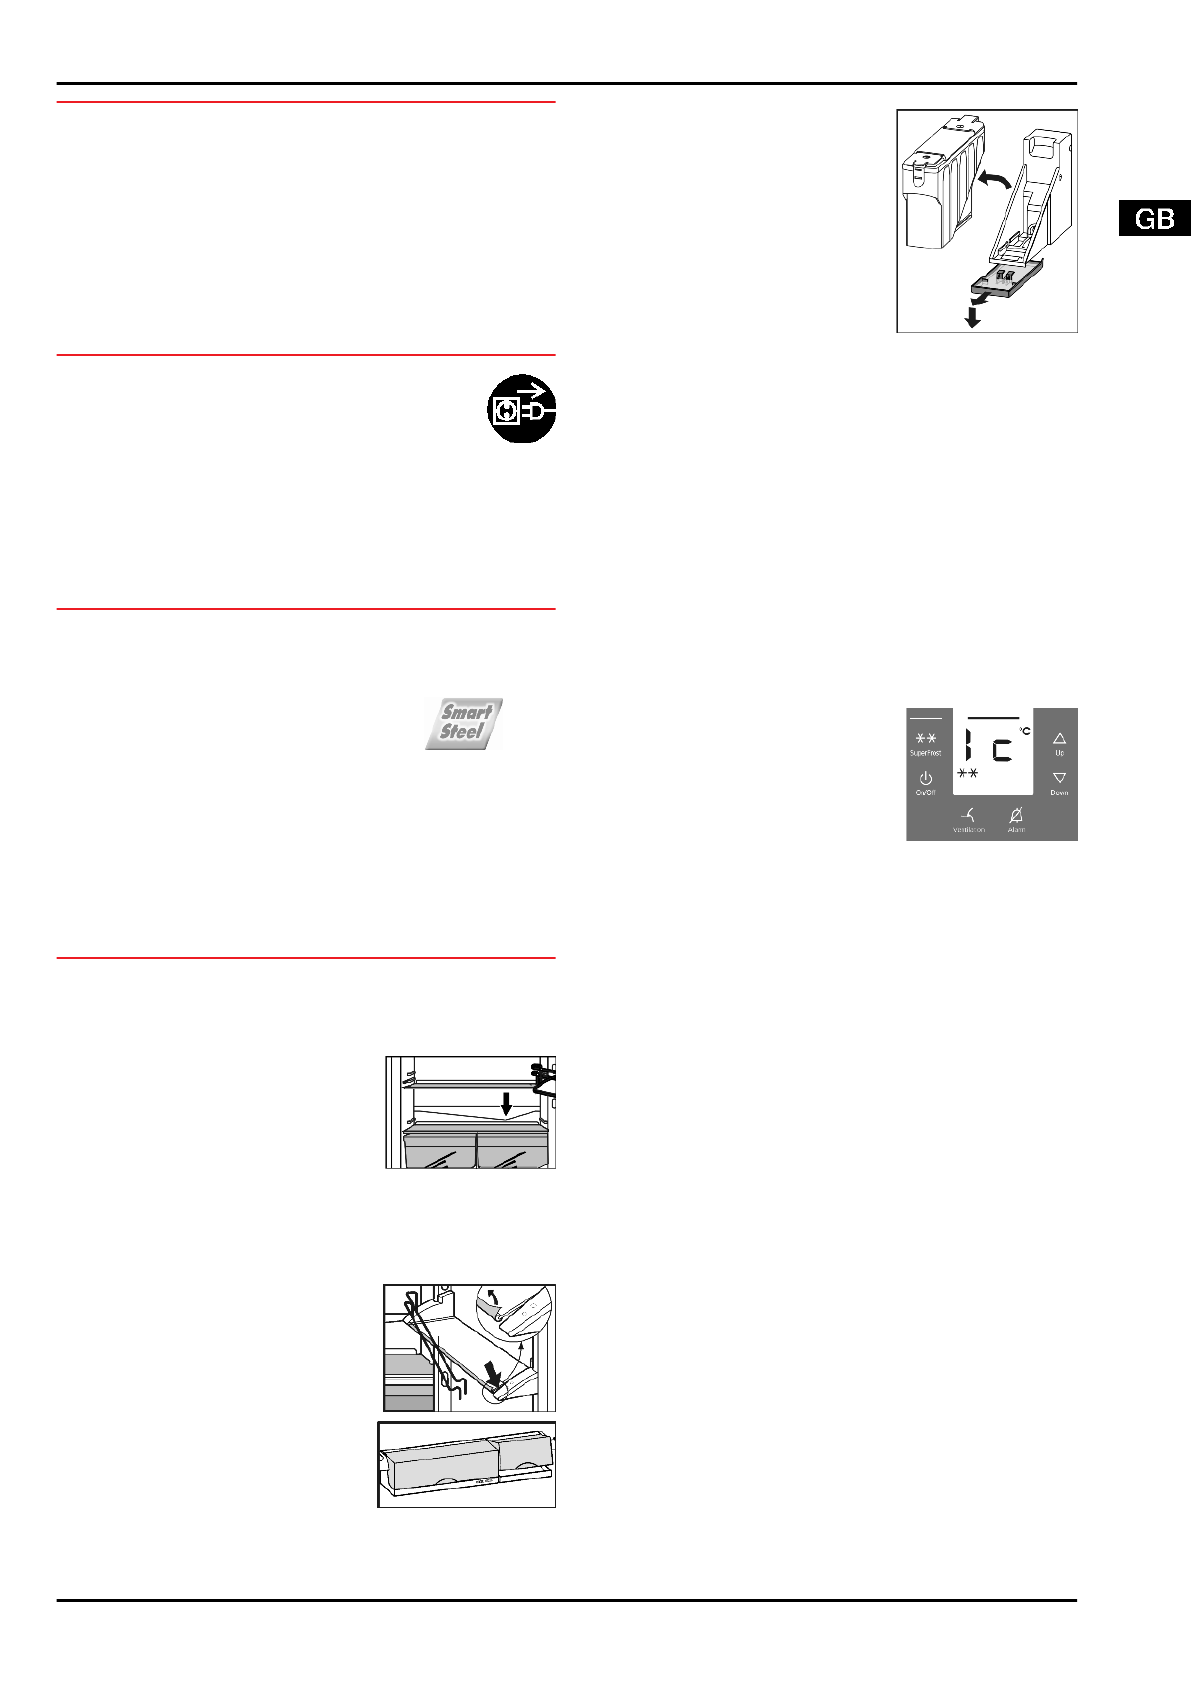
To clean the drain opening: remove
any deposits with a fine instrument,
e.g. a cotton bud.
Items of equipment:
u
Clean items of equipment by hand with lukewarm water and
a little washing-up liquid.
u
For cleaning, remove the support rails for the half-sized glass
shelves.
u
To dismantle the shelves: remove the
trims and side parts.
u
To dismantle the storage rack:
remove the protective film from the
decorative trims.
u
Lift out the boxes and lift the covers
for removal.
u
To empty the water collecting tray:
Remove the water tank. Carefully
disengage the tray forwards and
then lower for removal.
After cleaning:
u
Wipe dry the appliance and items of equipment.
u
Connect the appliance and switch it on again.
u
Switch on SuperFrost (see 5.6.4) .
When the temperature is sufficiently cold:
u
Put the food back inside.
6.3 Cleaning the IceMaker*
The drawer of the IceMaker has to be emptied and slid in.
u
To activate the setting mode: press the SuperFrost button
Fig. 3 (4) for about 5 s.
w
The display indicates
c
.
w
The menu symbol
Fig. 3 (18) shines.
u
Using the Up setting button, freezer compartment
Fig. 3 (11)/
Down setting button, freezer compartment
Fig. 3 (9) select
I
.
u
To confirm: press the SuperFrost button
Fig. 3 (4).
u
Using the Up setting button, freezer
compartment
Fig. 3 (11)/ Down setting
button,
freezer
compartment
Fig. 3 (9) select
Ic
.
u
To confirm: press the SuperFrost
button
Fig. 3 (4).
w
The IceMaker moves into the cleaning position and switches
off.
u
To deactivate the setting mode: press the On/Off button,
freezer compartment
Fig. 3 (6).
-or-
u
Wait for 2 minutes.
w
The temperature is indicated again in the temperature display.
u
Remove the drawer.
u
Clean the ice cube tray and drawer with warm water. If neces-
sary, use mild washing-up liquid. Then rinse.
u
Slide in the drawer again.
If washing-up liquid was used:
u
throw away the first three loads of ice cubes to get rid of any
remaining washing-up liquid.
Either leave the IceMaker switched off in this position or switch
the IceMaker on again (see 5.6.10) .
6.4 Changing the interior light with bulb
Bulb data
T25 tube, Philips
max. 25 W
Fitting: E14
Type of current and voltage must conform with the details on
the type plate
Maintenance
13
Характеристики
Остались вопросы?Не нашли свой ответ в руководстве или возникли другие проблемы? Задайте свой вопрос в форме ниже с подробным описанием вашей ситуации, чтобы другие люди и специалисты смогли дать на него ответ. Если вы знаете как решить проблему другого человека, пожалуйста, подскажите ему :)


